Tuesday, December 29, 2009

Eggnog Cake

I think that one of the best parts of the Christmas season (after the family togetherness, yuletide festivities, and joyous giving of gifts and appreciation to others) is when all the holiday goodies go on sale. In the past, I've usually done the majority of my Christmas decor shopping the days immediately following the holiday... and this year was no different. So far I've purchased: wrapping paper, ribbons, bows, wreaths, tree ornaments, chocolates and of course... EGGNOG.

I purposefully held off on buying eggnog before Christmas because I knew that Superstore would have a sale ... and low-and-behold, on the 27th of December eggnog was on sale for $1 a liter. Having bought 4 cartons of the deliciously creamy beverage, I realized that I went a little overboard and would need to finish up the stuff quickly... yes, it's true folks eggnog does not last forever :(

Since I'm the only person in my family who's a real fan of the eggy-nutmeggy concoction it took me a while to figure out how I'd bamboozle the rest of my family to help me in the consumption of the eggnog. Finally, my baking brain decided that an eggnog cake would be just the thing to bridge the gap between my family's tummies and the nog.

Eggnog Cake with Rum Glaze

Ingredients:
- 1 cup whole wheat flour
- 1 1/2 cup-all purpose flour
- 2 tsp baking powder
- 1/2 tsp salt
- 1/4 tsp nutmeg
- 2 eggs
- 1 cup granulated sugar
- 1 cup eggnog
- 1/2 cup butter, melted
- 1 tsp vanilla essence
- 1 tsp spiced rum

Method:
1. Preheat the oven to 350degrees and prepare a 9-inch round cake pan.
2. In a bowl, combine flours, baking powder, salt and nutmeg.
3. In a separate bowl, mix together the eggs, sugar, eggnog, butter, vanilla and rum.
4. Add wet ingredients to the dry mixture and mix until just combined.
5. Bake for 45-50minutes or until a toothpick inserted comes out clean. Remove cake and place on wire cooling rack, with a baking sheet beneath, while you prepare the rum glaze.

Rum Glaze
Ingredients:
- 1 cup sugar
- 3 tbsp spiced rum
- 1/2 cup eggnog
- 1 tbsp butter

Method:
1. Place sugar in a small saucepan on the stove over medium heat. Do not stir sugar, simply allow for the heat to cause sugar to brown and become liquid-like. If you wish to stir the sugar, swirl the saucepan gently. Continue heating sugar until all of it has dissolved.
2. Lower the heat and carefully add in the rum. Be cautious, as the addition of liquid to the hot sugar can cause the syrup to bubble and splatter out of the pan and cause a serious burn-hazard.
3. Once the mixture stops bubbling, stir the rum into the sugar to incorporate the flavor.
4. Carefully add in the eggnog, 1/8 cup at a time. Be cautious, as the addition of eggnog can cause the sugar-rum mixture to foam and expand. By adding eggnog 1/8 cup at a time, you minimize the risk of the glaze overflowing the saucepan. Continue adding the remainder of the eggnog, mixing thoroughly to incorporate the flavor.
5. Remove pan from heat and add in the butter, mixing until butter has melted.
6. Gently spoon 1/2 of the glaze over the top of the eggnog cake (I pierced the surface of the cake with a fork to allow for the glaze to seep into the cake, but this is optional).
7. For serving: slice the cake into pieces and provide the remaining glaze for spooning over each individual slice.

I was a bit wary of whether or not the taste of the eggnog would be palatable in cake-form, but there was nothing to worry about. The cake plus the rum-eggnog glaze gave the dessert a wonderfully nutmeg-eggnog taste... it was fantastic! This cake is quite heavy and dense, with the crumbly and moist texture of a pound cake. The glaze is very, very sweet and I could only manage to finish a small piece of the cake as it was so rich. I'll probably make this cake in the future; it will actually make a nice gift if packaged in a cute loaf-pan for next Christmas, or I could even make some tiny cupcakes and frost them with eggnog-rum buttercream?! Oh, the possibilities!

Sunday, December 27, 2009

Daring Bakers December '09

Wahoo! Closing out the year with a bang... and some clangs in the kitchen! This month's challenge was a lot of fun and very festive. I was so glad to hear that we would be baking gingerbread and making houses/cookies :)

The December 2009 Daring Bakers’ challenge was brought to you by Anna of Very Small Anna and Y of Lemonpi. They chose to challenge Daring Bakers’ everywhere to bake and assemble a gingerbread house from scratch. They chose recipes from Good Housekeeping and from The Great Scandinavian Baking Book as the challenge recipes.

The rules for this DB challenge stated:

1. Everything needs to be edible - no glue or inner non-food supports allowed.

2. You must bake the gingerbread yourself, whichever recipe you choose. No graham cracker houses please!

3. You must use some sort of template. If you don't use ours, take a picture or link to what you do use in your final post. It doesn't have to be super technical - Anna didn't even measure hers, she just cut out shapes from parchment and made sure the edges matched up.

4. Your house must be able to stand on its own. If you want to go adding balconies with candy stick buttresses or whatever go right ahead, but the main house itself must be free-standing.

Gingerbread Creation

Ingredients (Dough):

- 2 1/2 cups (500g) packed dark brown sugar
- 1 1/2 cups (360mL) heavy cream or whipping cream
- 1 1/4 cups (425g) molasses
- 9 1/2 cups (1663g) all-purpose flour

- 2 tablespoon(s) baking soda

- 1 tablespoon(s) ground ginger


Method:

1. In very large bowl, with wire whisk (or with an electric mixer), beat brown sugar, cream, and molasses until sugar lumps dissolve and mixture is smooth. In medium bowl, combine flour, baking soda, and ginger. With spoon, stir flour mixture into cream mixture in 3 additions until dough is too stiff to stir, then knead with hands until flour is incorporated and dough is smooth.

2. Divide dough into 4 equal portions; flatten each into a disk to speed chilling. Wrap each disk well with plastic wrap and refrigerate at least 4 hours or overnight, until dough is firm enough to roll.

3. Grease and flour large cookie sheets (17-inch by 14-inch/43x36cm)

4. Roll out dough, 1 disk at a time on each cookie sheet to about 3/16-inch thickness. (Placing 3/16-inch dowels or rulers on either side of dough to use as a guide will help roll dough to uniform thickness.)

5. Trim excess dough from cookie sheet; wrap and reserve in refrigerator. Chill rolled dough on cookie sheet in refrigerator or freezer at least 10 minutes or until firm enough to cut easily.

6. Preheat oven to 300 degrees F (149C)

7. Use chilled rolled dough, floured poster board patterns, and sharp paring knife to cut all house pieces on cookie sheet, making sure to leave at least 1 1/4 inches between pieces because dough will expand slightly during baking. Wrap and reserve trimmings in refrigerator. Combine and use trimmings as necessary to complete house and other decorative pieces. Cut and bake large pieces and small pieces separately.

8. Chill for 10 minutes before baking if the dough seems really soft after you cut it. This will discourage too much spreading/warping of the shapes you cut.

9. Bake 25 to 30 minutes, until pieces are firm to the touch. Do not overbake; pieces will be too crisp to trim to proper size.

10. Remove cookie sheet from oven. While house pieces are still warm, place poster-board patterns on top and use them as guides to trim shapes to match if necessary. Cool pieces completely before attempting to assemble the house.


Royal Icing

Ingredients:
- 1 large egg white
- 3 cups (330g) powdered sugar
- 1 teaspoon white vinegar
- 1 teaspoon almond extract


Beat all ingredients until smooth, adding the powdered sugar gradually to get the desired consistency. Pipe on pieces and allow to dry before assembling. If you aren't using it all at once you can keep it in a small bowl, loosely covered with a damp towel for a few hours until ready to use. You may have to beat it slightly to get it an even consistency if the top sets up a bit. Piped on the house, this will set up hard over time.


Since I have had experience making gingerbread houses and sleighs... I thought that this year I would branch out and try making a gingerbread boat. I figured that my creation fit into the respective guidelines, as a boat could be considered a house for a pirate! In my head I thought building a gingerbread boat would be fairly simple; however, I was completely mistaken :P During the process of building my pirate house I had to have many people/objects assist me in ensuring that the structure did not collapse upon itself... I suppose I was a bit impatient, and should have taken my time building the base structure before attempting to attach the "deck" but I am not one for being patient when it comes to gingerbread building. As the picture below reveals, a Toblerone bar is perfect for holding the back of the ship in place while the icing dries.

My ship and it's horrid decor... why are the waves made of peppermint? What is a snake doing in the ocean? Why are the cannons so exposed? Why does the mast not have a sail? Why are there no railings on the main deck?


Suffice it to say, I do not recommend that anybody ride on this ship as I'm sure it would not pass its safety inspection. And any poor gingerbread sailor/pirate who boards the USS Toblerone will probably meet a very mushy demise.

Monday, December 14, 2009

Low Fat Fruit Cake

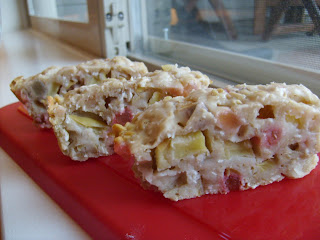
A delicious twist on the holiday classic... fruit cake! This afternoon, as I watched the flurry of snow coming down on the pavement outside, I asked myself... "what could make this moment feel even more Christmas-y?" With this in mind, I thought... FRUIT CAKE! But, I didn't just want to make any old fruit cake, I wanted to make it in such a way as to enjoy my favorite Christmas cake while still maintaining a healthy diet. All that alcohol (who doesn't love rum?) butter and sugary fruits, although delicious can sometimes hamper your holiday healthy-eating plans. But, with this recipe... healthy + tasty can be combined in one sentence with no need to compromise! Albeit, the loaf isn't so pretty to look at... it's kind of pale in comparison to traditional fruit cake. However, it is nice and moist with the addition of freshly cut apples and yes... of course I had to add the rum :P

Low Fat Christmas Fruit Cake
Yields: one 8-inch rectangular loaf (serves 8)
Ingredients:
- 1 cup all purpose flour
- 1 packet of equal/twin/sweet-and-low
- 1/4 tsp salt
- 1/2 tsp each baking soda, baking powder
- 1/4 tsp cinnamon
- 1/2 tsp all spice
- 1/3 cup mixed peel
- 1 medium apple, chopped to the same size as the mixed peel
- 1/3 cup desiccated coconut, sweetened
- 1/4 cup rolled oats
- 1 oz dark rum
- 1 egg white
- 2 tbsp milk powder + enough water to equal 125ml
- 1 tbsp low calorie margarine (I used celeb)

Method:
1. Mix together the fruit peel, chopped apple, coconut and rolled oats. Slowly add in the dark rum. (If you want to add a little more flavor and no calories, you can always add in some vanilla or maple essence). Mix until well combined and allow mixture to rest/soak up the liquor for at least 2 hours.

Tuesday, December 01, 2009

Daring Bakers: On the Spot

Okay, this is just a quick post... but I've been featured as a DB Member on the official Daring Bakers Website (http://thedaringkitchen.com/)! Yay!

Update: I'm no longer in the spotlight :( but you can still read my stuff if you click link Here.

Sunday, November 29, 2009

Daring Baker Challenge: Cannolis

Okay, so first off... I'm not really great when it comes to frying foods. Frying foods is just really finicky because you have to make sure you have the oil hot enough that the food will cook. My past experiences with frying have usually ended up in failure and a very inedible piece of food. The "fried" foods usually end up burnt on the outside and undercooked on the inside, or they end up soaked in oil and just soppy and gross. However, for this DB Challenge I was determined to make sure my oil was the perfect temperature so my cannolis would turn out ... edible. So, with no further adieu... here is the DB November Challenge recipe for Cannolis.

The November 2009 Daring Bakers Challenge was chosen and hosted by Lisa Michele of Parsley, Sage, Desserts and Line Drives. She chose the Italian Pastry, Cannolo (Cannoli is plural), using the cookbooks Lidia’s Italian-American Kitchen by Lidia Matticchio Bastianich and The Sopranos Family Cookbook by Allen Rucker; recipes by Michelle Scicolone, as ingredient/direction guides. She added her own modifications/changes, so the recipe is not 100% verbatim from either book.


Lidisano’s Cannoli
Makes 22-24 4-inch cannoli
Prep time: Dough – 2 hours and 10-20 minutes (including resting time); Filling – 5-10 minutes plus chilling time (about 2 hours or more); Frying – 1-2 minutes per cannoli; Assembly – 20–30 minutes


Ingredients for Cannoli Shells:
- 2 cups (250 grams/8.82 ounces) all-purpose flour
- 2 tbsp (28 grams/1 ounce) sugar
- 1 tsp (5 grams/0.06 ounces) unsweetened baking cocoa powder
- 1/2 tsp (1.15 grams/0.04 ounces) ground cinnamon
- 1/2 tsp (~3 grams/0.11 ounces) salt
- 3 tbsp (42 grams/1.5 ounces) vegetable or olive oil
- 1 tsp (5 grams/0.18 ounces) white wine vinegar
- 1/2 cup (~59 grams/4 fluid oz/125 ml) sweet Marsala or any available white/red wine
- 1 large egg, separated (you will need the egg white but not the yolk)
- Vegetable or any neutral oil for frying (about 2 quarts/8 cups/2 liters)
- 1/2 cup (~62 grams/2 ounces) toasted, chopped pistachio nuts, mini chocolate chips/grated chocolate and/or candied or plain zests, fruits etc.. for garnish (optional)
- Confectioners' sugar (optional)


Note - If you want a chocolate cannoli dough, substitute a few tablespoons of the flour (about 25%) with a few tablespoons of dark, unsweetened cocoa powder (Dutch process) and a little more wine until you have a workable dough (Thanks to Audax).


Method:
1. In the bowl of an electric stand mixer or food processor, combine the flour, sugar, cocoa, cinnamon, and salt. Stir in the oil, vinegar, and enough of the wine to make a soft dough. Turn the dough out onto a lightly floured surface and knead until smooth and well blended, about 2 minutes. Shape the dough into a ball. Cover with plastic wrap and let rest in the fridge from 2 hours to overnight.

2 Cut the dough into two pieces. Keep the remaining dough covered while you work. Lightly flour a large cutting or pastry board and roll the dough until super thin, about 1/16 to 1/8” thick (An area of about 13 inches by 18 inches should give you that). Cut out 3 to 5-inch circles (3-inch – small/medium; 4-inch – medium/large; 5-inch;- large. Your choice). Roll the cut out circle into an oval, rolling it larger and thinner if it’s shrunk a little.

3 Oil the outside of the cannoli tubes (You only have to do this once, as the oil from the deep fry will keep them well, uhh, oiled..lol). Roll a dough oval from the long side (If square, position like a diamond, and place tube/form on the corner closest to you, then roll) around each tube/form and dab a little egg white on the dough where the edges overlap. (Avoid getting egg white on the tube, or the pastry will stick to it.) Press well to seal. Set aside to let the egg white seal dry a little.

4. In a deep heavy saucepan, pour enough oil to reach a depth of 3 inches, or if using an electric deep-fryer, follow the manufacturer's directions. Heat the oil to 375°F (190 °C) on a deep fry thermometer, or until a small piece of the dough or bread cube placed in the oil sizzles and browns in 1 minute. Have ready a tray or sheet pan lined with paper towels or paper bags.

5. Carefully lower a few of the cannoli tubes into the hot oil. Do not crowd the pan. Fry the shells until golden, about 2 minutes, turning them so that they brown evenly.

8. Lift a cannoli tube with a wire skimmer or large slotted spoon, out of the oil. Using tongs, grasp the cannoli tube at one end. Very carefully remove the cannoli tube with the open sides straight up and down so that the oil flows back into the pan. Place the tube on paper towels or bags to drain. Repeat with the remaining tubes. While they are still hot, grasp the tubes with a potholder and pull the cannoli shells off the tubes with a pair of tongs, or with your hand protected by an oven mitt or towel. Let the shells cool completely on the paper towels. Place shells on cooling rack until ready to fill.

9. Repeat making and frying the shells with the remaining dough. If you are reusing the cannoli tubes, let them cool before wrapping them in the dough.


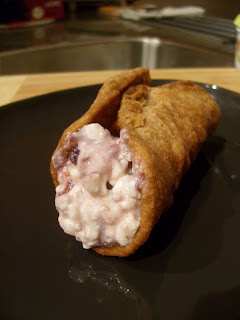
I decided to make the chocolate flavored cannoli shells and they turned out fantastic. The taste was not too subtle and not too bold as to detract from the filling that I was planning on using. For my filling I went very simple and used a honey-sweetened cottage cheese with mixed-berry syrup. Although the dessert tasted delicious and the frying was actually a success, I was a little disappointed with the thickness of my cannolis. While I did allow for the dough to rest for about 5 hours before rolling it out, I simply couldn't get the shells to stay thin as I rolled them onto the cannoli shaping tool. Alas, I ended up with a silly looking little cannoli taco with cottage cheese filling... oh well.

With the left over dough I decided to make a couple of those cute little twisted cookies. They were much easier to shape then the cannolis and it still packed the amazing chocolaty taste. I would definitely use the dough recipe again, although I may just use it to make cookies instead of cannolis as I'm not a big fan of the tedious nature of having to shape them. Onward to next month's challenge... I can't wait to see what's lined up for the Christmas season.

Wednesday, November 25, 2009

Yay! Christmas Cookies

I simply love baking cookies for Christmas! It just gets me into the holiday spirit. But, living on my own this year, the difficult part is figuring out who's going to eat all the cookies! Thankfully, my nursing class this year is holding a Christmas party and is asking for me to help with the desserts! Yay! Here was my chance to bake up a storm. I didn't know what I wanted to make, there's always so many choices with Christmas. Should I make a yule-log, cupcakes, cookies, gingerbread, fruit cake AAAHHH!! The possibilities are endless. I finally settled on making molasses cookies, using the same recipe I used in a previous post (link HERE) just leaving out the nuts. But what was I going to do about decorating?? I didn't really feel like using royal icing or buttercream for cookies (I find it to tedious working with finicky icing bags and the horrendous after-math of having to clean up numerous piping bags and tips drives me up the wall)... but is there any other option?? Yes, yes there is... and the results are spectacular!


FONDANT!! I'd only ever used fondant on one occasion, when I made my mother her birthday cake a couple years back. That fondant was home-made and it was a bit of a task to make. This time I decided to buy some from Michael's Craft Store (the Wilton brand) and that saved me a lot of time. I actually really enjoyed playing... I mean decorating with the fondant, it was like I was in pre-school all over again. Kneading and rolling and cutting out fun shapes reminded me of play-doh... except play-doh you can eat! Anyways, here are a couple pictures of my cute little cookies. Enjoy :)


To add the extra details on top of the fondant I didn't bother with piping bags, I simply bought some icing writers from Michael's as well. Man, they've thought of everything at Wilton... they make everything so simple for the holidays. I like that, because what fun is baking and giving treats to your friends when your buggered with stress :P

Well, I hope my pictures give you some ideas of how to decorate your Christmas cookies. Happy baking everybody!

Sunday, November 15, 2009

Fruitcake Bread

Well, I've been meaning to use up this can of mixed fruit peel that's been in my fridge for the past 3 months. Why did I buy it? Well... it's pretty much the age-old habit of buy it because it's being cleared by the supermarket because nobody wants to buy it... meaning that it's a great value! But, I couldn't think about what to do with it besides nibble at it piece by piece (hehehe... yeah, I have a very strong sweet-tooth). Finally, after 3 months of pondering (or being so stressed out with school that my mind just wasn't thinking straight), I remembered how much I use to love hot-cross buns. So, I decided to use a hot-cross bun recipe to make a loaf because who doesn't love a hot and fresh loaf of fruity bread in the early morning?

Fruitcake Bread
Yields 1 loaf and you still have a bit of dough left over for approximately 3-4 buns!

Ingredients
- 3/4 cup warm water
- 3 tbsp butter
- 1 tbsp instant powdered milk
- 1/4 cup white sugar
- 3/8 tsp salt
- 1 egg
- 1 egg white
- 3 cups all-purpose flour
- 1 tbsp active dry yeast
- 3/4 cup mixed fruit-peel
- 1 tsp ground cinnamon
- 1 egg yolk

Method:
1. Put warm water, butter, skim milk powder, 1/4 cup sugar, salt, egg, egg white, flour, and yeast in bread maker and start on dough program.
2. When 5 minutes of kneading remain, add fruit-peel and cinnamon. Leave in machine until double.
3. Punch down on floured surface, cover, and let rest 10 minutes.
4. Shape into log, and place enough dough into a greased loaf pan. Whatever dough is left over can be shaped into little buns. Cover loaf and buns and let rise in a warm place until doubled in size (about 35-40 mins)
5. Mix egg yolk and 2 tbsp water. Brush on top of loaf and buns.
6. Bake at 375 degrees F (190 degrees C) for 20 minutes. Remove from pan immediately and cool on wire rack.

Sadly, I didn't remember to place the fruit-peel in the machine when 5 minutes of kneading were left. I thought actually placed the mixed peel in the machine when 5 minutes of rising were left, so the peel didn't become very well incorporated into the dough. The result was a loaf that had speckles of fruit-peel along the edges of the loaf and buns. Other than that, I would say that the loaf was pretty much a success. Although I may have handled the dough too much after the first rise in the machine, causing the loaf to be a little less raised than I would have liked, the texture of the bread was very soft and delicate. The fruit-peel added a nice sweetness to a regular old white loaf, and the crust was perfectly crusted. The important thing to remember with this recipe is that you must grease the pan well... otherwise you'll end up with some of pieces of loaf getting stuck and simply ripping off because the bread is so delicate. I might attempt making this recipe again, but in the hot-cross bun form... that way I get to make those pretty little crosses on the top of some cute little buns :)

Monday, October 26, 2009

Molasses Pecan Cookies


Halloween's a coming, and thanks to this silly holiday my friend has asked me to whip up some goodies for a party. I didn't want to do anything too crazy, so I thought that cookies would be the best bet. I love the taste of molasses cookies and they are definitely a Fall flavor (don't ask me why, they just are :P) and nuts are always delicious, so I decided to make some molasses nut cookies.

Molasses Pecan Cookies

Yields 30 large cookies

Ingredients:
- 2 1/3 cups all purpose flour
- 2 tsp baking soda
- 1/2 tsp salt
- 2 tsp ground ginger
- 1/2 tsp each ground cinnamon and cloves
- 1/4 tsp ground allspice
- 3/4 cup butter, room temperature
- 1 cup brown sugar, packed
- 1/2 cup molasses
- 1 egg
- 1/3 cup crushed pecans (or your favorite nut)
- 30 whole walnuts to decorate
- 1/2 cup of sugar for rolling

Method:
1. Mix together flour, baking soda, salt and spices
2. Beat the butter until creamy, then add brown sugar and molasses until smooth. Add in egg, continue mixing until well incorporated.
3. Add flour mixture to butter mixture and stir until just combined.
4. Split the dough into two portions, rolling them into logs and wrapping each in plastic wrap. Place dough in the fridge for 1hour to settle.
5. Cut each dough log into 15 pieces. Roll each piece into a ball, coat with rolling sugar and place on an ungreased baking sheet. Ensure at least 2 inches between cookies, as they spread out significantly. Flatten the sugar-coated ball with the bottom of a glass and gently press a decorative pecan into the center of the cookie. Repeat for all the dough pieces.
6. Bake in a 350 degree oven for 14 minutes. Allow to cool for 1 minute on the tray, then remove to cooling rack.

I doubled this recipe with no problems, and the cookies turned out fantastic! I brought half of the doubled batch to my family and they simply loved them. (I also made a special batch for my sister who's allergic to nuts; in it I added chocolate chips, coconut, oats and sunflower seeds... not your traditional molasses cookie, but she enjoyed them). Now all I have to do is complete my Halloween costume... that's right, I'm sewing my own! If it turns out right then I might post pictures... we'll just have to wait and see.

Tuesday, October 13, 2009

Can't Have Thanksgiving Without ... Pumpkin!!

Well, another year's rolled around again and it's Thanksgiving time! Luckily I didn't have to learn how to make my own turkey (I'm sure I'll have to learn eventually, but for now I think I'll stick to meats I can cook on the George Foreman :P) because my parents invited me over to the house for dinner. I didn't want to show up empty handed and I had this can of pumpkin filling that I'd been wondering what to do with for the longest time... so I set to work on storming up a recipe for a pumpkin bar that would be easy and delicious.

Pumpkin Pie Cake-bars
Yields 1 13x9 inch rectangular pan

Ingredients:

Bottom Layer
1 package Betty Crocker's Butter Pecan cake mix (or another white-cake based mix)
1 egg
1/2cup butter, softened

Filling
3 cups pumpkin pie filling (1lb, 4oz)
2/3 cup milk
2 eggs

Topping
1 cup reserved batter of the bottom layer
¼ cup sugar
1 tsp each nutmeg, cloves and cinnamon
¼ cup butter

Method:

1. Preheat oven to 350 degrees, and prepare a 13x9 inch cake pan.

2. Mix together the ingredients for the bottom layer. (This batter will be fairly chunky and thick). Reserve 1 cup and set it aside for later use.

3. Press the remaining mixture into the pan.

4. In a separate bowl, combine the filling ingredients and pour it over the bottom layer.

5. Combine the topping ingredients with the 1 cup of reserved batter and crumble it over the top.

6. Bake for 45 – 50 minutes or until cake tests done. Cool and cut into squares and eat the day of baking.

These bars were very tender and you had to be careful not to break them when lifting them after cutting. Luckily I lined the cake pan with parchment paper, otherwise there would be no way I could have removed the cake bars without destroying a good portion of them. I included "eat the day of baking" to the last step because although the bars were wonderfully tender on the bottom, with a crisp streusel topping just after baking... the next day (after I had packaged them all) I realized that the topping had also become soft :( but luckily my parents and sisters didn't cake. They were just happy to eat some festive pumpkin dessert bars, and when eaten warm and topped with ice-cream... they were divine!

Monday, October 12, 2009

Asian-Cajun Chicken Salad

Making meals for one is sometimes a task, but individual chicken breast pieces make dinner-making way easier. For dinner yesterday I was craving something a little healthier than cup-o-noodles, mac 'n cheese and canned soup... so I opted for a salad. And to get my protein kick I decided to top it off with a marinated chicken breast. This recipe was basically a hodge-podge of amazing spices and Asian sauces that I had lying around my kitchen... and I call it Asian-Cajun chicken salad.

Asian-Cajun Chicken Salad
Serves 1

Ingredients:
-
1 frozen chicken breast, thawed
- 1 tsp each cayenne pepper, paprika and red pepper flakes
- 1/4 tsp each ground cinnamon, cumin and coriander
- 1 tbsp red wine vinegar
- 3 tbsp Hoisin sauce
- 1 tsp Frank's Red Hot Cayenne Sauce
- 2 garlic cloves, crushed and minced finely
- Pinch of salt and pepper, to taste
- 1 bed of your favorite greens

Method:
1. In a bowl large enough to hold the chicken breast, toss in the chicken with the spices, pepper flakes, vinegar, hot sauce and hoisin sauce. Let sit in the fridge, and allow to marinate for at least 3 hours.

2. Just before cooking, add the finely minced garlic and allow chicken to sit for another 30minutes.

3. Add salt and pepper to taste and place on a pre-heated grill plate or barbeque. Cook chicken for about 5 minutes, or until done to desired tenderness.

4. Once cooked, remove chicken from the grill and let sit for at least 3 minutes. During this time, prepare your salad.

5. After the chicken has rested, and the juices have settled, slice the chicken breast to strips of desired thickness and place on top of your salad. Add a dressing of your choice if you wish to have a more flavorful salad.

Optional: For my salad, I added a home-made salad dressing by combining: 1 tbsp dijon mustard, 1 tsp Frank's Red hot sauce, 1 tsp sweet relish and 1 tbsp red wine vinegar.

This chicken was delicious! I made mine on my George Foreman grill and it was cooked to perfection, nice and juicy just the way I like it. The Hoisin sauce gave this chicken a real kick, and the red wine vinegar tied the Asian spices and the Cajun tastes together nicely. I will definitely be making this recipe again. It's perfect for a nice, light and healthy dinner or even for a lunch! Super easy and definitely delish!

Wednesday, September 30, 2009

September Daring Bakers Challenge: Vols Au Vent


I know I've been very slacky on my blog this month, but hopefully it's not going to become a habit. I've just been bogged down with a few term papers, studying for midterms and spending two 12 hour days in the hospital for my clinical rotation!! AAHHH! I literally have no time to do anything!!! Well, at least I was able to complete this month's DB challenge, it kind of gave me some stress-relief and I was glad to have my kitchen time... I needed to take my mind off of my text books :P

The September 2009 Daring Bakers' challenge was hosted by Steph of A Whisk and a Spoon. She chose the French treat, Vols-au-Vent based on the Puff Pastry recipe by Michel Richard from the cookbook Baking With Julia by Dorie Greenspan.


Michel Richard’s Puff Pastry Dough
From: Baking with Julia by Dorie Greenspan
Yield: 2-1/2 pounds dough

Ingredients:
2-1/2 cups (12.2 oz/ 354 g) unbleached all-purpose flour
1-1/4 cups (5.0 oz/ 142 g) cake flour
1 tbsp. salt (you can cut this by half for a less salty dough or for sweet preparations)
1-1/4 cups (10 fl oz/ 300 ml) ice water
1 pound (16 oz/ 454 g) very cold unsalted butter
plus extra flour for dusting work surface


Mixing the Dough:
Check the capacity of your food processor before you start. If it cannot hold the full quantity of ingredients, make the dough into two batches and combine them.

Put the all-purpose flour, cake flour, and salt in the work bowl of a food processor fitted with a metal blade and pulse a couple of times just to mix. Add the water all at once, pulsing until the dough forms a ball on the blade. The dough will be very moist and pliable and will hold together when squeezed between your fingers.

Remove the dough from the machine, form it into a ball, with a small sharp knife, slash the top in a tic-tac-toe pattern. Wrap the dough in a damp towel and refrigerate for about 5 minutes.

Meanwhile, place the butter between 2 sheets of plastic wrap and beat it with a rolling pin until it flattens into a square that's about 1" thick. Take care that the butter remains cool and firm: if it has softened or become oily, chill it before continuing.


Incorporating the Butter:
Unwrap the dough and place it on a work surface dusted with all-purpose flour (A cool piece of marble is the ideal surface for puff pastry) with your rolling pin (preferably a French rolling pin without handles), press on the dough to flatten it and then roll it into a 10" square. Keep the top and bottom of the dough well floured to prevent sticking and lift the dough and move it around frequently. Starting from the center of the square, roll out over each corner to create a thick center pad with "ears," or flaps.

Place the cold butter in the middle of the dough and fold the ears over the butter, stretching them as needed so that they overlap slightly and encase the butter completely. (If you have to stretch the dough, stretch it from all over; don't just pull the ends) you should now have a package that is 8" square.

To make great puff pastry, it is important to keep the dough cold at all times. There are specified times for chilling the dough, but if your room is warm, or you work slowly, or you find that for no particular reason the butter starts to ooze out of the pastry, cover the dough with plastic wrap and refrigerate it . You can stop at any point in the process and continue at your convenience or when the dough is properly chilled.


Making the Turns:
Gently but firmly press the rolling pin against the top and bottom edges of the square (this will help keep it square). Then, keeping the work surface and the top of the dough well floured to prevent sticking, roll the dough into a rectangle that is three times as long as the square you started with, about 24" (don't worry about the width of the rectangle: if you get the 24", everything else will work itself out.)

With this first roll, it is particularly important that the butter be rolled evenly along the length and width of the rectangle; check when you start rolling that the butter is moving along well, and roll a bit harder or more evenly, if necessary, to get a smooth, even dough-butter sandwich (use your arm-strength!).
With a pastry brush, brush off the excess flour from the top of the dough, and fold the rectangle up from the bottom and down from the top in thirds, like a business letter, brushing off the excess flour. You have completed one turn.

Rotate the dough so that the closed fold is to your left, like the spine of a book. Repeat the rolling and folding process, rolling the dough to a length of 24" and then folding it in thirds. This is the second turn.


Chilling the Dough:
If the dough is still cool and no butter is oozing out, you can give the dough another two turns now. If the condition of the dough is iffy, wrap it in plastic wrap and refrigerate it for at least 30 minutes. Each time you refrigerate the dough, mark the number of turns you've completed by indenting the dough with your fingertips. It is best to refrigerate the dough for 30 to 60 minutes between each set of two turns.

The total number of turns needed is six. If you prefer, you can give the dough just four turns now, chill it overnight, and do the last two turns the next day. Puff pastry is extremely flexible in this regard. However, no matter how you arrange your schedule, you should plan to chill the dough for at least an hour before cutting or shaping it.

Forming and Baking the Vols-au-Vent
Yield: 1/3 of the puff pastry recipe below will yield about 8-10 1.5” vols-au-vent or 4 4” vols-au-vent

You will need:-well-chilled puff pastry dough (recipe below)
-egg wash (1 egg or yolk beaten with a small amount of water)
-your filling of choice

Line a baking sheet with parchment and set aside.

Using a knife or metal bench scraper, divided your chilled puff pastry dough into three equal pieces. Work with one piece of the dough, and leave the rest wrapped and chilled. (If you are looking to make more vols-au-vent than the yield stated above, you can roll and cut the remaining two pieces of dough as well…if not, then leave refrigerated for the time being or prepare it for longer-term freezer storage. See the “Tips” section below for more storage info.)

On a lightly floured surface, roll the piece of dough into a rectangle about 1/8 to 1/4-inch (3-6 mm) thick. Transfer it to the baking sheet and refrigerate for about 10 minutes before proceeding with the cutting.

(This assumes you will be using round cutters, but if you do not have them, it is possible to cut square vols-au-vents using a sharp chef’s knife.) For smaller, hors d'oeuvre sized vols-au-vent, use a 1.5” round cutter to cut out 8-10 circles. For larger sized vols-au-vent, fit for a main course or dessert, use a 4” cutter to cut out about 4 circles. Make clean, sharp cuts and try not to twist your cutters back and forth or drag your knife through the dough. Half of these rounds will be for the bases, and the other half will be for the sides. (Save any scrap by stacking—not wadding up—the pieces…they can be re-rolled and used if you need extra dough. If you do need to re-roll scrap to get enough disks, be sure to use any rounds cut from it for the bases, not the ring-shaped sides.)

Using a ¾-inch cutter for small vols-au-vent, or a 2- to 2.5-inch round cutter for large, cut centers from half of the rounds to make rings. These rings will become the sides of the vols-au-vent, while the solid disks will be the bottoms. You can either save the center cut-outs to bake off as little “caps” for you vols-au-vent, or put them in the scrap pile.

Dock the solid bottom rounds with a fork (prick them lightly, making sure not to go all the way through the pastry) and lightly brush them with egg wash. Place the rings directly on top of the bottom rounds and very lightly press them to adhere. Brush the top rings lightly with egg wash, trying not to drip any down the sides (which may inhibit rise). If you are using the little “caps,” dock and egg wash them as well.

Refrigerate the assembled vols-au-vent on the lined baking sheet while you pre-heat the oven to 400ºF (200ºC). (You could also cover and refrigerate them for a few hours at this point.)

Once the oven is heated, remove the sheet from the refrigerator and place a silicon baking mat (preferred because of its weight) or another sheet of parchment over top of the shells. This will help them rise evenly. Bake the shells until they have risen and begin to brown, about 10-15 minutes depending on their size. Reduce the oven temperature to 350ºF (180ºC), and remove the silicon mat or parchment sheet from the top of the vols-au-vent. If the centers have risen up inside the vols-au-vent, you can gently press them down. Continue baking (with no sheet on top) until the layers are golden, about 15-20 minutes more. (If you are baking the center “caps” they will likely be finished well ahead of the shells, so keep an eye on them and remove them from the oven when browned.)

Remove to a rack to cool. Cool to room temperature for cold fillings or to warm for hot fillings.

Fill and serve.

*For additional rise on the larger-sized vols-au-vents, you can stack one or two additional ring layers on top of each other (using egg wash to "glue"). This will give higher sides to larger vols-au-vents, but is not advisable for the smaller ones, whose bases may not be large enough to support the extra weight.
*Although they are at their best filled and eaten soon after baking, baked vols-au-vent shells can be stored airtight for a day.
*Shaped, unbaked vols-au-vent can be wrapped and frozen for up to a month (bake from frozen, egg-washing them first
).


For my variation on the vols-au-vent I decided to make a sweet version. Thus, I modified the pastry recipe to incorporate more sugar and less salt. I was pleased with the way my pastry turned out, it was fairly light and flaky. I may have over-worked the dough a bit too much, and it wasn't as tender as it could have been, but I think that I can improve on my pastry making skills in the future. I filled my pastry with strained plain yogurt, mixed with a little honey and then topped it off with a berry and sugar compote. The yogurt was super easy to make; all you do is take a cup of plain, greek-style yogurt and use a muslin cloth to strain out the moisture by sitting the yogurt in the cloth overnight. Once the yogurt is strained, simply add in honey to taste and then fill the vols-au-vent. Well, now it's time to sleep because I have to wake up early for my clinical rotation on the surgical floor tomorrow... gotta be there at 7am, so must leave the house at 6:00am ... meaning I must wake up at 5:30am if I'm going to be alert enough to drive :P

Friday, September 11, 2009

Lamb Stew

The first day of school did not present with beautiful weather, instead it was pouring rain :( I only had a morning class, and so I decided to head to the grocery store and pick up some necessities for my dinner. With such miserable weather, I thought that a stew would be nice... and since I would only be cooking for myself, I decided to buy one of my favorite meats... Lamb!! My mom doesn't like the smell, look, texture or taste of lamb; I'm not sure why? In my opinion, it's absolutely delicious. It has a very earthy and rustic flavor, and makes one mean stew.

I'd never made stew before, my dad usually makes a really quick beef stew in a crock-pot, but since I didn't have a crock pot I opted to simply cook it in a large stove-top pot. I kind of just eye-balled the ingredients, and tweaked the dish as I cooked and it turned out fantastic!

Lamb Stew

Ingredients:
- 1/2 lb of lamb meat (I used the shoulder blade)
- 6 yukon gold potatoes, cut into chunks
- 3 medium carrots, cut into chunks
- 1 large onion, cut into chunks
- 2 cloves garlic, minced
- 2 tbsp canola oil
- 1 tsp each dried rosemary, parsley, oregano
- 2 tbsp flour
- 2 bay leaves
- 1/4 cup of red cooking wine, or more to taste
- 3 cups water
- salt and pepper to taste

Method:
1. Prepare the lamb meat ahead of time. Rub the meat with olive oil and season with rosemary, parsley and oregano. Sprinkle with salt and pepper, and let rest for at least 1 hour.
2. After marinating, separate the meat from the bones and fat. Cut the meat into bite-sized chunks.
3. Heat 1 tbsp canola oil in a large stove-top pot on high, allow oil to reach very high temperature by letting it sit for 45 seconds.
4. Add the seasoned lamb meat to the pot, searing both sides for about 2 minutes each. Place seared meat in a dish and set aside. Now add the bones and fat to the pan. Cook for 2 minutes allowing the fat to drain out.
5. Add in the minced garlic and additional spices (rosemary, parsley, oregano). Add more oil if necessary to prevent burning, and add in the onions.
6. Pour in the cooking wine to deglaze the pan. Once deglazed, add in the potatoes and carrots, stir mixture to thoroughly coat the vegetables with the herbs and oil. Add salt and pepper.
7. Make a well in the center of the pot, and add in the flour. Mix the flour with all the drippings in the pan until fully incorporated.
8. Pour in the water and continue cooking stew on high until it comes to a boil. Once boiled, add in the reserved lamb meat pieces and the bay leaves. Lower the temperature until the mixture reaches only a simmer.
9. Cover pot with lid and allow stew to simmer for 1 hour, or until the meat pieces are cooked and tender.
10. Serve with steamed rice.


This stew was very tasty. If you find that the consistency is too watery, you can always remove the lid and boil out some of the liquid for about 15-20 minutes. Also, the stew may begin to thicken as the mixture cools.

I really enjoyed this stew for my dinner, it was the perfect compliment to a cold and wet day. It really is a comfort food. The stew sauce was amazing over top of freshly steamed rice, and I seriously had to control myself otherwise I might have finished it on the first day. This recipe makes enough stew for about 4 people... or if you're like me, it makes enough for 4 meals for one person :P I should have my mom try some of the stew, and see if she still feels the same way about lamb... maybe it'll convince her that lamb isn't so bad.

Wednesday, August 26, 2009

August Daring Bakers Challenge - Dobos Torta

I know that I didn't get around to posting last month's daring bakers challenge, but the truth is I didn't get a chance to do much baking. But now that I'm getting settled into my new living quarters, and feeling more comfortable in my new kitchen I think the bakes will be coming a long much more smoothly. This month's daring bakers recipe seemed very exciting! I love making cakes, and this torta recipe sounded like it would be delicious and have a great wow-factor. And now... on with the recipe!

The August 2009 Daring Bakers' challenge was hosted by Angela of A Spoonful
of Sugar and Lorraine of Not Quite Nigella. They chose the spectacular Dobos
Torte based on a recipe from Rick Rodgers' cookbook Kaffeehaus: Exquisite
Desserts from the Classic Caffés of Vienna, Budapest, and Prague.


Dobos Torta

Sponge cake layers

  • 6 large eggs, separated, at room temperature
  • 1 1/3 cups (162g) confectioner's sugar, divided
  • 1 tsp (5ml) vanilla extract
  • 1 cup + 2 tbsp (112g) sifted cake flour (SUBSTITUTE 95g plain flour + 17g cornflour (cornstarch) sifted together)
  • pinch of salt

Chocolate Buttercream

  • 4 large eggs, at room temperature
  • 1 cup (200g) caster (ultrafine or superfine white) sugar
  • 4oz (110g) bakers chocolate or your favourite dark chocolate, finely chopped
  • 2 sticks plus 2 tablespoons (250g) unsalted butter, at room temperature

Caramel topping

  • 1 cup (200g) caster (superfine or ultrafine white) sugar
  • 12 tablespoons (180 ml) water
  • 8 teaspoons (40 ml) lemon juice
  • 1 tablespoon neutral oil (e.g. grapeseed, rice bran, sunflower)

Finishing touches

  • a 7” cardboard round
  • 12 whole hazelnuts, peeled and toasted
  • ½ cup (50g) peeled and finely chopped hazelnuts

Directions for the sponge layers:

1.Position the racks in the top and centre thirds of the oven and heat to 400F (200C).

2.Cut six pieces of parchment paper to fit the baking sheets. Using the bottom of a 9" (23cm) springform tin as a template and a dark pencil or a pen, trace a circle on each of the papers, and turn them over (the circle should be visible from the other side, so that the graphite or ink doesn't touch the cake batter.)

3.Beat the egg yolks, 2/3 cup (81g) of the confectioner's (icing) sugar, and the vanilla in a medium bowl with a mixer on high speed until the mixture is thick, pale yellow and forms a thick ribbon when the beaters are lifted a few inches above the batter, about 3 minutes. (You can do this step with a balloon whisk if you don't have a mixer.)

4.In another bowl, using clean beaters, beat the egg whites until soft peaks form. Gradually beat in the remaining 2/3 cup (81g) of confectioner's (icing)sugar until the whites form stiff, shiny peaks. Using a large rubber spatula, stir about 1/4 of the beaten whites into the egg yolk mixture, then fold in the remainder, leaving a few wisps of white visible. Combine the flour and salt. Sift half the flour over the eggs, and fold in; repeat with the remaining flour.

5.Line one of the baking sheets with a circle-marked paper. Using a small offset spatula, spread about 3/4cup of the batter in an even layer, filling in the traced circle on one baking sheet. Bake on the top rack for 5 minutes, until the cake springs back when pressed gently in the centre and the edges are lightly browned. While this cake bakes, repeat the process on the other baking sheet, placing it on the center rack. When the first cake is done, move the second cake to the top rack. Invert the first cake onto a flat surface and carefully peel off the paper. Slide the cake layer back onto the paper and let stand until cool. Rinse the baking sheet under cold running water to cool, and dry it before lining with another parchment. Continue with the remaining papers and batter to make a total of six layers. Completely cool the layers. Using an 8" springform pan bottom or plate as a template, trim each cake layer into a neat round. (A small serrated knife is best for this task.)


Directions for the chocolate buttercream:

1.Prepare a double-boiler: quarter-fill a large saucepan with water and bring it to a boil.

2.Meanwhile, whisk the eggs with the sugar until pale and thickened, about five minutes. You can use a balloon whisk or electric hand mixer for this.

3.Fit bowl over the boiling water in the saucepan (water should not touch bowl) and lower the heat to a brisk simmer. Cook the egg mixture, whisking constantly, for 2-3 minutes until you see it starting to thicken a bit. Whisk in the finely chopped chocolate and cook, stirring, for a further 2-3 minutes.

4.Scrape the chocolate mixture into a medium bowl and leave to cool to room temperature. It should be quite thick and sticky in consistency.

5.When cool, beat in the soft butter, a small piece (about 2 tablespoons/30g) at a time. An electric hand mixer is great here, but it is possible to beat the butter in with a spatula if it is soft enough. You should end up with a thick, velvety chocolate buttercream. Chill while you make the caramel topping.


Directions for the caramel topping:

1.Choose the best-looking cake layer for the caramel top. To make the caramel topping: Line a jellyroll pan with parchment paper and butter the paper. Place the reserved cake layer on the paper. Score the cake into 12 equal wedges. Lightly oil a thin, sharp knife and an offset metal spatula.

2.Stir the sugar, water and lemon juice in a small saucepan. Bring to a boil over a medium heat, stirring often to dissolve the sugar. Once dissolved into a smooth syrup, turn the heat up to high and boil without stirring, swirling the pan by the handle occasionally and washing down any sugar crystals on the sides of the pan with a wet brush until the syrup has turned into an amber-colored caramel.

3.The top layer is perhaps the hardest part of the whole cake so make sure you have a oiled, hot offset spatula ready. I also find it helps if the cake layer hasn't just been taken out of the refrigerator. I made mine ahead of time and the cake layer was cold and the toffee set very, very quickly—too quickly for me to spread it. Immediately pour all of the hot caramel over the cake layer. You will have some leftover most probably but more is better than less and you can always make nice toffee pattern using the extra to decorate. Using the offset spatula, quickly spread the caramel evenly to the edge of the cake layer. Let cool until beginning to set, about 30 seconds. Using the tip of the hot oiled knife (keep re-oiling this with a pastry brush between cutting), cut through the scored marks to divide the caramel layer into 12 equal wedges. Cool another minute or so, then use the edge of the knife to completely cut and separate the wedges using one firm slice movement (rather than rocking back and forth which may produce toffee strands). Cool completely.


Angela's note: I recommend cutting, rather than scoring, the cake layer into wedges before covering in caramel (reform them into a round). If you have an 8” silicon round form, then I highly recommend placing the wedges in that for easy removal later and it also ensures that the caramel stays on the cake layer. Once set, use a very sharp knife to separate the wedges.


Assembling the Dobos

1.Divide the buttercream into six equal parts.

2.Place a dab of chocolate buttercream on the middle of a 7 1/2” cardboard round and top with one cake layer. Spread the layer with one part of the chocolate icing. Repeat with 4 more cake layers. Spread the remaining icing on the sides of the cake.

3.Optional: press the finely chopped hazelnuts onto the sides of the cake.

4.Propping a hazelnut under each wedge so that it sits at an angle, arrange the wedges on top of the cake in a spoke pattern. If you have any leftover buttercream, you can pipe rosettes under each hazelnut or a large rosette in the center of the cake. Refrigerate the cake under a cake dome until the icing is set, about 2 hours. Let slices come to room temperature for the best possible flavor.


This cake didn't actually take that much time at all to prepare! The cake was very simple to make and it baked very quickly, despite having to bake several layers. I don't usually use an egg-based buttercream for my recipes but this one was very good. It reminded me of a delicious chocolate pudding, and I had to control myself from eating too much of it so that I would have enough of the buttercream to spread on the cake. Assembling the cake was also very simple... the only part I had a tough time with was cutting the caramelized layer of cake... the toffee coating does become very hard, and even though I cut the cake versus only scoring it, it took some hacking at the candy to make the decorative wedges come apart. I only had enough hazelnuts to decorate the sides of the cake, and so I had to use chocolate-covered fruits & nuts to help prop up the decorative caramel-wedges. These chocolates actually worked very well, and their color blended into the chocolate buttercream so you could hardly tell that they were helping angle the wedges. I would possibly consider making this recipe again if a big party comes around and I want to wow the guests, but I am much more confident that I will be making another batch of the buttercream... mmmm, gotta love the choco-pudding taste!!


Friday, August 21, 2009

Blue Cheese Scones

The good thing about blue cheese is that since it's already moldy, it doesn't expire very quickly... the bad thing about it is that I honestly had know idea what to make with the remaining piece of my blue cheese wedge. Whenever I am plum out of ideas from my cookbooks/noggin I head for the internet and the place to search was the Rosenborg webpage. Most of the time the manufacturers of food products have some pretty decent recipe ideas that are not only tasty but very simple and use few ingredients (I think the idea is to showcase their product's ease and versatility! Those guys are brilliant)... so anyways, I stumbled upon many recipes that peaked my interest, but settled for one that suited my baking addiction... Blue Cheese Scones! The recipe can be found here.


These scones were divine!! I decided to forgo sprinkling the extra bits of cheese on top of the scones because I thought that it would make for sloppy looking scones, and that the blue cheese fragrance and taste would be too strong. In all actuality, I could have sprinkled on the cheese because although the flavor was very powerful, when baking, the pungent moldy smell and taste is mellowed and the true cheese-flavor rings through. The scones were wonderfully flaky and buttery and I very much enjoyed the cheesy taste. They taste the best when they're fresh from the oven; so, if serving them for breakfast the next day, be sure to toss them in the microwave or toaster oven to warm up before you snack on them. I definitely recommend this recipe for anyone who loves blue cheese, and for those who've never ventured out to try the moldy stuff this recipe will help ease you into loving the taste of blue cheese!

Tuesday, August 11, 2009

Rosemary- Blue Cheese Rice

Whipped up a quick and easy lunch for one! Yup, I've got to learn to cook for myself so that I don't end up with a whole fridge full of unfinished food. And if I continue to cook up lunches like this tasty dish, then I don't think I'll have any problem with left-overs :P

Rosemary-Blue Cheese Rice

Ingredients:
- 3 cups cooked rice (a mixture of wild, brown and white)
- 1 tbsp canola oil
- 1 tbsp dried rosemary
- 1 small onion, chopped
- 1/4 cup red cooking wine
- 50g crumbled blue cheese
- salt & pepper to taste
- 1 tsp sugar

Method:
1. Heat rice in the microwave so that it is warmed through.
2. In a small pot, heat the oil on medium and add in the rosemary. Once fragrant, add in the chopped onion, and continue cooking until tender.
3. Add in half of the cooking wine, and then add in the blue cheese. Continue to stir the mixture until the cheese melts. Add some salt and pepper, and the sugar.
4. Add in the rice to the pot and stir until the rice is nicely coated with all of the blue cheese "sauce".
5. Place rice on a nice plate and serve!

This recipe actually made enough rice for two people, so I suppose I'll just eat the rest for dinner or for lunch tomorrow... who knows? The sugar and the red cooking wine cuts the sharpness of the blue cheese while still keeping that distinct cheese flavor. I simply loved this rice, it was irresistible! I ended up almost cleaning the pot without washing it... jkjk, I washed it :P This recipe is definitely a keeper!

Monday, August 10, 2009

Yay! Testing out the Oven at my Condo

HOORAY! Today marks the day that I am living on my own! A little bit frightening, but a little bit exciting at the same time. I woke up this morning to a beautifully clear sky, and I was ready to start my day with a big breath of fresh air so I went for a 10k run. After an exhilirating early morning run, I decided that since my day wasn't going to be too eventful I would have some time to try out my condo oven! Having purchased a large bag of bananas (2 bunches for only $1.99) and knowing that I would not be able to eat all of the bananas before they go bad, because I'm now living on my own, I thought I'd use some in a recipe! Bananas also make a delicious post-run snack, so while I was whipping up a batch of Banana-nut-n-Oat cookies I decided to munch on a plain ol' banana... mmm, tasty!

So here it is! My first baking adventure in my new place!

Banana-Nut and Oat Drop cookies
Yields 17 cookies

Ingredients:
- 1/2 + 1/4 + 1/8 cup rolled oats
- 1 1/2 cup flour
- 1/4 tsp baking soda
- 1/4 tsp salt
- 1/4 tsp cinnamon
- 1/4 tsp each vanilla extract and almond extract
- 60g (1/4 cup) celeb margarine
- 1/4 cup granulated sugar
- 1 egg
- 1/2 cup semi-sweet chocolate chips
- 1 medium banana
- 1/3 cup almonds, crushed

Method:
1. Combine oats, flour, baking soda, salt and cinnamon. Set aside
  • Combine oats, flour, baking soda, salt and cinnamon. Set aside

  • In another bowl, beat celeb and sugar. Add in egg and continue beating.

  • Add in flour mixture until blended, then add in semisweet chocolate, banana and almonds.

    Drop by tbsp onto a greased baking pan and bake at 375degrees for 11-13minutes!
  • Sunday, August 09, 2009

    7 Traits: An Award/Meme

    I've been given this Meme from my gal Palidor over at http://crazyasiangal.blogspot.com/, thank you very much... I haven't done a meme in quite some time :)

    Here are the rules of this Meme:
    1. Acknowledge the person who gave you the award (thanks Palidor!)
    2. Nominate 7 other blogs
    3. Share 7 personality traits
    Here are my nominees... I'd sure love to find out what there 7 personality traits may be.
    - Steph at Obsessed with Baking
    - Small Small Baker at Small Small Baker
    - Camille at Rtemis
    - Gattina at
    Kitchen Unplugged
    - Irene at Irene's Rumbles
    - Sheryl at Crispy Waffle
    - Belachan at
    Little Corner of Mine

    And now one with rule #3... listing my personality traits

    1. I guess one would call me a realist. In terms of guessing what the future holds, I'm not really an optimist, or a pessimist but I like to analyze the situations around me in order to determine what would be the most rationally occurring event. If you ask me whether the glass is "half-empty" or "half-full" my response would have to be in relation to the question... "well, did you recently pour water into the glass or take a sip from the glass?"

    2. Obsessive, I am definitely an obsessive individual. Once I've set my mind to complete something I must do it, or else I will most definitely beat myself up about not completing it. I can never do anything without putting my whole heart and all my effort into it... if I go for a run with the mentality of completing a 10k, I can't cut my run short or else I feel like a lazy bum.

    3. Perfectionist, this is probably the best/worst trait for me to have. Whenever I bake and something goes right I am very proud of myself and ready to great the world head-on... however, when something goes wrong during my time in the kitchen, everything goes downhill. I start to get bummed out because I start believing that I can't accomplish my baking/cooking task, and then my mind starts to wander which results in the inevitable baking/cooking failure... an impossible to present dish

    4. Egocentric, again, not a very nice trait but it is me none-the-less. Although I do occasionally enjoy making others around me happy I am a very self-centered individual. If I'm not happy, I really must remove myself from big social settings, lest I make the rest of the group uncomfortable... yes, I'm sometimes a downer who always wants her own way.

    5. Thrifty, this is probably the most prominent trait I express. I am Asian through and through, I will often stop by the supermarket even if I don't intend to purchase anything, simply so that I can walk through all the aisles and gather coupons that can be utilized at other times when the products are on sale... because on sale + coupon = major savings!! I am one of those people who take shampoos/soaps from hotels; asks for extra packs of peanuts on planes and saves them for an off-flight snack sometime during my vacation; and yes, I have asked for a refill on my "bottom-less fries" simply to ask the waitress to pack them to go... Also, my fave place to shop is called McFrugal's... so that's saying something :P

    6. Distractable, it doesn't really take much to get me off topic and keep me off topic. I don't know what's wrong with the rails in my brain, but one's you hit the track-switch I'm off on a tangent with no capability of return unless you remind me where I was. I blame the internet, who invented this "tabbing application"? It is seriously a major cause for ADD. I can go on the web with the only intention of checking my e-mail, and then randomly end up on facebook, craigslist, ebay and attempting to buy merchandise from thinkgeek.com!!! AAAAHHH!

    7. Indecisive, it seems that my friends and I share this trait. Don't ask us what we do on our nights out because we certainly don't know until we're actually doing it! Many of our conversations go a little something like this...
    "Do you guys want to see a movie?"
    "sure, if you want to"
    "I'm okay with going, if you are"
    "I guess we can go then"
    "why not" ... and so on, and so forth... crazy, no?

    Anyways, so that's pretty much me. Woah, I never realized that almost all of my traits are negative... dude that's not cool. Oh well, I'm not going to bother changing it... so I guess my 8th trait would have been laziness :P