Showing posts with label Lunch. Show all posts

Wednesday, June 01, 2011

Spiced Steak

For lack of a better title for this recipe I've just decided to call it spiced steak. The fusion of flavors in this dish make it impossible for me to pinpoint what type of cuisine it is; some-what Indian inspired, some-what Mediterranean, and somewhat Szechuan inspired... well, whatever it is... it's sure tasty.

Spiced Steak (for one)


Ingredients:
- 1 piece of outside round steak
- 2 gloves garlic, minced
- 1 tsp of your favorite chili paste (I used a hot-pot soup chili paste)
- 1/2 tsp coriander seeds, crushed
- 1/2 tsp cumin
- 2 tbsp soy sauce
- 2 tbsp red cooking wine
- 1 tbsp rice wine vinegar
- salt and pepper to taste
- 2 tbsp canola oil

Method:
1. Create marinating sauce by combining the garlic, chili paste, cumin, coriander, soy sauce, cooking wine and vinegar.
2. Rub the steak with salt and pepper and then place in a bowl with the marinade. Coat the steak with the sauce and allow to sit for at least 1 hour; or overnight is possible.
3. Preheat the oven to 450 degrees.
4. Heat the oil in an oven-proof pan. Once oil has reached appropriate temperature, place steak in the pan and sear on either side for about 30 seconds.
4. Pour in the remaining marinade and place pan in the oven to finish cooking the steak (~10minutes for a nice medium). Just before serving, slice the meat on an angle and against the grain.
5. Serve with rice, salad, potatoes, fries or whatever else you enjoy!

Since I did most of the prep for this the night before, it was really simple to finish off this dish for a nice and easy lunch. I served mine with a simple salad and some oven-baked fries, and the dish was perfect. I might try this recipe with another cut of beef next time; while the outside round was relatively flavorful, the lack of marbling within the meat made it slightly tough to carve (hence the reason I pre-cut the meat before serving)... well, maybe next time when I can afford a prime-cut of beef I'll whip up this recipe once more ^__^


Wednesday, October 06, 2010

Welsh Rarebit

Again, thanks to my new found obsession with the show Come Dine With Me I've gotten a hankering for some not-so-Canadian dishes. Not that I'll be cooking anything like Laverbread, skirly, Howtowdie wi Dappit Eggs and Tatties or any black pudding (at least not anytime soon), but I did find myself craving some Welsh Rarebit. The ingredients were on-hand in my kitchen and the recipe didn't seem too labor intensive or complicated for a quick afternoon snack, so... off I went.
Welsh Rarebit

Ingredients:
- 6 slices of French bread
- 1/2 tsp salt, or more to taste
- 2 tsp Worcestershire sauce
- 1 tsp mustard powder
- 1/2 tsp nutmeg
- 1/4 cup butter
- 3 tbsp flour
- 1 clove of garlic minced
- 3/4 cup cheddar cheese, shredded (I only had marble)
- 1/3 cup dark ale (I used Guinness)
- 1/2 cup milk
- chopped spring onion (optional)


Method:
1. Melt butter in a heavy bottomed saucepan and fry garlic until golden brown and fragrant.
2. Add in the flour and mix over medium heat to form a roux.
3. Slowly pour in the dark ale, and continue to mix until well combined. Then, slowly add in the milk and cook over medium until mixture begins to thicken.
4. Add in nutmeg, mustard, Worcestershire sauce and salt to taste. Continue mixing, and add in the cheese. Stir sauce until cheese is well melted and mixture is nice and thick.
5. Place slices of French bread on a baking tray; spread cheese-ale sauce over top of slices and place tray in the oven. Set oven to broil and cook until cheese topping bubbles and browns, and French bread begins to brown.
6. Optional: Serve rarebit topped with a garnish of chopped spring onions.

The Guinness flavor was really strong in the rarebit, but boy was it tasty. Man! The Brits really know how to eat their toast! I mean, toast and beans, toast and eggs, toast and cheese... all sound uber-tasty to me but I've never seen it served as a snack food in Canada. I will definitely be making this recipe again, I just gotta go out and buy more ale... I finished off the last can of Guinness, because hey... what else could I do since my recipe only called for 1/3 cup of the malty, creamy nectar?! (Did I mention that Guinness is my favorite draught... probably why it was the ale that ended up in my rarebit)... uh, oh... gotta sober up before work :P jkjk

Tuesday, August 17, 2010

Mac&Cheese... on a stick!


Okay... before you think I've gone completely insane with the comfort food on a stick thing, I'll have you know that I'm simply making this recipe in order to enter a "Food on a Stick Contest". Actually, I've found that competitions are a great way to light a fire under my butt and spark my creativity when it comes to baking or cooking. Without a little challenge, I'd probably just stick with making the same-old, same-old foods that I've tried over and over and over again. But I digress... you guys probably just want the recipe :P

If you like the recipe, you can check it out at Instructables.com And if you really like it, please vote for my recipe. Voting begins August 22.

Macaroni & Cheese On a Stick

Mac&Cheese Ingredients:

- 3/4 cup elbow macaroni, uncooked

- 2 tbsp butter

- 1 ½ tbsp flour

- 1 ¼ cup warm milk

- Pinch of nutmeg and cayenne pepper

- ½ cup grated cheese (I used marble, but you could use any good quality hard cheese gruyere, mozzarella, cheddar)

- Salt and pepper to taste
Method:
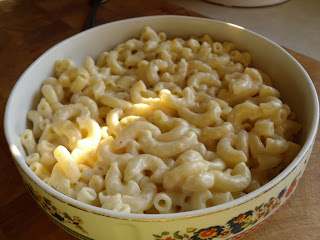
1. In a medium sized pot, bring some salted water to a boil and cook macaroni as per instructions on the bag. Once al dente, drain the pasta and set aside.
2. In a separate saucepan, melt the butter.
3. Add flour to butter, whisking vigorously until mixture if of uniform consistency. Remove pot from heat, and slowly add the warm milk (whisking continuously to avoid lumps).
4. Return butter + flour + milk mixture to stove and bring to a simmer. Add cayenne and nutmeg, and continue to stir.

5. Once sauce thickens, remove pan from heat and add in the cheese. Continue to stir sauce until cheese dissolves.
6. In a rectangular casserole dish, combine the sauce and the macaroni. Mix thoroughly until all pasta is coated with cheese sauce. Cover dish, and place macaroni in the fridge for at least 4 hours (or overnight).
7. Remove refrigerated/day-old macaroni and cheese from fridge.
8. Take handfuls of mac&cheese and form them into balls ~1.5-2inches in diameter.
9. Place balls on a baking tray and return to fridge while you prepare the frying batter.

Batter Ingredients:

- 1 ¼ cup flour

- ¼ cup corn starch

- ½ tsp baking powder

- ½ tsp baking soda

- ¼ tsp salt

- 1 cup cold water (adjust amount of water to produce a batter that is not too runny)

- ½ cup bread crumbs

- ¼ cup grated cheese

- 2 tbsp parmesan cheese

- Pinch of Cajun seasoning and cracked black pepper


Method:
1. Sift together the flour, corn starch, baking powder, baking soda and salt.
2. Stir in the bread crumbs, cheeses, seasonings and pepper.
3. Have cold water ready to add to dry ingredients when your frying oil, mac&cheese balls and cooking station is ready to begin the frying process.

Frying the Balls:
1. Complete preparation of batter mixture by adding the cold water to the dry ingredients. Stir until no lumps remain, and batter is nice and thick (add more flour if batter is too runny).
2. In deep wok, heat 2L of canola oil (or 2-3inches of oil) over medium until it reaches 375degrees (or batter-test the oil temperature: drop a tsp of batter in the oil and if ready, the batter should bubble up to the surface immediately).
3. Remove Mac&Cheese balls from fridge. Place one ball into the batter mixture gently. Use a spoon to coat the sides and top of the ball fully. Use that same spoon to gently drop the battered ball into the hot frying oil. Cook for 3-4minutes (or until batter is nicely browned), remove with a slotted spoon and place on a paper-towel lined plate to cool. 4. Repeat step 3 for all the Mac&Cheese balls. (Note: again, be not alarmed if the balls fall apart slightly. Remain calm! Slowly scoop up the Mac&Cheese bits with your large spoon, and if the pieces are all coated in batter then the ball is remain whole once deep fried ^_^)


Mmm... nothing like Mac& Cheese with Ketchup :)


Tuesday, June 29, 2010

Japadog

The last time I visited a Japadog was when I travelled to downtown Vancouver with my sisters during the Olympics. During this visit, we bought our dogs from the stand on Burrard & Smithe and thoroughly enjoyed them... they were delicious and unique and to be honest, my sisters and I simply adore anything Japanese (cuisine, manga, anime, music etc.). Here are some pictures of our culinary experience at the Japadog stand...
Their cute menu board
Their array of condiments... including: sweet chili sauce, mustard, wasabi mayo, Japanese mayo, honey mustard, dijon mustard, sriracha, ketchup and bacon bits
I decided on the Oroshi Dog (bratwurst topped with grated radish, green onions and soy sauce... the sweet chili-sauce and mayo were my additions), while my sister ordered the Okinomi dog (Kurubuta weiner topped with Japanese mayo, okinomiyaki sauce, bonito flakes and fried cabbage). My other sister remained on the less adventurous side and ordered a regular Kobe beef hot dog.


Flash-forward to yesterday, and it marks the day my sisters and I travelled downtown for another Vancouver outing. We were hankering for something to eat that was quick and affordable and as we walked down Robson Street we noticed that the Japadog sit-down restaurant was now open. So, without hesitation we headed towards the wonderful aroma of cooked meat and ordered us some tasty Japadog creations.
Signage outside of the restaurant
Look at all those hot dog buns!! Crazy!
Their Terimayo dog (teriyaki sauce, seaweed and Japanese mayo) $4.75

The Tonkatsu dog (breaded pork patty topped with red cabbage and Japanese mayo) $4.95


Once I saw this on the menu board, I knew I'd have to try it. Their Yakiniku Rice dog (pork dog with grilled teriyaki beef, lettuce and radish sprouts all in a rice-patty "bun") a bit pricey at $6.25, but totally worth it.


My sister's and I have always found that the quality at the Japadog stalls is always top-notch, and although on the expensive side (especially for a hot dog) we're always willing to pay for it. The only thing I'd have to say about the Yakiniku Rice dog is that you must eat this sitting down. Chomping at this baby is kind of a messy ordeal; and if you're like me and enjoy topping your hot-dogs off with "the works" in terms of condiments, then the drippy-soppy-messiness will be tripled. The rice "bun" of the Yakiniku dog is fairly sturdy and soaks up the meat juices and condiments well, but once it reaches its saturation point it will slowly begin to break apart. I went through my fair share of napkins while eating this bad-boy; yet, while it may have been a challenge to eat, it was really good! I highly recommend that if you're in the Downtown Vancouver area, you try Japadog at least once.

Monday, January 11, 2010

Mushy Peas!


I was staring at my pantry and wondering what to make for a simple and tasty lunch that wouldn't require too many ingredients. For some reason my eyes gravitated towards a can of peas that had been sitting in my pantry for the longest time, simply waiting to be used up. I wondered what I could do with the peas, when I remembered that I had once ordered a delightful side of mushy peas at my local Irish pub. Mushy peas... that didn't seem like it'd be too difficult to whip up, and I do remember the peas being delicious. So, here's the recipe I used to make them.

Mushy Peas
Serves 2
(or 1 if you're really hungry for peas)


Ingredients:

- 1 can (398ml) marrowfat peas, drained and rinsed

- 2 tbsp butter, or margarine if you prefer

- 1/8 cup onions, finely minced

- 2 cloves garlic, finely minced

- 1/4 cup milk
- salt to taste


Method:

1. Melt butter in a saucepan over high heat
2. Fry the onions and garlic until fragrant and caramelized

3. Add in the milk and lower the heat to medium, continuing to heat until it just comes to a boil.
4. Add in the peas, lower heat and allow mixture to simmer. Place cover on the saucepan and allow peas to cook for 5-10minutes (until most of the liquid has evaporated).

5. Once peas are tender, and there is still enough liquid to help with the mashing, use a fork/spoon/potato masher to crush the peas.
6. Add salt to taste


I really enjoyed this dish. Although it didn't taste exactly like the peas I had enjoyed at the pub, I would definitely make these again. When making mushy peas, you kind of know whether or not you'll like... simply put, if you don't like peas then you probably won't like this dish. Thankfully, I love my peas... in fact, I even indulge on frozen peas when I'm a hankering for something cold. Now, all I need to make this a complete Irish meal is a nice tall pint of Guinness :P

Tuesday, August 11, 2009

Rosemary- Blue Cheese Rice

Whipped up a quick and easy lunch for one! Yup, I've got to learn to cook for myself so that I don't end up with a whole fridge full of unfinished food. And if I continue to cook up lunches like this tasty dish, then I don't think I'll have any problem with left-overs :P

Rosemary-Blue Cheese Rice

Ingredients:
- 3 cups cooked rice (a mixture of wild, brown and white)
- 1 tbsp canola oil
- 1 tbsp dried rosemary
- 1 small onion, chopped
- 1/4 cup red cooking wine
- 50g crumbled blue cheese
- salt & pepper to taste
- 1 tsp sugar

Method:
1. Heat rice in the microwave so that it is warmed through.
2. In a small pot, heat the oil on medium and add in the rosemary. Once fragrant, add in the chopped onion, and continue cooking until tender.
3. Add in half of the cooking wine, and then add in the blue cheese. Continue to stir the mixture until the cheese melts. Add some salt and pepper, and the sugar.
4. Add in the rice to the pot and stir until the rice is nicely coated with all of the blue cheese "sauce".
5. Place rice on a nice plate and serve!

This recipe actually made enough rice for two people, so I suppose I'll just eat the rest for dinner or for lunch tomorrow... who knows? The sugar and the red cooking wine cuts the sharpness of the blue cheese while still keeping that distinct cheese flavor. I simply loved this rice, it was irresistible! I ended up almost cleaning the pot without washing it... jkjk, I washed it :P This recipe is definitely a keeper!

Wednesday, June 24, 2009

Chive Buds and Shrimp


Woah, it's been one crazy month. Not much time has been spent in the kitchen... other than attempting to pack up all of my baking utensils and staple baking ingredients for the big move on JUNE 30th!!! AAAHHH I still can't believe that I'm moving to my own place by the end of this month!! In a way I'm super excited, but in other ways I'm completely stressing about how I'm going to adjust to living on my stoney-lonesome :( I'm gonna miss the random noises that my silly sisters make, the crazy daily conversations with my mom and dad and especially the yappy barking of my little doggie.

It's not like I'm moving too far away, in fact my condo is only about 15 minutes from my parents house if you take the highway. I suppose that sooner or later moving out was an inevitability but who knew that it would be the former. Anyways, amongst the chaos of cleaning up my pantry and re-arranging the cupboards of their crazy clutter I managed to whip up a simple and tasty lunch for myself. I had bought some "reduced-to-clear" chive buds from the local asian supermarket the day before today, and decided that I'd better use up the buds before they go completely limp and lifeless. So I chopped and pan-fried the chive buds, tossed in some seared shrimp and allowed the entire mixture to heat through. Mmmm, delicious and healthy... just the way I like it.

Spicy Chive Buds with Shrimp
(Yields enough for 2 servings)

- 1 tbsp canola oil
- 1 garlic clove, minced
- 1 cup frozen shrimp, thawed
- 1/4 cup chicken stock
- 2 tbsp spicy hot-pot paste
- 4 cups chive buds, chopped into 3-inch long sticks
- 1 tbsp soy sauce

Method:
1. Heat the oil in a deep-sided, non-stick frying pan and fry up the garlic until fragrant
2. When pan is sizzling on medium-high heat, add the shrimp and sear on one side for a full minute. When cooked on one side, flip shrimp over to alternate side
3. Add in the chicken stock to help deglaze the pan, and add in the spicy hot-pot paste.
4. Continue cooking mixture over medium heat and add the chive buds. Fry up the mixture until buds are heated through, but not limp. Add soy sauce to taste and serve.

This recipe was really simple to create. I simply used the random ingredients that were inside my fridge. I wasn't quite sure how it was going to turn out, but I actually quite enjoyed the spicy, garlicy flavor. This dish will definitely be made again, especially when I have little time to cook up anything too fancy.


Thursday, March 26, 2009

Rainbow Butterfly: A Review

It's not often that my family takes a chance and ventures out to try a new dim-sum restaurant, but I guess my parents just didn't feel like having to drive all the way to Richmond for some good old HK breakfast. Instead, we decided to dine at this quaint little Chinese restaurant in Port Coquitlam called Rainbow Butterfly. I'm usually pretty wary of a restaurant that uses strange imagery within their name, but since this place did not use the words "panda" or "dragon" or "authentic Chinese cuisine" I was all for dining there. The following is a picture show of the amazing dishes that they served, with commentary of course :P

All of the dishes below were $2.75, except for the special dishes which were $3.75 or the "Chef Specials" which were $4.75.

As always, we ordered a bowl of congee... nothing amazing, but certainly tasty. It was considered a "Chef's Special" and in my opinion, not worth $4.95

Another dim-sum fave... lor bak gou. Again, tasty but nothing to rave about.


Can't go wrong with chicken feet... I thought these were really flavorful, and not too salty.

Their gyoza was nicely fried and crisp. Although, the skin was more doughy than I would have liked, and it cost $4.75!

I really enjoyed this chiu chow fun quor, it had pork, peanuts and chives... mmmm quite yummy.

Xiao Long Bao, another yum cha classic... my sisters devoured these and literally drank the red vinegar! Crazy kids.

Steamed rice rolls with scallop, $3.75

The beef omasum was soft and gingery

Their satay honeycomb tripe was also very nice and soft. It's one of my favorite dishes and they did not disappoint.

When we first received this dish, we weren't quite sure what it was. Then one bite into it and we could taste the seafood and pumpkin. These were a delightful addition to our lunch

I love my egg-tofu, and when combined with shrimp it's even better.

One of the best dishes at the Rainbow Butterfly has got to be their fried eggplant with pepper, salt, garlic and dried shrimp. They were crispy and spicy and just all-round delicious! And although it was a "Chef's Special" and costing $4.95 per dish, it was totally worth it.

I would definitely get this again, it was AMAZING! These fried bitter melon sesame balls, filled with black-sesame paste were ooey-gooey and oh so sweet!

My sister loves her mango pudding, in my opinion it's not as good as the one our mom makes but it was still better than the cheap, imitation mango puddings from sushi restaurants :P

My mom really loves her baked sago, and so she got one of these warm, rich puddings. I had to try a little, and really enjoyed the taro-paste they filled it with. It was a great alternative to the traditional red-bean paste.

I'm also a sucker for agar-agar. I had to try this chilled lychee and longgan agar-agar cake. It was very refreshing and had a nice, crisp bite to it. The wolfberries inside were a great addition to the cake... I'll have to see if I can make this one at home!

Yes, I called this one as well. I'm a sucker for the dessert section of dim-sum. This rich, flaky butter pastry was filled with a lotus-seed and ginger paste and had a century egg in the center. It was so rich and tasty... I felt so guilty eating two!

All in all, I would definitely recommend a visit to Rainbow Butterfly. The service is friendly and very quick. They are very attentive and accomodating to your requests if you are kind and friendly yourself. They have a great variety of traditional and specialty dim-sum dishes and they are, for the most part, relatively decent in price. I plan on making a return visit to Rainbow Butterfly, and ordering all my favorites plus a few other specialties that caught my eye last time. Sadly, neither my stomach nor my wallet are big enough to accomodate what my eyes beg for me to try :( but that just means I'll be back for more!

Monday, March 09, 2009

Scallops and Spaghettini


Like I said in my last post, I tend to get really inspired to be creative in the kitchen whenever a new season of Hell's Kitchen is on. I've been watching season 5, and I just love how Gordon Ramsey yells at the chefs... they know it's for their own good :P Anyways, having seen the chefs work with scallops often, I decided to whip up a fancy scallop and pasta dish for my mom for her special birthday lunch. Let me be clear that this was a very random recipe, but I will try to document the ingredients and method to the best of my abilities.

Scallops and Spaghettini For Two

Ingredients:
6 thin slices of Yukon Gold potatoes
1 tsp each tarragon and rosemary
1 tbsp olive oil
2 ounces dry spaghettini (1 cup cooked pasta)
1 cup broccoli florets
1 large clove of garlic, minced
1/2 medium onion, julienned
2 tbsp olive oil
6 uncooked scallops
2 tbsp pine nuts, toasted
Salt and Pepper to taste

Method:
1. Toss the potatoes with tarragon, rosemary, some salt and 1 tbsp olive oil. Wrap in an aluminum foil packet and place in a 350 degree oven for 10-15mins until tender.
2. While the potatoes are cooking, prepare the spaghettini according to package directions. When the pasta is half-cooked, add in the broccoli and allow those to cook with the spaghettini. Remove pasta and broccoli from the boiling water while the pasta is slightly undercooked. Set aside
3. Place an empty skillet over medium-high heat for one minute; then add 2 tbsp of olive oil, continuing to heat for 30 seconds. Meanwhile, season the scallops with salt and pepper.
4. Add the scallops to the pan and fry over medium-high heat until cooked through (approximately 2 minutes per side). Remove the scallops and set aside on a heated plate, but keep the oil and scallop juices in the pan.
5. To the pan, add in the garlic and onions. Cook over medium heat until fragrant, then add in the broccoli and the spaghettini.
6. Continue to mix and fry the pasta and vegetables until heated through. Season with salt and pepper.
7. By this time, the potatoes should be finished baking. Remove them from the oven.
7. Plate the dish by placing 1/2 a cup of pasta in one corner of a plate, and topping with one tablespoon of toasted pine nuts. On the opposite corner of the plate (assuming your plate is square) place 3 potato medallions, top each medallion with 1 scallop. Drizzle a home-made or commercially prepared vinegar-based sweet glaze over the scallops and the plate... just be creative!

Jo's Very Quick Glaze
Method: Whisk together 1/4 cup of balsamic vinegar, 1 tbsp brown sugar, 1 tbsp soy sauce and 2 tbsp of raspberry preserves in a small sauce pan. Heat over medium, until sugar is fully dissolved and the sauce looks slightly "drizzl-able" (thick) then remove from heat. Use immediately.

Well, it was a lot of fun making this fancy looking dish for my mom. She really thought it looked like something off of Hell's Kitchen... I don't know if that's suppose to be a complement or not, but I'll take it :P Since it was just my mom and I hanging around the house for lunch, this made-for-two dish was perfect. It was nice and light, and very simple

Thursday, November 20, 2008

Soba Time

I decided on a minimalist meal for lunch today. Its not that I was feeling lazy and not wanting to cook up anything spectacular, it's just that for some reason (probably from watching too much Gintama) I was craving the simple Japanese dish of Kake Soba (hot soba noodles, in soup with scallions). After cooking the soba noodles to an aldente state, I made my soba soup using a pre-made soba dipping sauce. I did not really use a standardized recipe, but simply eye-balled all the ingredients (I'm slowly becoming more like Rachel Ray) and seasoned it to my personal taste. I added some water and soy sauce to the pre-made dipping sauce, mixed in some granulated sugar and minced ginger, and brought the whole mixture to a boil. Once the soup boiled, I added in the chopped scallions and turned off the heat (I didn't want the scallions to start wilting on me). I placed servings of soba noodles in each of the bowls, and topped the noodles with some sliced nori, julienned green onions (julienned carrots would have been a nice addition) and sesame seeds. I slowly poured the hot soup over the cooked noodles, and lunch was ready to be served.

To get more information on soba noodles, and a few great recipes check out Just Hungry. This site has a ton of great information specifically relating to Japanese cuisine.


Monday, November 10, 2008

Eating Natto!


Some of you may be asking, "What is Natto?! Does such a word even exist?" The answer is, "It's fermented soybean, and yes it does!" :P

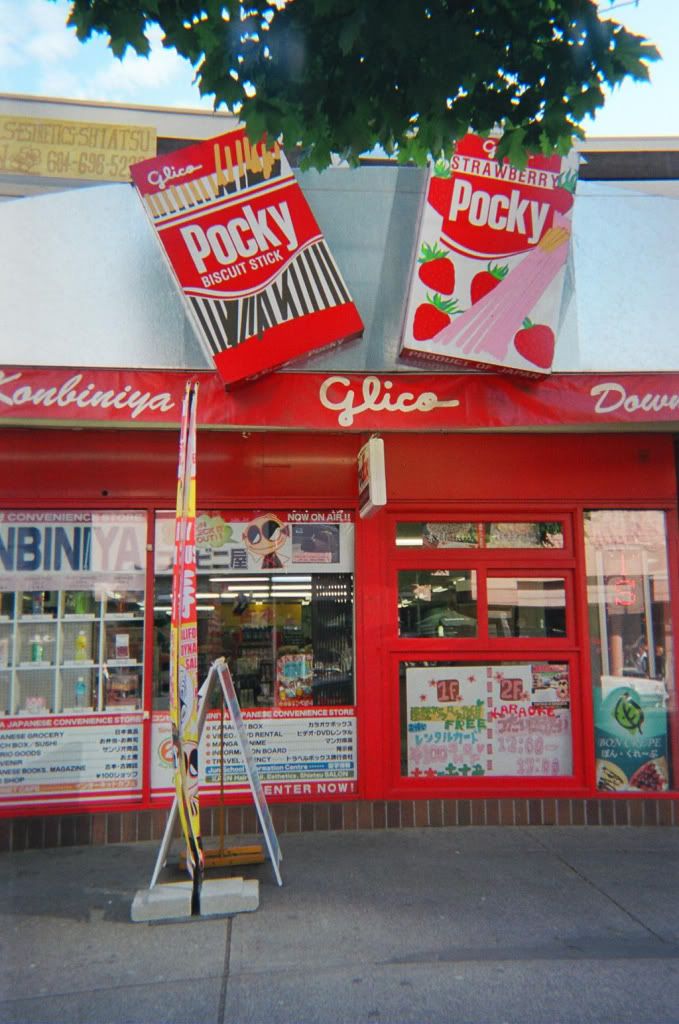
I was wondering around downtown Vancouver with a friend of mine when we stumbled upon a lovely little Japanese Grocery Store on Robson Street. It's kind of hard to miss, since it has two giant boxes of Pocky plastered to the entrance way (seriously... want to see the picture? click here). So I wandered inside, because I am a true foodie... and all foodies know that you can't just walk by a grocery store and not go inside! And so, it was in this Japanese store that I stumbled upon the triple-pack styrofoam boxes that encase the wonderous food known as natto...

I took the package home and wasn't quite sure how to eat it. I had heard about this interesting Japanese food from a couple Japanese friends (some saying it was good, other's saying that it was the devil's puke) but it was only after reading Gintama, and seeing one of the characters (Sa-chan) always holding a bowl of natto, that I dared to try the smelly beans.

If you want to see how natto is traditionally eaten, I recommend you do what I did... watch it on youtube... or for more reliable sources check out wikipedia :P

Inside the styrofoam package is the fermented soy beans, along with a packet of mustard and a packet of soy sauce.

Start by unveiling the beans. The slime coating is sticky... be careful not to get it all over your placemat, shirt and/or friends.

Add in the mustard and soy sauce packets. Then stir the mixture vigorously with your chopsticks about 15 times.
Note the gooey-ness... be glad you cannot smell the stinky-ness.

Eaten by itself, natto is a force to be reckoned with. It has a very pungent smell; but if you can get past that, you will probably enjoy the bean's taste. Adding the natto to rice helps to mellow out the flavor, while also increasing the ability to pick up the slimey buggers with your chopsticks.

I'm not sure what it is with me and food that has a slightly "off" aroma. I do like durian, and stinky tofu... and I actually really liked the natto. The only thing I didn't like about the natto was that it got all over my face; I'm not even joking. The little strings of sticky stuff were hanging off my chin by the end of the meal; so, after eating, I had to go to the washroom and wash my face... and while I was there, brush my teeth (lest someone be unfortunate enough to get a whiff of my "natto breath").


So my verdict for natto: I like it! But I'll have to remember to only snack on it when I have access to a clean washroom and toothpaste :P