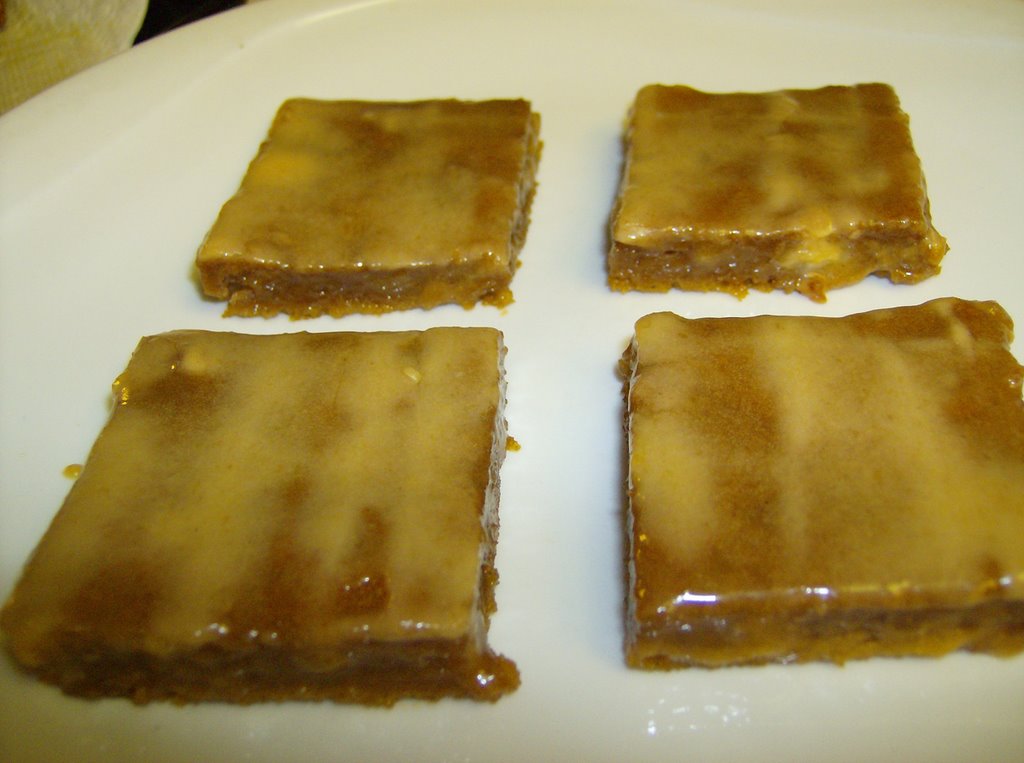
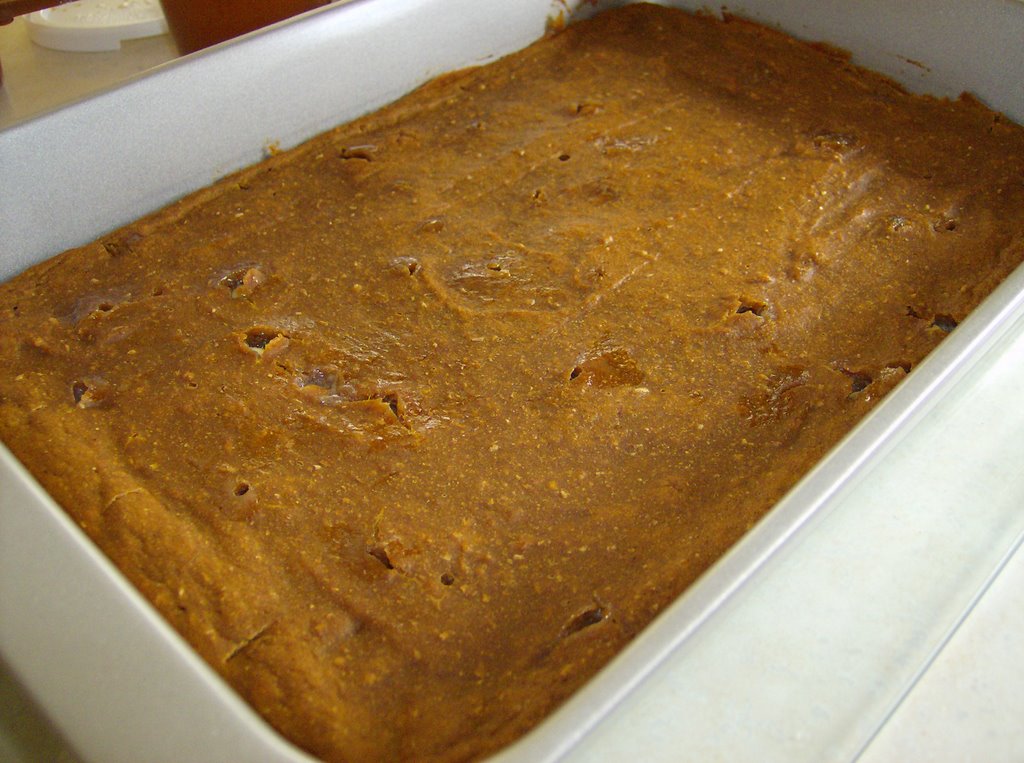
Showing posts with label Bars. Show all posts

Tuesday, October 05, 2010

Bailey's Cheesecake Swirl Brownies

I was sitting at my computer watching another lovely episode of Come Dine With Me, and having watched each of the competitors puddings be either chocolate or cheesecake related I suddenly felt the urge to have something creamy, chocolatey and cream-cheesey. So, just before the winner of the Come Dine With Me episode was revealed, I paused it and ran off to the kitchen to whip up a tasty treat for myself (seeing as how no body else was around to share it with me :P)

Bailey's Cheesecake Swirl Brownie


Ingredients:
- 1/2 cup (8 tbsp) butter
- 1 cup white sugar
- 1/2 cup brown sugar
- 2 eggs
- 1 cup flour
- 1/2 cup unsweetened cocoa powder
- 1 tbsp instant coffee
- 1/4 tsp salt
- 1 tsp vanilla essence
- 2 tsp milk
- Cream Cheese Swirls: 3 tbsp cream cheese + 1 tbsp sugar + 1 tsp flour + 2 tsp Bailey's (all creamed together)


Method:
1. Melt butter and add in both sugars, mixing until well combined. Mix in the eggs one at a time and stir in vanilla.
2. In a separate bowl combine flour, cocoa powder, coffee granules and salt.
3. Add the liquid ingredients to the dry, mix well and then add in the splash of milk.
4. Place in prepared 8x8 pan . Take tsp sized dollops of cream cheese swirl mixture and drop randomly on the surface of the chocolate brownie batter. With a knife, swirl the mixture around.

Look at the lovely swirls of rich, cream cheese! Mmmm...

5. Bake at 350degrees for 35-45minutes.
6. When done, remove from oven and leave to cool on wire rack before slicing.

This brownie turned out better than I had anticipated, and I'm sure if I were a competitor on Come Dine With Me (and had served the dessert with some home made vanilla bean ice cream) I could have been a real contender for top. The topping was nicely crisp and the cream cheese swirls were rich with the ever lovely taste of Bailey's Irish Cream. The inside of the brownie was gooey, soft, moist and simply decadent and it was hardly noticeable that I had used no baking chocolate whatsoever. This recipe is definitely a keeper, that's for sure!


Friday, August 13, 2010

Black Cherry and Coconut Tart

I had just returned from a 2-day trip to Seattle, and on my answering machine was a message offering me a job as an RN on the unit that I'm currently casual on. "Finally!" I thought to myself, "I'll have a steady schedule, and be able to make plans with friends without having to say 'well, I'm casual and always on-call... so, I may or may not be able to come... we'll have to wait and see'."

Words cannot express my excitement!! And so, to celebrate a wonderfully sunny summer day, and me having a steady job (at least for the next 7 months), I decided to do some baking.

I'd always wanted to bake a fruity, tart-like, butter-cookie based bar... and with my black cherry tree producing an over-abundant amount of tiny, tasty cherries I thought that making a Black Cherry and Coconut Tart (with a shortbread cookie base) would be perfect. My friend works at a bake-shop (in Cloverdale) and they make the best almond-cherry tarts... so, this was my attempt to gain par with their tart... although I'm pretty sure that that would be an impossible feat.

Black Cherry and Coconut Tart


Ingredients:
- 1 cup flour
- 1/4 cup confectioner's sugar
- 1/2 cup butter
- 1/4 cup flour
- 3/4 cup granulated sugar
- 1/2 tsp baking powder
- 1/4 tsp salt
- 1 egg
- 1/2 cup cherries, fresh and pitted
- 1/2 tbsp corn starch
- 1/2 cup shredded coconut

Method:
1. Crust: By hand, combine the first 3 ingredients until a soft, crumbly dough forms. Press this crusty dough into the bottom of a lined baking pan (8x8 square, or 8-inch round). Bake at 350degrees for 25minutes (watch that the edges do not burn).
2. Filling: Combine the cherries and corn starch, mix until all cornstarch is no longer powdery white and visible. In a small bowl, combine the flour, sugar, baking powder and salt. Add the flour mixture to the cherries and mix until well combined. Beat in the egg, beating until uniform batter forms. Add in the coconut, continue to mix until well combined.
3. Pour the filling mixture over the warm crust, bake the tart at 350degrees for another 30minutes. Allow to cool, remove from pan, slice and serve.


This tart had the perfect balance of sweet and tangy. I loved the beautiful purple color that the freshly pitted cherries gave to the filling component of the recipe. Served with ice cream, this was the perfect treat for my summer-time celebration ^_^

Wednesday, January 27, 2010

Daring Bakers Challenge: Nanaimo Bars


Hehehe... my delicious, yet drippy Nanaimo bars!

The January 2010 Daring Bakers’ challenge was hosted by Lauren of Celiac Teen. Lauren chose Gluten-Free Graham Wafers and Nanaimo Bars as the challenge for the month. The sources she based her recipe on are 101 Cookbooks and www.nanaimo.ca.

Eeeee! I epically failed in this month's challenge, and I'm Canadian... way to go :( I did not represent *sigh*. But to tell you the truth, this was actually the first time I'd ever attempted to make Nanaimo bars... ever! The graham cracker recipe went swimmingly, and the cookies/crackers turned out so delicious. And when it came to making the bottom layer of the bars, everything was going according to plan. The epic fail came when I attempted to make a different version of the middle layer of the bar... and ended up with a non-setting, gooey mess. I think I realize where I went wrong, I could have either reduced the amount of liquid or add more confectioner's sugar (sadly, I'd already added the liquid and I had run out of sugar!). Anyways, here's the recipe...


For Gluten-Free Graham Wafers


Ingredients
1 cup (138 g) (4.9 ounces) Sweet rice flour (also known as glutinous rice flour)
3/4 cup (100 g) (3.5 ounces) Tapioca Starch/Flour
1/2 cup (65 g) (2.3 ounces) Sorghum Flour
1 cup (200 g) (7.1 ounces) Dark Brown Sugar, Lightly packed
1 teaspoon (5 mL) Baking soda
3/4 teaspoon (4 mL ) Kosher Salt
7 tablespoons (100 g) (3 ½ ounces) Unsalted Butter (Cut into 1-inch cubes and frozen)
1/3 cup (80 mL) Honey, Mild-flavoured such as clover.
5 tablespoons (75 mL) Whole Milk
2 tablespoons (30 mL) Pure Vanilla Extract


Directions:
1. In the bowl of a food processor fitted with a steel blade, combine the flours, brown sugar, baking soda, and salt. Pulse on low to incorporate. Add the butter and pulse on and off, until the mixture is the consistency of a coarse meal. If making by hand, combine aforementioned dry ingredients with a whisk, then cut in butter until you have a coarse meal. No chunks of butter should be visible.
2. In a small bowl or liquid measuring cup, whisk together the honey, milk and vanilla. Add to the flour mixture until the dough barely comes together. It will be very soft and sticky.
3. Turn the dough onto a surface well-floured with sweet rice flour and pat the dough into a rectangle about 1 inch thick. Wrap in plastic and chill until firm, about 2 hours, or overnight.
4. Divide the dough in half and return one half to the refrigerator. Sift an even layer of sweet rice flour onto the work surface and roll the dough into a long rectangle, about 1/8 inch thick. The dough will be quite sticky, so flour as necessary. Cut into 4 by 4 inch squares. Gather the scraps together and set aside. Place wafers on one or two parchment-lined baking sheets. Chill until firm, about 30 to 45 minutes. Repeat with the second batch of dough.
5. Adjust the rack to the upper and lower positions and preheat oven to 350 degrees Fahrenheit (180 degrees Celsius).
6. Gather the scraps together into a ball, chill until firm, and reroll. Dust the surface with more sweet rice flour and roll out the dough to get a couple more wafers.
7. Prick the wafers with toothpick or fork, not all the way through, in two or more rows.
8. Bake for 25 minutes, until browned and slightly firm to the touch, rotating sheets halfway through to ensure even baking. Might take less, and the starting location of each sheet may determine its required time. The ones that started on the bottom browned faster.
9. When cooled completely, place enough wafers in food processor to make 1 ¼ cups (300 mL) of crumbs. Another way to do this is to place in a large ziplock bag, force all air out and smash with a rolling pin until wafers are crumbs.


Nanaimo Bars

Ingredients:


Bottom Layer:
1/2 cup (115 g) (4 ounces) Unsalted Butter
1/4 cup (50 g) (1.8 ounces) Granulated Sugar
5 tablespoons (75 mL) Unsweetened Cocoa
1 Large Egg, Beaten
1 1/4 cups (300 mL) (160 g) (5.6 ounces) Gluten Free Graham Wafer Crumbs (See previous recipe)
1/2 cup (55 g) (1.9 ounces) Almonds (Any type, Finely chopped)
1 cup (130 g) (4.5 ounces) Coconut (Shredded, sweetened or unsweetened)


Middle Layer:
1/2 cup (115 g) (4 ounces) Unsalted Butter
2 tablespoons and 2 teaspoons (40 mL) Heavy Cream
2 tablespoons (30 mL) Vanilla Custard Powder (Such as Bird’s. Vanilla pudding mix may be substituted.)
2 cups (254 g) (8.9 ounces) Icing Sugar


Top Layer:
4 ounces (115 g) Semi-sweet chocolate
2 tablespoons (28 g) (1 ounce) Unsalted Butter


Directions:
1. For bottom Layer: Melt unsalted butter, sugar and cocoa in top of a double boiler. Add egg and stir to cook and thicken. Remove from heat. Stir in crumbs, nuts and coconut. Press firmly into an ungreased 8x8 inch pan.
2. For Middle Layer: Cream butter, cream, custard powder, and icing sugar together well. Beat until light in colour. Spread over bottom layer.
3. For Top Layer: Melt chocolate and unsalted butter over low heat. Cool. Once cool, pour over middle layer and chill.


For my middle layer, I simply added some seedless raspberry syrup to the mix (roughly 1/4 cup). I think that this addition of liquid should have been balanced by minimizing the amount of cream added to the mix. However, I don't think my thinking cap was on straight as the smell of chocolate and cookies was too distracting :P Oh well, the challenge was fun and the dish was delicious... although appearing strange and loppy, it was chock full of chocolate-y, raspberry goodness.


Monday, January 04, 2010

Layers of Delicious Goodness

I was in the mood for something sweet... something really sweet; and in perusing random food-blogs this morning, I stumbled across this amazing recipe for the mother of all layered cookies/bars!! The bars themselves are called Motherlode Layered Cookie Bars... and they will blow your mind. Albeit, my bars are definitely not as gorgeous as those baked up by their creator (I was too lazy to make the chocolate drizzle, and just wanted to dig into the bars :P) but I think I did a fairly decent job at following the original recipe. You can find the original recipe at PickyPalate.com this blogger has an amazing assortment of recipes that I am dying to test out... hopefully I'll have the time in the coming year... I'll have to make it my resolution!

Tuesday, October 13, 2009

Can't Have Thanksgiving Without ... Pumpkin!!

Well, another year's rolled around again and it's Thanksgiving time! Luckily I didn't have to learn how to make my own turkey (I'm sure I'll have to learn eventually, but for now I think I'll stick to meats I can cook on the George Foreman :P) because my parents invited me over to the house for dinner. I didn't want to show up empty handed and I had this can of pumpkin filling that I'd been wondering what to do with for the longest time... so I set to work on storming up a recipe for a pumpkin bar that would be easy and delicious.

Pumpkin Pie Cake-bars
Yields 1 13x9 inch rectangular pan

Ingredients:

Bottom Layer
1 package Betty Crocker's Butter Pecan cake mix (or another white-cake based mix)
1 egg
1/2cup butter, softened

Filling
3 cups pumpkin pie filling (1lb, 4oz)
2/3 cup milk
2 eggs

Topping
1 cup reserved batter of the bottom layer
¼ cup sugar
1 tsp each nutmeg, cloves and cinnamon
¼ cup butter

Method:

1. Preheat oven to 350 degrees, and prepare a 13x9 inch cake pan.

2. Mix together the ingredients for the bottom layer. (This batter will be fairly chunky and thick). Reserve 1 cup and set it aside for later use.

3. Press the remaining mixture into the pan.

4. In a separate bowl, combine the filling ingredients and pour it over the bottom layer.

5. Combine the topping ingredients with the 1 cup of reserved batter and crumble it over the top.

6. Bake for 45 – 50 minutes or until cake tests done. Cool and cut into squares and eat the day of baking.

These bars were very tender and you had to be careful not to break them when lifting them after cutting. Luckily I lined the cake pan with parchment paper, otherwise there would be no way I could have removed the cake bars without destroying a good portion of them. I included "eat the day of baking" to the last step because although the bars were wonderfully tender on the bottom, with a crisp streusel topping just after baking... the next day (after I had packaged them all) I realized that the topping had also become soft :( but luckily my parents and sisters didn't cake. They were just happy to eat some festive pumpkin dessert bars, and when eaten warm and topped with ice-cream... they were divine!

Thursday, April 23, 2009

Butterscoth Cereal Bars


They're super easy and super tasty... I looooove these cereal bars. I don't quite know why, but for some reason I woke up this morning craving not cereal + milk but cereal bar sweets. I riffled through my pantry looking for some marshmallows, but to no avail. So I decided to try out this cereal-bar recipe that my friend gave to me, which didn't require marshmallows. The original recipe calls for peanut-chippers (the Reese's chips that look like chocolate chips), but since that would mean that my sister could enjoy the cereal bars I decided to use butterscotch chips instead. And now... on with the recipe!

Butterscotch Cereal Bars

Ingredients:
- 1/2 cup butter
- 1/2 cup brown sugar, packed
- 1/2 cup corn syrup
- 1 cup butterscotch chips
- 6 cups of your favorite cereal (I used half Cheerios and half Nesquik)
- Melted chocolate, to drizzle (optional)

Method:
1.Heat butter, brown sugar and corn syrup in a small saucepan. Stir until sugar dissolves.
2. Stir in the butterscotch chips until they are fully melted. Remove mixture from heat and add in the cereal, mixing well.
3. Press the cereal mixture into a prepared 9x13-inch pan. Let rest at room temperature and then slice, drizzle with melted chocolate and enjoy!

These bars were a wonderful breakfast treat... although I did end up enjoying them for a mid-morning snack as well. Apparently they are really sweet, but since my taste-buds are sort of adapted to anything super-sweet I couldn't really tell (that's not good is it??!! :P) My sisters really enjoyed eating the bars while they were still slightly warm and gooey, but I preferred them more crunchy. I may try making this recipe with peanut-butter chips, if I bring this recipe to a potluck or something... mmmm, I can just taste it now!

Wednesday, April 01, 2009

Mincemeat Bars

I know it's not the season for mincemeat, but hey... when they're in bar-form and super tasty, anyone will gobble them up even though it's not Christmas. But I have some very good reasons for making these mincemeat bars...

Reason #1: it was snowing today (I know!! April 1st does not equal snow in a logical world :P) so I thought I may as well take advantage of the frigid weather and make some piping hot baked goodies.
Reason #2: since it's not mincemeat season Save-on-Foods was clearing out all their mincemeat (yup, I can't resist a great deal)
Reason #3: I love, love, love mincemeat... it's so good by itself or spread on toast (I know, I'm strange)

Anyways, I'll stop trying to justify my baking escapades and give you the recipe!

Mincemeat Bars
Recipe Adapted from TheBakingPan.com
Yields 24 bars


Ingredients:
- 1 cup flour
- 1/4 tsp baking soda
- 1/4 tsp salt
- 1/2 tsp cinnamon, ground
- 1/2 tsp cloves, ground
- 1/2 tsp allspice, ground
- 1/2 tsp nutmeg, ground
- 1 egg
- 2 tbsp butter, room temperature
- 3/4 cups brown sugar, packed
- 2 tbsp molasses
- 1/2 tsp rum extract
- 1/2 tsp vanilla extract
- 1 cup mincemeat
- 1/2 cup raisins
- 1/2 cup pine-nuts (pecans or walnuts can be substituted)
- powdered sugar for dusting

Method:
1. Preheat oven to 350 degrees. Grease and flour a 13x9-inch baking pan (Note: I lined the pan with aluminum foil, leaving some over-hang on the sides of the tray. This provides "handles" for easy removal of the bars when they're finished baking)
2. Sift together the flour, baking soda, salt and spices. Set aside
3. In a separate bowl, combine egg, butter, brown sugar and molasses; mix well. Add in the rum and vanilla extract and mix; add in mincemeat, raisins and pine-nuts, continue mixing until well incorporated.
4. Pour the batter into the pan, and spread into an even layer. Bake in oven for 25-30 mins or until a toothpick inserted comes out clean.
5. Allow the bars to cool until warm, at room temperature; then, use a sifter to dust the bars with powdered sugar. Allow them to cool fully and then slice into 2 inch squares.

When spreading the batter into the pan, I was a bit worried that I wouldn't have enough. It looked like the batter was spread-out fairly thin and that the bars wouldn't be thick enough, but thankfully they rose to almost triple their height in the oven. In the end these bars were great! They tasted just like gingerbread, with mincemeat and pine-nuts studded throughout! I was so impressed that the rest of my family enjoyed it, even though they're not fans of mincemeat... I guess it was that good.

Monday, February 23, 2009

Energy Bars


Just yesterday I was walking through Superstore and decided that I'd mosey on down to the "health-food" section. When I got there, I noticed that they were having a sale on energy bars! Being on a real "running-high" and trying to maximize my nutritional intake and athletic performance, I was excited to try a whole bunch of different energy bars. I simply love Clif bars (my favorite is the Oatmeal Raisin Walnut) and Luna Bars, and usually stick to my favorites for fear of spending money on something that tastes nasty, so when I saw that they were 5 for $5 I was ecstatic. Usually they're $1.49 each, so $1 per bar was a steal. I left the supermarket proud of my purchase, and headed home.

The next day, I thought to myself "hey, it can't be that difficult to make my own energy bars?!" What a brilliant idea! So, I grabbed all of the "healthy" ingredients in my pantry and began sorting out what flavor combinations I wanted to create. I couldn't really decide on the "right" combination so I basically made a hodge-podge energy bar full of ingredients that I deemed energy-bar-worthy.

I can't quite remember the exact proportions of ingredients that I added to my energy bars, but here is the list of the various ingredients and their rough measurements:

Jo's Energy Bars

Yields 6 bars

Ingredients
- 1 medium banana, mashed

- 1/4 cup steamed zucchini, mashed
- 1/3 cup oats
- 1/4 cup 7-grain cereal (hot breakfast cereal, Roger's brand)
- 1/8 cup whole wheat flour
- 2 tbsp cocoa powder
- 1 tbsp espresso powder
- 3 tbsp dried cranberries

- 1 tbsp chocolate chips

- 1 1/4 cup Multi-grain cheerios
- 1/4 cup ground flax seeds
- 2 tbsp no sugar added maple syrup

Method:
1. Mash together the zucchini and the bananas, set aside

2. Combine the remaining ingredients together (except for the maple syrup), tossing well

3. Add the mashed zucchini mixture to the dry ingredients, stirring until the entire mixture is moistened. Add in the maple syrup, to taste
4. Press into half of an 8x8 square pan, and bake at 350F for 15-20minutes or until the mixture is firmed up (honestly, it's difficult to tell if the mixture is fully cooked... but there's no egg in it, so there's no risk of salmonella :P)

5. Remove from oven, allow to cool and cut into 6 bars.
6. Cool bars completely and wrap individually in saran or aluminum foil.

These bars were great! There fairly dense, so I wasn't tempted to eat more than one and they tasted very much like dark chocolate. I think the next time I make this recipe I will add a bit more sugar (or at least some more sugary ingredients) to counter-balance the unsweetened cocoa powder taste. The espresso powder was a nice flavor boost to the bar, and I'm sure the caffeine did something to give me energy :P I usually will eat half of an energy bar before a run (if the run is longer than 75mins) and then have the other half-bar post-run. It's always important to replenish your energy store after a great run, and don't forget to hydrate!


Monday, February 09, 2009

Yet Another Toaster Oven Creation


Well, my mid-terms are over... but February (the month I have been dreading, in terms of projects and assignments) has only just begun. You know what that means!??! Time to enjoy the carbs :P

The other day I was shopping around Langley and found a cute little place called McFrugal's... I thought to myself, "Man, with a name like that how can an Asian resist :P" So, I stepped in and to my surprise they have some really good-quality stuff there. I was expecting a whole pile of dollar-store-esque products to surround me, but was quite pleased to see that there was very little of that here. What I loved about McFrugal's was that it had a grocery section with a good selection of organic foods, pasta, baked chips, canned vegetables... and tubs of Pecan Cookie Dough! The entire tub of cookie dough was only $2.50 so I had to buy it. I brought it home and immediately began thinking of ways to fancy up this beautiful creation. If I was truly lazy, I would have simply scooped out the dough, placed it on a cookie sheet and made a batch of cookies. But, making cookies from scratch is easy enough (and tastes way better) so I decided that using this cookie dough, I would create the cookie-bar to rule all cookie-bars.

The Ultimate Cookie-bar

Ingredients:
- 1/2 tub of cookie dough
- 1/2 cup chocolate chips
- 1/2 cup marshmallows
- 1/4 cup desiccated coconut
- 1 cup Teddy Grahams, crushed

Method
1. Prepare an 8x8 inch square baking pan. Lining it with tin-foil (for easy lifting), greasing it and flouring it.
2. Press the cookie dough into the pan, even it out and make sure that is covers the bottom of the entire pan.
3. Mix together the chocolate chips, marshmallows, coconut, teddy grahams and set aside.
4. Place the pan in a 350F oven (toaster oven) for 10 minutes.
5. Remove the cookie dough from the oven and sprinkle on your chocolate chip mixture, covering the cookie dough evenly.
6. Place tin foil over-top of the pan to prevent the marshmallows from browning, and return the pan to the oven for another 5 minutes.
7. After 5 minutes check the cookie dough for done-ness by pocking the center with a skewer/toothpick. If not fully cooked, continue to cook covered for 5 more minutes.
8. Once the cookie dough is done, remove the tin foil and continue baking until the marshmallows begin to turn golden (but do not burn).
9. Once marshmallows are golden, remove pan from the oven and allow cookie-bar to cool in the pan for 3 minutes.
10. Remove cookie-bar from pan and place on cooling rack. Cool completely before slicing. Slice into 16 bars.

As the title of this post implies, I did end up making this creation with my trusty toaster oven. But... I am very excited to say that my new oven will be arriving sometime tonight! The delivery guys are bringing in the new oven sometime between 5-9pm tonight and I am beyond thrilled. I really hope that they come at 5pm, because I have a lecture tonight from 6-9pm and I don't want to miss watching them install it! Oh, but it doesn't really matter, as long as it all hooks up alright and the oven doesn't explode I'll be happy. And it's just in time for February's Daring Baker's Challenge. I am one happy baker :)

Thursday, January 01, 2009

Using What I've Got... Espresso Brownies with Cream-cheese Swirls


Just because my equipment is non-functional doesn't mean that I have to follow suit. I am in awe of my amazing little toaster oven... it's really picking up the slack for it's big-sister and is helping me get through my baking-addiction.

It's the start of a new year and I couldn't feel any less energized to ring it in. I decided to surprise the family this New Year's morning (which, by the time everyone woke up was actually 11am) by baking them a fresh batch of Espresso Brownies! But being that coffee tastes so much better when cream is added I decided to add in an amazing cream-cheese swirl topping.

Espresso Brownies with Cream-cheese Swirls

Ingredients for Brownies:
1⁄2 cup butter (1 stick)
6 oz. unsweetened chocolate (6 squares)
1 1⁄2 cups granulated sugar
2 1⁄2 tbsp. instant espresso coffee powder
1 tbsp finely ground coffee grinds (optional, but adds a nice texture)
1 tsp. vanilla
3 large eggs, lightly beaten
1⁄4 tsp. salt
1 cup all-purpose flour

Ingredients for Cream-cheese Swirls:
3 ounces cream cheese, room temperature
2 tbsps unsalted butter, room temperature
1/4 cup granulated sugar
1 large egg
1 tbsp all purpose flour


Method:
1. Preheat oven to 350°F. Grease 8x8-inch square baking pan.
2. In medium saucepan, over low heat, melt butter and chocolate, stir until smooth. Remove from heat, stir in sugar, espresso powder, vanilla and coffee grinds if using.
3. Add eggs and salt, blend well.
4. Gradually stir in flour, mix until smooth. Spread batter evenly into pan.
5. Make cream-cheese mixture by creaming together the cream-cheese, butter and sugar. Add in beaten egg and mix in flour until well incorporated.
6. Make swirls: drop dollops of cream-cheese mixture by the tablespoon onto the brownie batter in a random design of "dots". Use the tip of a sharp knife to run through the various cream-cheese dots and swirl the batters together.
7. Bake for 25 to 30 minutes. Cool thoroughly in pan on wire rack, cut into squares.

These brownies were amazing! Much better than the boxed kind (although I do love Betty Crockers brownies :O) The cream-cheese swirls were not overpowering in flavor, but did add that wonderful subtle creaminess to contrast the rich dark-chocolate flavor of the brownie batter. The addition of finely ground coffee beans was also very intriguing; they added a slightly gritty texture to the bars that lingered on after you swallowed the rich brownie. I've always been a fan of the chocolate covered coffee beans... I just love the grit, I don't know why?! I will definitely be making these brownies again, I might even have to make a double batch because my sisters loved them so much.


Thursday, December 11, 2008

I'm finally free!!!

Finally, my week of crazy studying (more like awful procrastination) is over!! My finals are all complete and all I have to dread now is the marks I'll be getting back. Oh well, at least I can look forward to Christmas :)

During my attempts to study for Psych Nursing, Nutrition and Statistics I kind of got side-tracked more than once...

The first time I became distracted was one crazy Wednesday afternoon. I was enjoying a healthy lunch and watching Martha Stewart Living, when she decided to tempt me and my very weak will power by making these lovely Coconuty Dream Bars. They were very simple, only taking about 10mins to make and (when using my toaster oven) only 7mins to bake!! Although the prep and baking was quick, I ended up spending a lovely long time snacking on them and sipping tea... when I should have been studying. Oh Martha...


The second time I became distracted from my studies was entirely my fault. I shouldn't have been blog-browsing... but you know, checking my hotmail lead to checking my facebook, which lead to checking my blog, which lead to checking all of the blogs on my "links" list... and from there the cycle just spirals out of control. Anywho, I was reading Baking Bites and came across this amazing Cherry Cornmeal Cobbler recipe. And so I decided to make it; but, I varied it by using my Europe's Best Grapes instead of cherries, and baking them in individual ramekins.


Ooey Gooey and Delicious!

And the final time I was distracted from my studies was completely, and utterly the fault of my crazy imagination. I was sitting down trying to read over my Nutrition textbook, when something I read about fruits and fiber triggered my mind to begin thinking about fruit jams... and then for some reason I began thinking about baking fruit/jam oat-bars. So to end off my blog post, I present you with my own recipe of Blueberry+Mixed Berry Crumble Bars with White Chocolate...

Not entirely nutritious, but very gooey, sweet and delicious!


Blueberry, Mixed Berry Crumble Bars with White Chocolate

Ingredients:

-1 1/2 cups plain flour

-1 1/2 cups rolled oats

- 3/4 cup brown sugar, packed

-1/2 tsp baking soda

- 1/2 tsp salt

- 3/4 cup butter, chilled and cubed

- 1 tsp vanilla extract

- 1 egg

- 1/4 cup each: blueberry jam and mixed berry jam (mix them together)

- 1/4 cup of white chocolate chips or white chocolate candy melts


Method:

1. Sift together the flour, baking powder, salt and sugar.

2. Use a pastry cutter to mix in the butter; continue blending together until butter pieces are the size of peas and mixture resembles coarse crumbs. Add in the oatmeal and mix until well combined.

3. Lightly beat the egg and vanilla together. Add the egg mixture into the dry ingredients and quickly stir until all of the mixture gains some moisture.

4. Remove 1/2 cup of the mixture and set aside. Pour the rest of the bar dough into a greased and floured 9x9 square cake pan. Pat down the mixture until well compressed. Refrigerate for 15-20minutes; during this time, preheat the oven to 350F.

5. Once chilled, spread the "crust" evenly with the jam mixture. Now sprinkle the white chocolate chips evenly over the jam layer.

6. Take your 1/2 cup of reserved "crust" crumble and sprinkle this on top of your bars. Bake for 25minutes, let cool and then slice into squares.


Wow! I'm sorry for not having had time to post my recent baking adventures until now. Somehow baking the dishes is much quicker than having to sit down and try to recall exactly how you made them (plus, my computer is crazy slow for some reason... maybe all of my baking pictures are taking up to much disk-space??) Well, it's time for me to celebrate my freedom from exams and of course... CHRISTMAS ^_^

Friday, June 20, 2008

Ooo lala, Tiger Brownies!

What's great about the end of the school year is that the teachers always ask their students to bring some goodies to the end-of-year class party. What this usually means is that the parents (or the sister, being me :P) gets to dirty their hands in the kitchen and whip up some incredible treats for the youngsters to ooooo and aaaahhh at. My sister was asked to bring brownies to her class party, but I was bored/sick-and-tired of making plain ol' chocolate brownies and decided to try my hand and making some tiger brownies. These brownies were inspired by my love for brownies and blondies and my want to have them combined in a harmonious marriage of sweeeeeeett matrimony. Oh, too often have blondies been smothered and forgotten amongst the shadows of their more loved sister the brownie... but it's not the brownies fault. I tried to explain the "Tiger Brownie" recipe to my sister and she was thoroughly confused when I mentioned "blondie", she wasn't quite sure what that was.

Tiger Brownies with Shortbread Crust

Shortbread Ingredients:
- 1 cup all-purpose flour
- 1/4 cup sugar
- 2 Tbsp powdered sugar
- 1/4 tsp salt
- 1/2 cup unsalted butter, chilled
- 1 large egg yolk

1. Combine flour, sugars and salt.
2. Cut in butter using pastry cutter, until mixture resembles course crumbs (pea sized chunks).
3. Add in the slightly beaten egg yolk.
4. Press 3/4 of the mixture into an 8x8 square baking pan (lined with foil for easy removal) and bake at 350F for 8mins.
5. Remove crust and let cool, while you make the brownie topping.

Brownie Recipe: I used
this recipe for the brownie topping. Follow the directions exactly, except omit the chocolate chunks & nuts (I'll explain why later) and it'll make enough for one 8x8 pan (but since we're using 1/2 this recipe and 1/2 a blondie recipe, you'll have extra... I used the extra to make a Yin-Yang 6-inch round Tiger Brownie pie!)

Blondie Ingredients:

- 1/4 + 1/8 cup melted butter
- 1/2 cup brown sugar
- 1/4 cup granulated sugar
- 1 large egg
- 1/2 tsp vanilla extract
- 1 cup flour
- 1/4 tsp salt
- 3/4 cup chocolate chips (do not add directly to mix... I'll explain later)

1. Combine butter and sugars, mixing until well incorporated.
2. Add in egg and vanilla
3. Mix in the flour and salt. (Note: mixture should be the consistency of softened butter cream. If too stiff, add in 1 tbsp light corn syrup and 2 tbsp milk)

Assembly:
1. Take finished shortbread crust and prepare to assemble the tiger brownies.
2. Place 1/2 the brownie mixture in a piping bag, without any fancy tips.
3. Place 1/2 the blondie mixture into a separate piping bag.
(Note: The chocolate chunks/chips/nuts were not added because they would clog up the piping bag tip, if youre chocolate/nuts would fit through the tip you may add them directly to the mixes)
4. Take the brownie bag and pipe a line of the batter directly on top of the shortbread crust. Now take the blondie mixture and do the same. The batters should touch and you should not see any of the shortbread crust.
5. Continue piping until the pan is full (all the batter will not be used up).
6. Use the excess batter for whatever you like!
7. Bake the Tiger Brownies at 350F for 30-35mins, or until fully cooked.
8. Remove from oven, cool completely and cut into bars. Makes 16 bars and approx 8 extra chunks if you bake the excess batter.


Here's my little 6-inch Tiger Brownie Pie... looks like Yin-Yang. This made those extra 8 chunks.

The Tiger Brownie Pie wedges were very cute, I just had to take a photo

My sister was quite impressed with the end result, as was I. After making this recipe, I had a whole lot of mess to clean up around the kitchen. Melted chocolate, sticky fingers from piping bag catastrophes :P (somehow I just can't pipe without the batter getting all over my hands... and in my mouth). The brownies baked perfectly, and the blondie portion was to-die-for. I will definitely make this recipe again. Yum... I can't wait until my other sister's class party.


Saturday, May 17, 2008

Girlie Night

Okay, so staying out of the kitchen is next to impossible for me :P Last night, my sisters and I spent the night-in and celebrated our girliness. We didn't really feel like making anything too demanding, so we used a Betty Crocker Brownie Mix *gasp* I know!

Actually, the mix turned out really fudgy and delicious. The ganache-frosting was so simple and perfect. One day, I will find the perfect "from-scratch" recipe for brownies that turn out as perfect as these Betty Crocker ones, but until then I might as well just enjoy these :)

Saturday, April 05, 2008

Oatmeal, Raisin, Choco-chip Cookie Bars


Well, today was the final day of clinical for my maternity rotation. I'm so excited to be almost finished my 2nd year of nursing... I just can't contain myself. As a clinical group, we decided to gather together a basket of goodies for the maternity nursing staff at the hospital and so I decided to contribute to the basket by baking up some goodies (who would've guessed?). Anywho, here's my beautiful Oatmeal, Raisin, Chocolate-chip Cookie Bars ... boy, that's a mouthful... oh, and the name of the bars is quite something too :P

I got the idea from a recipe at the land o'lakes website but I adapted it to eliminate the nuts. I'm not too sure if the hospital had a policy on preventing food allergies related to nuts... so I simply decided to substitute them for raisins! Everybody loves raisins

Decorating the bars was so much fun. My sisters were quite impatient to let the chocolate set, so I was pressured in to cutting them a little prematurely. Oh well, they still turned out beautifully and really it's the taste that counts! (They were divine)

Thursday, March 20, 2008

Ready for the Road


Yeah! My family's heading down to Seattle to do some rest and relaxation over the Easter break. Oh... that and a little bit of shopping, can't forget the shopping. Anywho, after hearing about the long waits at the border on the news and all, we're preparing to spend a lengthy time stalled in front of the US border. So what to do? Roadtrip games can only go so far... especially when you're not moving, so I decided that I'd whip up some sweet treats that would travel well and last at least until we reach the States. Hmmm... this left me pondering, what I would make. I would have wanted something hearty, and full of fiber, but my sisters aren't that in to eating rolled-oat, bran, raisin and flax bars :( So, I was left with the alternative... sweet, marshmallowy, sugar-filled, cereal squares.

Any-kind-of-Cereal Squares

Yields 24 (moderately sized bars)
Ingredients
- 1/4 cup butter
- 250g marshmallows (40 large)
- 6 cups of whatever kind of cereal you like
- A handful of mix-ins of your choice

Method

1. Melt butter in saucepan
2. Add in marshmallows and stir until dissolved and gooey
3. Throw in the mixed up cereal and add in the mix-ins
4. Press into a greased pan and let cool for 1 hr
5. Cut into squares, take with you on the road and eat!

My sisters wanted to get in on the "baking" action and we all chipped in. It was so much fun. We took turns stirring and mixing and pressing and nibbling. The cereal we had on hand was: Special K, Corn Pops and Captain Crunch. Other options could be: Cheerios, Froot Loops, Oatmeal Crisp, Frosted Flakes, Honeycomb, Lucky Charms, Cocoa Puffs, French-toast Crunch (if they still make that). The mix-in we used was butterscotch chips, but you could also use: raisins, cranberries, coconut flakes, m&ms or other small treats. My sisters were fighting to lick the spoon, but I was content with picking at the marshmallow laden pan. Yeah! Now we'll be hoping for the long border-wait to take it's sweet, sweet time.

Monday, December 24, 2007

Caramel Shortbread Squares


I have been busy in the kitchen this holiday season... just in case you were wondering where I was :P I just have been too swamped with work to post anything online. But now I've finally gotten the time, so here goes.

I decided to try out a new recipe this Christmas but wasn't sure if I wanted to make cookies, chocolate or candy. Then I was searching through allrecipes.com and stumbled across this recipe for Caramel-Shortbread Squares. Pictured above, are the cute little squares I created using my 8x8 square baking pan, but since the recipe called for a 9x9 pan I ended up with some leftover ingredients. What did this mean? Well, it was time to tweak a recipe and make it my own.

My mom is always commenting on how I have so many baking utensils, pans and accessories that I don't use... actually, it's more like she complains about it :P So I decided to use some of thos individual tart molds (the ones I used for my mini pumpkin pies) to make mini caramel shortbread tartelettes. I divided the extra ingredients between 5 tart pans and layered them the same way I layered the squares. But for a little added flare, I swirled in some white chocolate... how elegant. Sorry about the picture, you can't really see the swirls very well... but you get the picture.

The white chocolate added such a nice touch that I decided to try making one tart with a white chocolate layer. It actually turned out beautifully as the layers were more contrasted than when I had used mere milk chocolate.
It's a guarantee that if you make these tarts/squares for a party you will get many oooo's and aaaaahhs. My friends loved the layering affect and would have gobbled them all up, had they not been uber-rich and crazy-sweet.

Wednesday, December 05, 2007

Finishing up those cranberries...

Wahoo! I'm coming back to cooking. Man, it seems like it's been way too long. I've finished off my last week of lecture and am ready to roll... roll out the dough that is :P I know, I know... very corny. All I have to complete are three exams and one Fine Arts Presentation, and once that's over I'm heading to my safe-house, my kitchen. In order to get myself back into the mood of cooking I decided to go back to my roots, baking. I flipped through my copy of Williams-Sonoma Baking and my attention was caught by a beautifully arrainged bunch of white-chocolate, cherry bars. I decided that this would be the perfect recipe for me to finish up the cranberries I had left-over from making biscotti. And it was...

Cranberry-Butterscotch Squares

Ingredients:
- 2 1/4 cups all purpose flour
- 1/2 cup salted butter
- 1 tsp baking soda
- 1/2 tsp salt
- 1 tsp baking powder
- 2 eggs
- 1/2 cup granulated sugar
- 2/3 cup brown sugar, packed
- 1 1/2 tsp vanilla
- 1/3 cup dried cranberries
- 1/3 cup butterscotch chips

Method:
1. Sift together flour, baking soda, baking powder and salt.
2. In a separate bowl, combine butter and both sugars; mixing until fluffy. Add in egg and vanilla, mixing well.
3. Add dry ingredients to wet and stir until it just comes together.
4. Pour batter into greased 9x13 inch pan.
5. Bake at 350 degrees, for 35-40 minutes.
6. Cool completely and then cut into 16 bars.

So I exchanged the cherries for cranberries, so I used butterscotch instead of white-chocolate... no big difference. My sisters loved them. Even the the youngest one, who hates fruits ate an entire square (and a half). My mom was glad that I had made something that wasn't overly sweet; and my dad was enjoying the treat while taunting out dog (don't worry, we gave him a doggy treat and he was pleased). Safe to say that I will be using this recipe again.

Friday, June 22, 2007

Brownies! Yay

My sister had a class party a few days ago and had volunteered to bring brownies. Or should I say, that she volunteered me to make her brownies :P My sister brought home a note that stated she would supply 30 brownies and my mom looked at it in shock. And here's how the conversation went.

Mom: *Gasp* "What! I'm suppose to make you brownies?"
Me: I would be more than happy to bake brownies for you, sis.
Mom: *Looks relieved"
Sister: That's what I thought. I knew Joanna would make me brownies!


Apparently, I'm a bake-aholic... and even my sister knows! I mustn't let this get around, so let's just keep it between me and the internet, o.k.?

The brownie recipe I used was from the nestle website verybestbaking.com. Everytime I bake brownies I use this recipe. I love it because these brownies turn out half-way between fudgy and cakey... and they are delicious. This is a really easy recipe, as it uses cocoa powder and not melted chocolate. So if you're a beginner baker and don't trust yourself with melting chocolate, this brownie recipe is for you! I always have to mix in something with my brownies, and since my sister's allergic to nuts I always reach for either white chocolate or butterscotch chips. I love these chips, because when they bake instead of getting all goey they sort of crystallize and become nut-like... yeah, I'm a huge nut fan :)


I cut out the brownies using handy-dandy cookie cutters and packed them up to be taken to my sister's class. The best thing about using cookie cutters is that you get to eat the left over scraps :P My family couldn't wait to dig into the brownie scraps/crumbs and we had a brownie-good time!

Monday, August 07, 2006

Lovely Pumpkin Bars

... As I was saying, I had to find a way to finish up the last 8 oz. of pumpkin puré and what better way than by making some lovely spiced pumpkin bars (with a special frosting to go with them. YUMMY!)

This recipe was adapted from the Pillsbury Ultimate Baking Cookbook (I really love that book... maybe I should just go out and buy instead of continually borrowing it from the library. It practically lives in my house anyways). I modified some ingredients and also halved the recipe because I only had 1 cup of pumpkin puré left over (again I am lacking ingredients... how sad). But the recipe turned out well and when halving it, you should use a 12x9x1- inch pan.

Light and Spicy Pumpkin Bars: 1/2 Recipe (Yields 24 bars- Original recipe yields 48)

Ingredients:
1/2 cup all purpose flour
1/2 cup whole wheat flour
3/4 cup packed brown sugar
1 tsp baking powder
1/2 tsp baking soda
1/2 tsp cinnamon (or more to taste)
1/4 tsp nutmeg
1/8 tsp salt
1/4 cup applesauce (original recipe calls for oil)
1/4 cup apple juice
1 cup pure pumpkin
1 egg

Frosting:
3/4 cup powdered sugar
1 tbsp pumpkin butter (original recip calls for butter/margarine)
1/4 tsp vanilla extract
1 to 1.5 tbsp sour cream (original recipe calls for plain yogurt)

Method:
1. Heat oven to 350ºF. Grease and flour 12x9x1- inch rectangular baking
pan. (Originally 15x10x1- inch)

2. In large bowl, beat all bar ingredients at low speed until moistened. Then continue to beat at medium speed for 2 minutes. Spread in greased and floured pan.

3. Bake at 350ºF for 20 to 30 minutes or until toothpick inserted in center comes out clean. Cool completely.

4. In medium bowl, combine the vanilla, pumpkin butter and sour cream, adding enough powdered sugar to reach the desired spreading
consistency; beat until smooth.

5. Frost cooled bars; sprinkle with nutmeg, if desired. Refrigerate to set frosting. Cut into bars.

Nutrition Per Serving:
Calories 90; Protein 1g; Carbohydrate 15g; Fat 3g; Sodium 60mg.

The bars I made may look a little more moist than a cake but that's only because while I was making the bars I halved all the ingredients except for the apple juice. So they turned out very moist and didn't rise as much as I would have liked. The taste was still great but the texture left much to be desired... it kind of resulted in a kueh-like texture once again. But remember my sister who hates all things kueh? Surprisingly the taste of these bars was so impressive that her distaste for kueh was over-riden... that sure says something.

Tuesday, July 18, 2006

Delicious Lemon Bars

I decided to whip out my 8x8 square baking pan once more and make something that would really make it feel like summer. I opened my fridge to find that my mom had bought about a pound of lemons. What to do? I love bars: nanaimo, peanut butter, chocolate, granola but one of my all-time favourites has got to the classic lemon bar. The lemony-citrusy taste practically screams summer is in town. I had a really simple recipe hanging around my kitchen and remembered how much everyone loved them the last time I baked them. (They're also reasonably healthy, with a few alterations)

Lemon Bars

Ingredients for Crust
1/4 cup margarine or butter, softened
1/4 cup sugar (I use unpacked confectioners)
1 cup flour
A pinch of salt

Method for Crust
1. Preheat oven to 350F

2. In a medium bowl, beat margarine and sugar until creamy. Add flour and salt and stir until well combined and crumbly.

3. Press into the bottom of an 8x8 square pan that has been sprayed with nonstick spray. Bake for 12-15 minutes, until the edges are pale golden.

Ingredients for Lemon Topping
1 cup sugar
2 tbsp. flour
1/4 tsp. baking powder
A pinch of salt
1 large egg (I used 1/4 cup egg substitute)
1 large egg white
The grated zest of 1 lemon
The juice of 1 lemon (approximately 3 tbsp.)
Icing sugar for sprinkling

Method (continued...)
4. In a medium bowl, combine sugar, flour, baking powder and salt. Add egg, egg white, lemon zest and juice and stir until well blended and smooth. Pour over the base. Return to the oven for 25-30 minutes, until slightly
golden on top and bubbly around the edges.

5. Cool completely in the pan on a wire rack. Sprinkle with icing sugar before cutting into bars.

6. Makes 12-16 bars (depending on how you cut it)

At 12 bars and not using my alterations the nutritional information is as follow:

Per bar: 165 calories, 4.3 g fat (.7 g saturated, 2.7 g monounsaturated, .5 g polyunsaturated), 30.3 g carbohydrates, 18 mg cholesterol, 91.2 mg sodium, 0.4 g fiber, 23% calories from fat.