Showing posts with label Kueh. Show all posts

Sunday, January 23, 2011

Green Bean Coconut Kueh

It's been a while since I steamed up some Malay goodies, so I thought this weekend I'd play around and experiment with what ingredients I had in my pantry to make a unique version of my favorite Malay sweet...

Green Bean Coconut Kueh

Ingredients:
Coconut Sticky Rice Layer
- 3/4 cup glutinous rice, soaked in water overnight
- 1/2 cup coconut milk + 1/2 cup water
- 1/3 cup sugar
- pinch of salt

Green Bean Coconut Layer
- 3/4 cup glutinous rice flour
- 1/2 cup sugar
- 1/2 cup coconut milk + 1/2 cup water
- 1/2 cup dried green beans, soaked overnight in water, then boiled until tender
- 1/3 cup dried shredded coconut

Method:
1. Combine the soaked rice, coconut milk mixture, sugar and salt in a bowl. Mix well, then pour into your steaming tray (I used a 6inch round tin). Steam over high heat for 45minutes, until rice is cooked.
2. In another bowl, combine the rice flour, sugar, coconut milk mixture, beans and shredded coconut.
3. Pour the flour mixture into the steaming tray, covering the cooked rice in an even layer. Continue steaming the kueh for another 45minutre, until flour layer is firm and cooked through.
4. Remove tray from steamer, allow to cool. Cut into wedges and serve, at room temperature or cold.

I must say, this was a pretty tasty treat! I guess I've made enough kuehs that I know the basics enough to throw together something decent. I hope one day I'll be able to make a cake/brownie/cookie recipe by heart... but baking takes a little bit more calculative work than steaming. Well... after some early morning kitchen antics, I'm off to watch the Arsenal v. Wigan game that I taped from yesterday (and maybe do some tumblr blogging). See ya!

Tuesday, September 02, 2008

Malaysia Day: Dinner and Dessert

With Malay Day just around the corner (September 16), I've suddenly just felt the urge to brew a South-East Asian storm in the kitchen. My friends wanted to have a get together, before summer drew to a close and figured that it would be really cool to have a theme to the food. I don't know if I'm biased, but I immediately threw out the option for South-East Asian cuisine. Everyone else seemed cool with the idea, although some of them were unsure of what to make. I said that it was okay if they just cooked whatever they felt like and I would bring most of the South-East Asian goodies... and hey, it worked out :)


For the main course, I didn't want to scare my friends away with very exotic dishes (i.e. Assam Laksa, Nasi Lemak, Sambal Sotong) and thought that roti and spring rolls would be too simple and just not exciting enough. So, I stuck with a very Malaysian dish that I think anyone would love to eat... Chicken Satay! I followed a recipe from malaysianfood.net and it turned out very tasty. The aroma throughout my kitchen as I grilled these spicy skewers was heavenly.


I served the Satay on a large platter, covered in banana leaves and accompanied the chicken with cubed cucumbers, red onions, spicy peanut satay sauce and compressed rice cubes (I tried to make Ketupat, but it didn't work out... just left me with a jumbled mess of coconut leaves).


When I unveiled my contribution to the dinner, everyone was very impressed. Some people even commented by saying "I didn't know you could cook!" <--- WHAT! who are these people and why do I even hang out with them?! I'm just kidding, the thing is that they only know me for my baking skills... but when I revealed the satay on the decorative platter, I must have finally shown them my savoury-culinary side.


So, after everyone had filled them tummies with the goodness of grilled chicken, spicy peanut sauce and rice, it was on to what I'm really known for... my yummy sweet treats :)


Again, I didn't want to spook them with some really exotic flavors and textures, but I did want them to experience REAL South-East Asian desserts. And what could be more South-East Asian than KUEH!!??! I followed this recipe from Kuali.com and made a Red Bean Kuih Talam for dessert. I was a bit unsure if my Caucasian friends would take to this very ethnic sweet, but to my surprise they gobbled down the cute trapezoids and hardly left any for me!


I should have given my friends more credit and trusted them to be adventurous in the food-tasting realm. But alas, I'm such a skeptic, which is why I whipped up another Nyonya dessert for them (in case no one wanted to eat the Kuih Talam). I used this recipe to make ang ku kueh (which actually shouldn't be called that seeing as their not "ang"/red)... and it also gave me a chance to whip out my mooncake/kueh molds :)


Actually, it was a good thing that I made both the Kuih Talam and the Ang Ku Kuih because both of them disappeared fairly rapidly. I'm so glad that my friends liked the food I made them... the fact that they ate every morsel of the meal meant more to me than any thank-you ever could! I really hope to do this again, it was so much fun. (But maybe we'll try a different theme next time)


Monday, June 09, 2008

Kueh Talam


I was feeling a little hungry for some Malaysian goodies again, but wasn't quite sure what to make. Remembering that I had a bag of green bean flour just lying around, un-opened, I decided to put it to good use. Now... what Kueh could I possibly make that required green bean flour? I know... Kueh Talam :) and I have all of the ingredients at my disposal.

Kueh Talam
Ingredients (A)
- 70g (~3/4cups) rice flour
- 30g (~1/4cups) green bean flour
- 270ml water

Ingredients (B)
- 1 1/2 cups sugar
- 1 cup water
- 1 tbsp pandan paste

Ingredients (C)
- 225ml thick santan
- 1 1/2 tbsp green bean flour
- 1/2 tsp salt
- 75ml water
- 1/4 cup rice flour

Method:
1. Mix ingredients (A) and set aside to soak for 10 to 15 minutes.

2. Combine ingredients (B) in a small pot, until pandan paste is thoroughly distributed. Add in mixture (A) to the sugar and pandan. Cook over low heat and stir continuously until the batter thickens and becomes slightly translucent.

3. Pour the mixture into a greased 20cm cake tin. Smooth out the batter with a plastic spatula, and steam for 20-30mins.

4. For coconut layer, mix ingredients (C) together and soak for 10 minutes. When pandan batter is finished steaming, pour the coconut layer over the cooked green layer. Steam for another 10 minutes.

5. Cool the kuih well and slice into small diamond-shaped pieces.

The top layer of the kueh didn't need any sugar to be added, because the bottom layer was sweet enough for the entire dessert. My sister really loved the pandan layer, and told me that she could eat an entire bowl of it... maybe I'll make that for her b-day and she'll be more than pleased :P My mom commented that the pandan layer could have been a bit more gelatinous, as it was more gummy and mushy than what she was expecting. Perhaps next time, I will add more rice flour to the pandan mixture ... but overall, this kueh was very tasty.


Monday, April 28, 2008

Soon Kueh


Yeah! Time for more kueh. So here's the deal, I had a bunch of spring onions left over from making jambalaya the other day (because I kind of forgot to garnish the jambalaya :P oops!) But that's okay, because that gave me plenty of onions to make Soon Kueh! I was craving some savory kueh for lunch today and it worked out perfectly, so I was glad. Anyways... here's the recipe

Soon Kueh (yield 8 pcs)

Dough Ingredients:
- 3/4 cup rice flour
- 1/4 cup tapioca flour
- 1/4 cup wheat starch
- 1 tsp salt
- 150mL water
- 2 tsp oil
- Filling (recipe follows)

Dough Method:

1. Mix together all the flour and salt.
2. Remove 1/4 cup of the mixture and set aside.
3. Place remaining flour in a small saucepan and add the liquid, stirring continuously to prevent clumping. Cook over medium heat until the dough begins to firm up (approx 2mins).
4. Remove dough from heat and dump the dough onto a generously floured (tapioca) surface.
5. Add the 2 tsp oil to the dough and add the reserved flour mixture from step 2.
6. Knead dough for 5mins, until it is no longer sticky and forms a nice ball. Add more flour if necessary.
7. Divide the dough into eight equal portions. Shape the dough portions into circles and roll out into an oval shape. Add 1 1/2 tbsp filling to the center of dough piece, fold over and seal shut.
8. Steam for 10mins, or until the dough is cooked and "transparent". Serve hot with chilli and soy sauce.

Filling Ingredients:

- 2 tbsp oil
- 1 tbsp garlic, minced
- 1 cup frozen cooked shrimp, defrosted (if large, chop them into small pieces)
- 7 stalks of spring onions
- 1/8 cup cilantro, chopped
- 1/4 cup beef, uncooked and minced, marinated in soy sauce for at least 30mins
- salt + pepper, to taste
- 2 tbsp chopped chilies (optional)
- 4 tbsp hoisin sauce

Filling Method:

1. Heat oil in frying pan over medium-high heat, add in the garlic and cook until fragrant.
2. Add in the spring onions, continue frying for 1 min. Add in the beef and continue to fry until beef is no longer pink. Add in the shrimp and cilantro, continue frying for 3mins.
3. Remove filling from heat, add salt + pepper, chilies, hoisin sauce and mix well. Use to fill your soon kueh.

These were surprisingly good. Hehehe... yeah, I didn't know whether the kueh would turn out nice and soft or hard and chewy, but the end result was somewhere in between the two. The meal was nice and small and just what I was looking for, and now I'm off to my philosophy summer course... wish me luck!

Thursday, April 24, 2008

More Tasty Nonya Treats

Today I decided that I needed to step out of my house and away from the computer (no offense, my beautiful box of wires and plastic). So, I went out for a little shopping escapade... where to? T&T? Alas, I did not go to my favorite supermarket (I had already been their a couple days ago and hadn't found anything that caught my eye). So where then? ... Henlong!! Yeah! My favorite "mini-market" :) And boy was I excited to spend my cash there...

I had seen these Teochew Kueh (also known as Peng Kueh) many times online, but had yet to actually taste this savoury Nonya delight. This kueh came packed in pairs of 2 and was in the frozen food section, along with some of the other sweet rice cakes. When I got home, I couldn't wait to try this kueh so I prepped all the things I needed for steaming it. I cleaned and greased a piece of banana leaf and steamed the kueh for about 15mins. I served it with a mixture of hoisin sauce and sambal oeleck (the best sauce in the world :P). The outside wasn't very flavorful, but the gooey glutinous rice filling was quite tasty. There was some ha mei, some chinese mushrooms and peanuts... the combination was delicious.


I found a few recipes online at wokkingmum and roseskitchen and myzest and simcooks and cuisine-asia. With so many recipes to try out, maybe I'll try making it next time. There's gonna be a lot of kueh going round my house!

Tuesday, February 12, 2008

CNY: Nian Gao

Woot! Finally, I gotten the courage to make Nian Gao. Actually it wasn't so much the courage as the pressure to find the "right" recipe. There are so many recipes available on the web that I had no clue which one to use. I finally settled on Florence's recipe and it turned out great. I didn't have such a nice mold to make the rice cake in, so I simply lined an 8-inch cake pan with banana leaves and steamed.


Here's the cake before steaming...

Here's the cake after steaming... (note the silly little holes that decided to appear. Probably due to condensation on the steamer lid dripping down)

Well, I'm still contemplating how to serve this... should I simply cut it into pieces and plate it? Or should I sandwich it between 2pcs of yam, dip it in egg and then fry it? I think the latter sounds best...

Sunday, January 06, 2008

Chwee Kueh


Hmm... I've been thinking that it's about time I got back to my nonya roots. So today I decided to make somemore kueh. So far, I can't decide if I like the sweet or savory kueh better... but it's a close call. Thought I would attempt a new recipe (I'm adventurous that way) and here's what I came up with.

Chwee Kueh

Ingredients:
- 1 3/4 cup rice flour
- 1/4 cup tapioca flour
- 1/2 tsp chicken broth granules (or salt)
- scant 3 cups water
- 2 tbsp oil

Filling

- 1 cup chai poh (pickled radish)
- 50g dried scrimps, chopped
- 5 tbsp oil
- 3 cloves garlic, minced
- 3 tbsp sugar
- 2 chinese mushrooms, soaked and chopped (optional)
- spoonful of belacan (optional)

Method:

1. Mix together the 2 flours and chicken broth granules.
2. Slowly mix in the half of the water and ensure that no lumps form. Boil the remaining water and slowly add it to the flour mixture, until it thickens. Stir in the oil, until well incorporated.
3. Grease chwee kueh molds and place in steamer, on high, for 5 minutes. Pour in the rice flour mixture and steam for 15 minutes.
4. Meanwhile, heat oil in frying pan and fry garlic until fragrant. Add in the shrimp, chai poh and mushroom (if using).
5. Continue to fry until the mixture becomes dry. Then finally add the belacan (if using) and the sugar.
6. For assembly: unmold the rice cakes onto a plate and top with the filling mixture. Serve hot.

Saturday, October 27, 2007

Pulut Inti


Okay, so here's the recipe for my Pulut Inti. It's pretty basic and doesn't use any palm sugar, instead I substituted brown sugar. I know it doesn't taste the same, but I find palm sugar a tad too sweet.

Pulut Inti

Ingredients For Rice:
- 3 cups of glutinous rice, soaked overnight and drained
- 300mL of coconut milk
- 2 tbsp sugar
- 2 tsp salt (or more, to taste)

Ingredients For Filling:
- 3/4 cup packed brown sugar
- 1/2 cup desiccated coconut
- 1 tbsp of water (add more if necessary)

Assembly:
-Banana leaves, washed, dried and cut into 3.5 x 3.5 inch squares

Method:
1. Steam the glutinous rice for 10 minutes, or until cooked.

2. Add in coconut milk, sugar and salt. Mix until well combined, steam for another 15 minutes. When done, set aside for assembly.

3. Mix filling ingredients together, adding enough water to make the filling "come together" but not turn into a liquified paste.

4. Take a handful of cooled glutinous rice and mold it into a "cube-like" shape. It doesn't have to be perfect.

5. Place a dollop of the filling mixture on top of the "rice cube". Then place your Pulut Inti in the center of a banana leaf.

6. Fold two sides of the banana leaf up, not completely covering the "peak" of the Pulut Inti. Then fold the remaining two sides underneath, to form a pyramid shape.

Tuesday, June 26, 2007

Onde Onde

After making all those savoury goodies for dinner and lunch I decided to get back to my real passion... sweets! Of course, everyone loves sweets so I guess it's not so much a passion as it is just a deep, deep love :P I also love making malay sweets which use rice flour and coconut, so since my dad had bought a sweet potato that has been sitting in our pantry for the last 3 weeks I decided to make ONDE ONDE!!! Hooray (I cheer for myself way too much, eh?). Anywho, I used the recipe posted by the baker who cooks. The only difference is that I made a smaller batch (because I didn't have enough sweet potato), and used brown sugar instead of Gula Melaka; the end result tastes very similar. Yes, I am too lazy to post the exact recipe I used but I will show pictures of my onde-onde making!

Here's the rice flour dough... what a nice orange-y color

Filling the dough with brown sugar and desiccated coconut

These onde-onde just need to be boiled and rolled in desiccated coconut; then they'll be ready for eating *drool*


Wednesday, June 20, 2007

Kueh Seri Muka

It has been a long time since I've tried my hand at the art of "kueh making" I decided to have at it once more. This time I wanted to try Kueh Salat... being that this was one of my mom's favorite treats when she lived in Singapore. Sadly it's very hard to buy it here in BC... but lucky for her, I am here to steam up this lovely kueh for her :)

Okay, so the truth is that I'm very cheap and didn't actually have enough eggs to make the Salat's kaya layer... so I turned to another kueh very close to Salat that used fewer eggs. Here is the recipe for my Kueh Seri Muka


Kueh Seri Muka

Ingredients:

Rice Layer
- 2 1/2 cups uncooked glutinous rice
- 200ml thick coconut milk with 100ml water added
- 2 tbsp pandan juice (if you don't have it, use the essence)
- pinch of salt


"Kaya" Layer
- 1 egg
- 100ml coconut milk
- 1/4 cup castor sugar
- 1/4 tsp pandan paste
- 3 tbsp all-purpose flour
- 3 tbsp rice flour


Method:
Rice Layer
1. Soak rice for 2-3 hours, or overnight. Drain
2. Steam the rice with the pandan juice and a pinch of salt for 15-20 mins, or until tender.
3. Remove from heat and add in coconut milk. Mix well with a wooden utensil.
4. Steam mixture for another 10 mins.
5. Line an 8-inch round pan with banana leaves/ greased paper; place steamed rice in the pan and press firmly with a banana leaf on top to compact.
6. Steam the rice for 5 mins.


NOTE: The bottom layer must be hot when the top layer is poured in.

Method:
"Kaya" Layer
1. Beat egg lightly and mix in the rice flour, until mixture is smooth.
2. In a pan cook coconut milk, pandan paste and sugar over low heat. Continue to stir and add in egg mixture. Allow mixture to thicken.
3. Pour the "Kaya" mixture over the steamed glutinous rice in the steamer slowly. Steam for 15-20 mins or until set.
4. Cool the kueh completely before cutting.


My mom was so excited to try out my version of Kueh Seri Muka. She said that it tasted very similar to the traditional kinds steamed in Singapore! Hooray for me :) I was happy that my mom enjoyed it and she was happy that I made it... what a perfect duo!

Tuesday, June 19, 2007

Henglong finds...

I've been shopping at Henglong for as long as I can remember... it's like a more quaint (small-scale) version of my favourite supermarket T&T. Being that it has most of the things T&T has (and lots more) at very reasonable prices I love Henglong just as much. I remember the days when my mom and dad would take the five year old me to this market, and they always treated me to my favourite treat... an ice cold red bean (and sometime durian) popsicle. Henglong use to be the only place you could find this treat, and then T&T rolled around stealing some of their business :(

I still enjoy buying bakery goods from Henglong that are usually only found if you go to Vancouver's Chinatown... seeing as how gas and bus fare is super expensive the only way to get the authentic nonya/chinese goodies are from Henglong. Here are some of the treats I purchased the other day...
Colorful Bak Tong Goh... with salty coconut cream sauce

Sweet, green, mungbean-filled rice cakes... with salty coconut cream sauce

Carioca... I had never heard of this one before and was interested to try it. They described it as deep fried sticky-rice flour, so I was expecting something like Jin Dui.

It was very much like Jin Dui, but had no redbean... the melted sugar syrup on top was delicious and tasted like gooey cotton-candy.

Sunday, January 14, 2007

Kueh Lapis

So, the other day I decided to reach deep down into my Singaporean/Malaysian roots and make a much loved Malaysian dessert: Nine Layer, Kueh Lapis. It was a bit tricky finding a recipe that was reliable but I managed to find one online at pwmf.blogspot.com/. I wasn't quite sure if I could trust this recipe so I also relied heavily on a book I have lying around the house entitled "Singaporean Cooking with Mrs Leong Yee Soo". These two resources combined with my culinary experience allowed me to create a beautiful looking (and tasting) Kueh Lapis with an amazing texture. But have no fear, though I cannot lend you all my cookbook I can surely show you how I was able to create this kueh (while also varying the recipe slightly).

When first approaching the recipe from pwmf.blogspot.com/ I prepared myself for what seemed a difficult dessert to make. Firstly, all of the ingredients were measured out in grams (sadly I do not have a kitchen weighing machine) so I had to modify the recipe using online conversion resources. So, feel free to follow the directions on the "Playing with My Food" site or use my variated recipe below.
Once I finished arranging my Kueh on a nice plate, I realized that the recipe yielded many servings. So I brought some to work and to my bible study. It got rave reviews and many people asked me for the recipe. I've decided to post the recipe online and share it (as well as my beautiful pictures) with the world, or anyone who stumbles upon my blog. Hope you enjoy the kueh... I know I did :P

(NOTE: I halved the online recipe so that the Kueh batter would fit into a round 8-inch diameter cake pan)


Joanna's Variation on Kueh Lapis Beras
(Steamed Tapioca Layer Cake)

Ingredients
Batter A: (Yields 4 Cups)
2 cups Tapioca Starch
1/2 cup Rice Flour
1 1/3 cup Sugar
1 1/4 cup Coconut Milk mixed with 1 1/4 cup Water
1 tsp Pandan Paste

Batter B: (Yields 2 Cups)
150 grams Cooked Taro Root (approx. 1/4 of a medium sized Taro)
1/3 cup Sugar 1 cup
Tapioca Starch 45ml Coconut Milk + 45ml Water
3-4 drops red food coloring

Batter C: (Yields 2 Cups)
150 grams Cooked Mung Bean (1 cup)
1/3 cup Sugar
1 cup Tapioca Starch
45ml Coconut Milk +45ml Water

Preparation:
To cook Mung Bean- Wash beans and discard damaged ones. Place in a pot with 2 cups of water and soak for 3-4 hours. After this time, boil mung beans for 15-20 minutes, until soft.

To cook Taro- Wash and peel off skin; remove damaged parts. Dice the taro into equal sized cubes. Place in a pot of water to soak for 1 hr. After this time, boil taro for 15-20 minutes, until soft.

Grease 8-inch round cake pan. Prepare wok for steaming process.

Method:
Pandan Layer
1. Combine Coconut milk and water (from Batter A) together in a small mixing bowl. Add 1 tsp pandan paste to give flavor and create the green color.
2. Combine the Tapioca Starch, Rice Flour and Sugar (from Batter A) in a larger mixing bowl.
3. Now pour the liquid ingredients (from Batter A) into the dry ingredients (from Batter A) to form a thin paste. Set Aside.

Taro Layer
4. Combine Coconut milk and water (Batter B) and mix thoroughly.
5. Drain cooked Taro Root and place in blender.
6. Add in the Tapioca Starch and Sugar (Batter B). Then add in the coconut/water mixture. Blend.
7. Add a few drops of red food coloring to create a purple color.
8. Place Batter B into an easily "pourable" bowl/container. Set Aside.

(TIP: When adding food coloring, add drops one at a time between blender pulses. This way you can more easily control the hue of the batter)

Mung Bean Layer
9. Combine Coconut milk and water (Batter C) and mix thoroughly.
10. Drain cooked Mung Beans and place in blender.
11. Add in the Tapioca Starch and Sugar (Batter C). Then add in the coconut/water mixture. Blend.

Look... all the pretty colors. Now the Batters are ready for steaming!

Cooking/Steaming:

1. Fill wok with water and steaming tray. Turn stove on "high" and allow water to boil, keep on "high" throughout steaming process. Place greased cake pan in wok for steaming.
(NOTE: Make sure the pan is level, otherwise the layers will be slanted. Also, This Kueh recipe yields more Batter A than Batters B and C --with a ratio of 2:1:1. So, when layering the cake keep this in mind.)
2. Pour in layer of Batter A, steam for 5-10 minutes (until cooked). Ensure this layer is firm (like jello) and no longer liquid before adding second layer. Pour in layer of Batter B and steam until cooked, roughly 5 minutes. Again check for doneness of each layer before adding subsequent layers. Alternate layers and create your own color pattern until all the batter is used up.
3. Let cool for 7-8 hours before cutting into slices. Cover the cake with plastice wrap or a lid to prevent drying out. I found it easiest to slice the cake using a serrated knife, it produces the cleanest and most evenly sliced pieces.
(NOTE: To ensure that you have an evenly layered cake, use the same amount of batter for each layer. For each layer, I used 1 cup of batter. Also, make sure to spread the layers of batter out to the edges of the pan.)

Thursday, January 11, 2007

Again... More Asian Pride


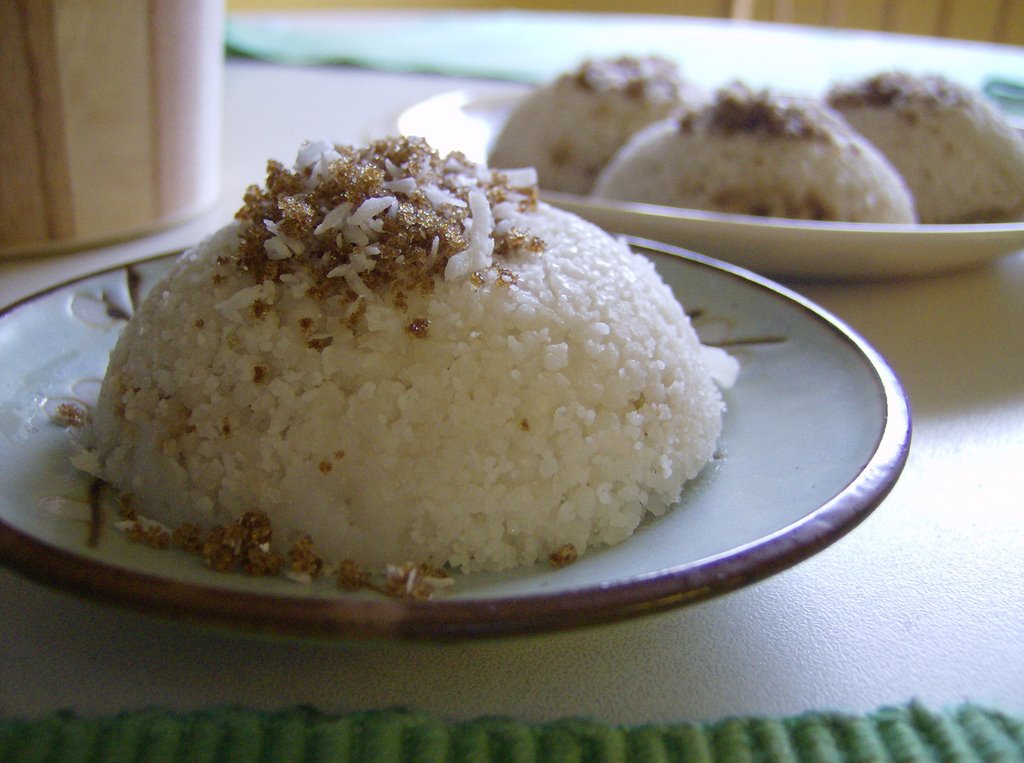
Decided to make Putu Piring today. Found the recipe on the Ja's Kitchen webpage. She is quite a talented cook, with great recipes to choose from. I followed her recipe for this Malay treat to a tee and it turned out beautifully. I was unsure of how my family would like it, seeing as this is one of my dad's favorite sweets I didn't want to mess up. So I decided to half the recipe and make only 4 Putu Pirings; sadly, I wish I had made more because my littlest sister (the one who doesn't particularly like Malay sweets actually liked this one!)
I read a review of this recipe somewhere that said it didn't turn out properly, but that person probably just didn't have the right ingredients or something. This recipe was easy to follow and the results were delicious.