Showing posts with label Fruits. Show all posts

Thursday, April 07, 2011

Yogurt Berry Bread

Whipped up this delightfully fruity bread for sharing with my co-workers on a night shift. Seriously, night shifts will be the end of me... don't get me wrong, I love them. But for some reason I always end up working with people who seriously love to order take-aways to gnosh on through the 12 hour shift. I tried to be all healthy by bringing this yogurt berry loaf, but then we all ended up pitching in for pizza, someone brought chips, another person brought brownies and someone else brought pop... o_O But anyways, here's the recipe for my somewhat "healthy" contribution to the food fair.

Yogurt Berry Bread

Yields 1 loaf

Ingredients:
- 2 cups flour
- 1/2 tsp baking powder
- 1/4 tsp salt
- 1 egg
- 1 1/4 cup sugar
- 100g of your favorite yogurt
- 1/3 cup margarine
- 1/4 cup milk
- 1/2 cup berries

Method:
1. Sift together the flour, baking powder and salt.
2. In a separate bowl, cream the sugar and margarine until fluffy. Add in the egg, mixing until well combined; then, add in the yogurt.
3. Add 1/3 of the dry ingredients to the wet and mix well. Now alternate with 1/2 of the milk.
4. Add another 1/3 of the dry ingredients, alternate again with the milk and finish off with the remaining dry ingredients. Add in the berries and continue mixing thoroughly.
5. Pour into a prepared rectangular loaf pan and bake at 350degrees for 45-60minutes, or until toothpick inserted comes out clean.

Tuesday, November 30, 2010

Daring Bakers: November 2010 - Crostata

I've been feeling rather guilty having not updated my blog for practically a month. I swear to you I've been in the kitchen quite a few times, and just this past week I whipped up a tasty batch of cookies. I just didn't get around to posting any of my escapades, but thankfully I baked up something for this month's DB challenge. I'm so glad that I joined this group... it's keeping me in-check, and making it so I have to post at least once a month.

I don't know where my time's been running off to. I have been working, but that part of my weekly routine seems to have settled itself out, and I'm getting use to my work schedule... maybe it's because I've been really engrossed in catching up with Arsenal FC's 2010/2011 season (The Premier League, UEFA Champions League and Carling Cup). These guys play brilliant football, and I can't help but be enamored with their dedication to the sport and great team play. I'm sure they'll take the top of the table by the season's end, and with the number of injuries the team's had to endure they're doing amazingly well. The team's last EPL game, they topped Wigan Athletica and like a winter fairlytale, lovely white snow began falling on the pitch.

But anyways, here's my long-awaited blog post for November's DB Challenge: Crostata. The 2010 November Daring Bakers’ challenge was hosted by Simona of briciole. She chose to challenge Daring Bakers’ to make pasta frolla for a crostata. She used her own experience as a source, as well as information from Pellegrino Artusi’s Science in the Kitchen and the Art of Eating Well.

Pasta Frolla (crust)

Ingredients:

  • 1/2 c. minus 1 tbsp superfine sugar or a scant 3/4 cup of powdered sugar
  • 1 and 3/4 cup unbleached all-purpose flour
  • a pinch of salt
  • 1 stick [8 tbsp] cold unsalted butter, cut into small pieces
  • grated zest of half a lemon
  • 1 large egg + egg yolk, lightly beaten in a small bowl
Method:
  1. Whisk together sugar, flour and salt in a bowl.
  2. Rub or cut the butter into the flour until the mixture has the consistency of coarse crumbs. You can do this in the bowl or on your work surface, using your fingertips or an implement of choice.
  3. Make a well in the center of the mounded flour and butter mixture and pour the beaten eggs into it (reserve about a teaspoon of the egg mixture for glazing purposes later on – place in the refrigerator, covered, until ready to use).
  4. Add the lemon zest to your flour/butter/egg mixture.
  5. Use a fork to incorporate the liquid into the solid ingredients, and then use your fingertips.
  6. Knead lightly just until the dough comes together into a ball.
  7. Shape the dough into a flat disk and wrap in plastic wrap. Place the dough in the refrigerator and chill for at least two hours. You can refrigerate the dough overnight.
  8. Roll dough, and form into a baking pan. Add filling, and bake in 350degree oven for 45minutes.
Berry Filling

Ingredients:

  • 1/8 cup butter
  • 1/4 cup granulated sugar
  • 1/2 cup unbleached all-purpose flour + additional 2 tbsp flour for roux
  • 1/4 tsp baking powder
  • a pinch of salt
  • 3/4 cup mixed field berries
  • 1 large egg and 1 large egg yolk, lightly beaten in a small bowl
  • Enough milk to make a thick batter (1/4 to 1/2 cup)
Method:
  1. Melt butter in a heavy bottomed saucepan, add in the sugar and 2 tbsp flour to form roux.
  2. Add in the berries, and heat over medium until berries become macerated.
  3. Add 1/4 cup milk to the mix and continue stirring mixture.
  4. Add in the flour + baking powder mix, stirring until well combined.
  5. Slowly add in the eggs, mixing well to ensure that the eggs do not begin to cook; and if batter remains thick, add in additional milk to form a batter with pudding-like consistency.
  6. Pour into the pasta frolla crust and bake at 350degrees until a toothpick inserted into the center comes out clean.
Yay!! The crostata was tasty, and with the winter-ish weather doing it's business outside (seriously, I can't believe it began snowing already) my family enjoyed the warm pie with a big dollop of whipped cream. Mmmmm... I cannot wait until Christmas rolls around, it seems so close yet so far!

Monday, December 14, 2009

Low Fat Fruit Cake

A delicious twist on the holiday classic... fruit cake! This afternoon, as I watched the flurry of snow coming down on the pavement outside, I asked myself... "what could make this moment feel even more Christmas-y?" With this in mind, I thought... FRUIT CAKE! But, I didn't just want to make any old fruit cake, I wanted to make it in such a way as to enjoy my favorite Christmas cake while still maintaining a healthy diet. All that alcohol (who doesn't love rum?) butter and sugary fruits, although delicious can sometimes hamper your holiday healthy-eating plans. But, with this recipe... healthy + tasty can be combined in one sentence with no need to compromise! Albeit, the loaf isn't so pretty to look at... it's kind of pale in comparison to traditional fruit cake. However, it is nice and moist with the addition of freshly cut apples and yes... of course I had to add the rum :P

Low Fat Christmas Fruit Cake
Yields: one 8-inch rectangular loaf (serves 8)
Ingredients:
- 1 cup all purpose flour
- 1 packet of equal/twin/sweet-and-low
- 1/4 tsp salt
- 1/2 tsp each baking soda, baking powder
- 1/4 tsp cinnamon
- 1/2 tsp all spice
- 1/3 cup mixed peel
- 1 medium apple, chopped to the same size as the mixed peel
- 1/3 cup desiccated coconut, sweetened
- 1/4 cup rolled oats
- 1 oz dark rum
- 1 egg white
- 2 tbsp milk powder + enough water to equal 125ml
- 1 tbsp low calorie margarine (I used celeb)

Method:
1. Mix together the fruit peel, chopped apple, coconut and rolled oats. Slowly add in the dark rum. (If you want to add a little more flavor and no calories, you can always add in some vanilla or maple essence). Mix until well combined and allow mixture to rest/soak up the liquor for at least 2 hours.

Friday, May 29, 2009

Daring Bakers May 2009: Apple Strudel

This month has been one crazy one, it's taken me up until the last minute to complete this challenge. I've been condo-shopping with my parents for the last 15days and we have finally settled on a place! It's sooo crazy!!! So, between talking with lawyers, notaries, mortgage brokers, real-estate agents and condo-owners I found it a bit difficult to complete this months challenge... but thankfully I did it! I modified the recipe to include strawberries, because I had tons of strawberries lying around the house (in my fridge to be exact). All I did was place 2 cups of sliced strawberries in a small sauce-pan and cooked them over medium heat with 3 tbsp of granulated sugar. I waited for the strawberries to excrete their juices, creating a beautiful, thick and syrupy strawberry compote. I simply mixed the strawberries with the apple-raisin-rum filling and voila! Strawberry-Apple Strudel

Apple Strudel

The May Daring Bakers’ challenge was hosted by Linda of make life sweeter! and Courtney of Coco Cooks. They chose Apple Strudel from the recipe book
Kaffeehaus: Exquisite Desserts from the Classic Cafés of Vienna, Budapest and Prague by Rick Rodgers.


Preparation time
Total: 2 hours 15 minutes – 3 hours 30 minutes

15-20 min to make dough
30-90 min to let dough rest/to prepare the filling
20-30 min to roll out and stretch dough
10 min to fill and roll dough
30 min to bake
30 min to cool

The beautifully flaky, pastry layers

Close-up of the layers within the score-marks

Apple strudel
from “Kaffeehaus – Exquisite Desserts from the Classic Cafés of Vienna, Budapest and Prague” by Rick Rodgers

2 tablespoons (30 ml) golden rum
3 tablespoons (45 ml) raisins
1/4 teaspoon ground cinnamon
1/3 cup plus 1 tablespoon (80 g) sugar
1/2 cup (1 stick / 115 g) unsalted butter, melted, divided
1 1/2 cups (350 ml) fresh bread crumbs
strudel dough (recipe below)
1/2 cup (120 ml, about 60 g) coarsely chopped walnuts
2 pounds (900 g) tart cooking apples, peeled, cored and cut into ¼ inch-thick slices (use apples that hold their shape during baking)


1. Mix the rum and raisins in a bowl. Mix the cinnamon and sugar in another bowl.

2. Heat 3 tablespoons of the butter in a large skillet over medium-high. Add the breadcrumbs and cook whilst stirring until golden and toasted. This will take about 3 minutes. Let it cool completely.

3. Put the rack in the upper third of the oven and preheat the oven to 400°F (200°C). Line a large baking sheet with baking paper (parchment paper). Make the strudel dough as described below. Spread about 3 tablespoons of the remaining melted butter over the dough using your hands (a bristle brush could tear the dough, you could use a special feather pastry brush instead of your hands). Sprinkle the buttered dough with the bread crumbs. Spread the walnuts about 3 inches (8 cm) from the short edge of the dough in a 6-inch-(15cm)-wide strip. Mix the apples with the raisins (including the rum), and the cinnamon sugar. Spread the mixture over the walnuts.

4. Fold the short end of the dough onto the filling. Lift the tablecloth at the short end of the dough so that the strudel rolls onto itself. Transfer the strudel to the prepared baking sheet by lifting it. Curve it into a horseshoe to fit. Tuck the ends under the strudel. Brush the top with the remaining melted butter.

5. Bake the strudel for about 30 minutes or until it is deep golden brown. Cool for at least 30 minutes before slicing. Use a serrated knife and serve either warm or at room temperature. It is best on the day it is baked.

Mmmm, the luscious filling of apples, strawberries, raisins and rum.


Strudel dough
from “Kaffeehaus – Exquisite Desserts from the Classic Cafés of Vienna, Budapest and Prague” by Rick Rodgers


1 1/3 cups (200 g) unbleached flour
1/8 teaspoon salt
7 tablespoons (105 ml) water, plus more if needed
2 tablespoons (30 ml) vegetable oil, plus additional for coating the dough
1/2 teaspoon cider vinegar


1. Combine the flour and salt in a stand-mixer fitted with the paddle attachment. Mix the water, oil and vinegar in a measuring cup. Add the water/oil mixture to the flour with the mixer on low speed. You will get a soft dough. Make sure it is not too dry, add a little more water if necessary.
Take the dough out of the mixer. Change to the dough hook. Put the dough ball back in the mixer. Let the dough knead on medium until you get a soft dough ball with a somewhat rough surface.

2. Take the dough out of the mixer and continue kneading by hand on an unfloured work surface. Knead for about 2 minutes. Pick up the dough and throw it down hard onto your working surface occasionally.
Shape the dough into a ball and transfer it to a plate. Oil the top of the dough ball lightly. Cover the ball tightly with plastic wrap. Allow to stand for 30-90 minutes (longer is better).

3. It would be best if you have a work area that you can walk around on all sides like a 36 inch (90 cm) round table or a work surface of 23 x 38 inches (60 x 100 cm). Cover your working area with table cloth, dust it with flour and rub it into the fabric. Put your dough ball in the middle and roll it out as much as you can.
Pick the dough up by holding it by an edge. This way the weight of the dough and gravity can help stretching it as it hangs. Using the back of your hands to gently stretch and pull the dough. You can use your forearms to support it.

4. The dough will become too large to hold. Put it on your work surface. Leave the thicker edge of the dough to hang over the edge of the table. Place your hands underneath the dough and stretch and pull the dough thinner using the backs of your hands. Stretch and pull the dough until it's about 2 feet (60 cm) wide and 3 feet (90 cm) long, it will be tissue-thin by this time. Cut away the thick dough around the edges with scissors. The dough is now ready to be filled.

The strudel is rolled-up, scored and placed on the baking tray


I had a lot of fun rolling and shaping the strudel dough. It was actually a lot of fun! The pasty was wonderfully light and tender, especially after letting the dough rest for quite some time. The filling was perfect! Not too sweet and not too tart... just right. My sisters are still at school right not, but when they come home I'm going to serve up a nice slice of strudel with a scoop of ice-cream on the side... mmmm, what a perfect summer-time snack.

Boy are my parents and siblings going to miss me when I move out. I mean, who's going to surprise them with tasty bakes on random occasions when I'm not around?? And who's going to eat all of my tasty bakes when I make them all on my lonesome?? Wait... I've got it! Thank you Daring Bakers... you'll give me an excuse to invite my family over at least once a month to enjoy a relaxing hang-out and treat-time with me in my new condo. Yay!


Monday, September 15, 2008

Plum Crazy!

So, I've got this disease... no, not a real disease... more of an idiosyncrasy. Like my mother, I've become one who is very annoyed by excessive amounts of anything. This sort of counters my dad's idiosyncratic habit of purchasing anything (even if we don't need it) as long as it's on sale/on clearance/is cheap/is free etc. In the past, this has led me to clear out the fridge of massive amounts of Costco-bought yogurt (by baking with it), get rid of grossly spotted bananas (by baking with them), and using up our hand-picked cherries (by, you guessed it, baking with them).

The title of this blog sort of gives away the big "guess the secret ingredient" but hey, it'd be easy enough to figure out. So, onward ho with the plums...


For my first plum-filled recipe... I opted for a nice Plum Cornmeal Cake. I love, love, love cornmeal. Corndogs are amazing (10x better than regular ol' hot dogs), corn bread is to-die-for and cornmeal pancakes are just plain yum... so this recipe jumped at me and I simply had to whip this up for dessert. The cornmeal makes this cake a little more dense than a simple plum buckle, and also adds a lovely "grittiness" to complement the mushy plum chunks.


Hmmm... after making the Plum Cornmeal Cake, I still had 4 softening plums left over. I decided to make a simple plum crumble. I really just whipped this together on a whim, but here's my estimated recipe:


Plum Crumble

Ingredients
4 plums, diced and tossed with 3 tbsp of sugar
1/2 cup sugar

1/4 + 1/8 cup flour
1/8 cup rolled oats

Pinch of ground cloves
1/4 cup unsalted butter, melted


Method:
1. Divide the diced plums between two buttered ramekins
2. In a separate bowl, combine sugar, flour, oats, cloves and butter; mix well.
3. Sprinkle flour mixture over-top of the plums (do not pat down).
4. Bake at 350F for 30-40mins.

Needless-to-say, my mom was very pleased that I finished up all the softening plums before they reached the "discard-now!" stage. And my dad was more than happy to gobble up a few pieces of cake. My sisters couldn't care less that I'd used up the plums, but they happily ate up their fruits... they're good gals :) Now that the plums are all used up, I'll have to do something about the bag of apples sitting in our pantry... hmm...

Saturday, September 06, 2008

Candy Apples!

After pigging out on cinnamon candied apples at Playland during the summer, and blowing my hard earned money on Rocky Mountain candied apples in Oregon, I decided that enough was enough. But of course, enough to me does not mean "stop caving into your sweet-tooth" rather, means... "no more spending money on a sweet treat that you can make at home". I LOVE SUGAR!!! If it were possible to live off of sugar then I would be in sweet-heaven *drool*. But of course, we all need balanced diets of carbs, fats, proteins etc... but once in a while you have to treat yourself to a little something special.

So, on with the recipe. It's pretty basic, and involves apples, candy, various sweet snacks, sugar and anything that goes with apples and sugar!

Joanna's Simple Caramel Apples
(Yield: 2 caramel apples, and some extra caramel sauce)

1/4 cup butter
1/2 cup packed brown sugar
1/4 cup corn syrup
1/2 cup condensed milk
1/2 tsp vanilla
2 wooden sticks

2 medium apples (I used one gala and one granny smith)

Topping Ideas:
- Chocolate chip morsels
- Crushed Graham crackers tossed with sweetened desiccated coconut
- Crushed nuts (I didn't use these, since my sis is allergic... but crushed peanuts would probably taste divine with these caramel apples)

Method:
1. Prepare apples by washing them, removing the stems and driving a wooden stick down the center of each apple. Combine the topping mixtures and set them aside. Cut out squares of waxed paper (large enough to place the prepared apples on).
2. Combine the first four ingredients in a saucepan and cook over medium-high heat. Let sugar melt, and allow for mixture to come to a rolling boil. Continue to stir over medium-high heat until the mixture becomes thick and reaches 280 degrees F.
3. Remove mixture from heat and stir in the vanilla.
4. While mixture is still warm, roll the apples in the caramel to coat. Allow the excess to drizzle off, then roll each apple in the toppings.
5. Placed finished apples on waxed paper squares and let harden at room temperature.

This recipe made enough caramel sauce to coat two apples and still left me with some caramel sauce to nibble on. I experimented with this last bit of drizzly candy by dipping in some sliced bananas and adding in some coconut flakes. The flavor somewhat resembled banana cream pie! Yummers!

I would now call myself a connoisseur of the candied/caramel apple. Having tried various different types and flavors. My favorite so far has got to be the Rocky Mountain Apple Pie Caramel Apple. I attempted to re-create that apple by using the graham cracker/desiccated coconut mixture... and you know, it actually worked! I simply love the amazing apple-pie flavor of the granny-smith covered in caramel, crackers and coconut... but seriously, who wouldn't?!


Thursday, June 14, 2007

Mangoes

Hooray! There are other fruit in the world besides bananas :P And mangoes have got to be one of my favorite (besides durian of course). I decided to make a simple dish of mangoes and coconut sticky rice. My sister loves rice pudding and especially when I make it with sticky rice and coconut milk. I used the recipe from thaikitchen.com but honestly the recipe is so simple I didn't really follow it to a "t". I just made it to taste, by adding tons of coconut milk to some soaked and then steamed glutinous rice... topping it all off with some cubed mangoes. Yummers, it was a really good dessert... try it! You'll like it!

Wednesday, June 13, 2007

Banana Chips


Finishing up the bananas was pretty easy. Seeing as how I only had 2 left, I couldn't really think of anything that I could make with 2 baby bananas (short of a baby banana split... but that's no fun!). So I decided to try making some "healthy" banana chips (I added the quotation marks because, these chips tasted soo good that I could easily have eaten 5 bananas worth :P)

Banana Chips

Ingredients:
- bananas, sliced thinly
Method:
1. Set oven to 170F. Prepare a cookie sheet by covering it with aluminum foil and greasing the pan well.
2. Place the banana slices on the prepared cookie sheet and bake in the oven (with the door open approx. 1 inch) for 2 hrs.
3. Flip the slices over and bake for another 1 1/2 hrs... or until the chips look dried, and dark yellow (but not brown)
NOTE: I let my banana chips brown alot, I just really enjoy the burnt/caramel-like flavour to them when they're "charred"... you don't have to let them brown as much.
4. Allow the chips to cool. They may feel soft/pliable now, but will harden/crisp as they cool.
5. Store in an airtight container for up to 1 week.

Tuesday, June 12, 2007

Bananas... continued

As promised, today I shall continue on with the tale of my Banana Misadventures. So... I left off my last post with many of you greatly anticipating what would become of the slowly browning baby bananas. I decided that, since I'm now legal, I would prepare a daring recipe of BANANAS FOSTER!!! Time to whip out the Captain Morgan's and go crazy :P I used the recipe I had in my Southern Cooking recipe book, but since I didn't have banana liqeuer I modified the recipe by using maple syrup instead.
Bananas Foster (Serves 4)

Ingredients:
- 4 baby bananas, peeled & sliced lengthwise
- 1/2 cup butter
- 1/2 cup brown sugar
- 1/4 tsp ground cinnamon
- 1/4 tsp allspice
- 1 tbsp maple syrup
- 1/4 cup rum
- 1 match

Method:
1. Melt the butter and brown sugar in a non-stick frying pan over medium heat until you gain a thick syrup consistency.

2. Add in the cinnamon, allspice and maple syrup (the syrup may cause the mixture to sizzle, but that's okay) and mix thouroughly.

3. Add in the prepared bananas and coat with the brown sugar syrup. Reduce heat to low and cook each slice for about 2 minutes on each side, or until the banana is soft but still maintains its shape without breaking.

4. With heat still on low, add in the rum. (Be sure to pour the rum all around the pan, and not concentrate it in one particular area!)

5. Swirl the pan to spread the rum around. Set the pan down and light your match. Thrown the match into the pan and wait until the flam dies down.

NOTE: to really see the amazing flames you should dim the lights a bit

6. For each serving, place two scoops of vanilla ice cream into the bowl. Slowly and gently spoon two halves of banana (1 whole baby banana) into the bowl. Drizzle the ice cream with some of the brown sugar syrup and serve.


Here's the video of my Bananas Foster Flambé-ing. I added the bananaphone song to it, just because I thought it kinda fit... oh, alright I admit I just really like that song :P


Surprisingly, my sister who didn't like the taste of the baby bananas raw really enjoyed the bananas foster. Though, after a few bites the sweetness really hits you. Funny thing... my sister found the syrup to be too sweet, but my mom thought that it was just right (when does that ever happen?) My dad loved the rum in the syrup and ate it all up. Four bananas down, 2 more to go! Hooray! I might actually win this baking challenge I made for myself... which will be a first.

Monday, June 11, 2007

Marbled Chocolate-Banana Bread Take 2

My past attempt at Marbled Banana Bread didn't turn out so marbled (as you can see in my previous post about the banana-y goodness). But this time when I made the bread, I was determined to get all the banana and chocolate mixed together to make a pretty looking breakfast treat. I was pleased with the way both my Banana Bread attempts turned out... I think that it's the addition of yogurt to the recipe that makes it taste soooo good. I just love yogurt in any recipe... be it scones, cakes, muffins, breads etc. Well, just wanted to show you guys that I've used up 4 more baby bananas and am still trying my darnedest to finish off the remaining 6... what should I make with them? You'll have to wait until tomorrow to find out!
I'm pretty impressed with my marbleing ability! It has been much improved since my last attempt :)


As you can see, when something goes right I like to show off :P Bad I know, but hey... arent' the slices pretty?

Trouble with Excess Fruit: Bananas

Yup... it always seems like my family ends up purchasing more groceries than we actually use. Recently, it was a bunch of baby bananas... 12 to be exact! You would think that since the bananas were small we'd finish them pretty quickly... not so. My sister was actually the one who wanted to buy them, and so my parents relented. You just can't say no to the "pretty please" face. But when she tasted one of the mini bananas she said that they tasted different and refused to eat another one! What was I to do? I had to think of something quick... because they bananas were going brown pretty quickly. First off: Quick and Easy Banana tarts

Banana Tarts

Ingredients:
- 2 baby bananas, sliced to 0.5cm
- 3 packets of HoneyMaid Thinsations, crushed (or 1 1/2 cups graham cracker crumbs)
- 6 tbsp butter, melted
- 2 tbsp brown sugar
- 1 package of vanilla pudding mix (plus all the ingredients necessary to prepare it)

Method:
1. Mix the graham cracker crumbs, butter and brown sugar together.
2. Press the crust mixture into tart tins, or a muffin pan. Bake the crust blind, in a 350F oven for 10-12 minutes.
3. Prepare the vanilla pudding mix, and let cool slightly (shouldn't been boiling when you spoon it into the tarts).
4. Place one slice of banana in each tart, then fill the tart with the vanilla pudding.
5. Refrigerate until the pudding sets (1-2 hrs) and serve. If storing, be sure to cover the tarts. Otherwise, you may end up with a rubbery layer of pudding on the surface of each tart.

Sunday, June 03, 2007

Crazy Heat = Cool Fruit Salad

The other day I was wondering around T&T (surprise, surprise) when I noticed that they were having a sale on dragon fruit. Having never tried this luxurious fruit before I decided to get one and "test taste" it. I bought it and brought it home, sat it on my counter and waited. I waited and stared at the pretty pink fruit and asked myself, " What could I possibly make with this thing!?!"
Being all healthy and seeing that a fruit salad would be a good way to beat the sweltering heat, that's what I made. The recipe is pretty simple.
Dragonfruit Bowl

Ingredients:
- 1 dragon fruit for every 2 people
-A mixture of your favourite fruits, diced (that go well together... I love durian to bits, but if I put it in this fruit salad then everything would taste like durian... hmmm, actually that doesn't sound half bad :P)

Method:
1. Gather up all of your favorite fruits and dice them into bite-sized pieces.
2.Then cut the dragon fruit in half (length-wise, or width-wise it doesn't matter... depends on how you want your "bowl" to look).
3. Scoop out the inside of the dragon fruit, while retaining the structure of the fruit's skin.
4. In a large bowl, combine the diced fruits (I used starfruit, banana, kiwi, pineapple)
5. Spoon the fruit mixture into the empty skins of the dragon fruit. Serve to the hot and sweaty masses!

Monday, May 07, 2007

Ichigo Daifuku

Tuesday: Ichigo Daifuku I was contemplating what items would be nice to place in my sister's bento box for school and it hit me. Ichigo Daifuku! I had just bought a package of strawberries the other day and they were perfectly ripe. I also had some left over sweet bean paste from another recipe. So I simply wrapped each strawberry in a thin layer of bean paste and then wrapped them in a daifuku skin which I dyed pink with food coloring. The mochi recipe I use is very simple and is as follows:

Daifuku

1. Prepare your work area with potato starch.

2. Sift together 1 cup of glutinous rice flour with 1/4 cup of confectioner's sugar into a small pot.

3. In a small cup mix together 1 cup of water and the preferred coloring (I used 2 drops of red dye).

4. Add the water to the pot containing the flour and sugar and stir over medium heat until the mixture becomes sticky, transparent and "mochi-like".

5. Once the dough is ready dump it onto your potato startched surface and then soak the pot in water (if you do this asap it makes the pot easier to clean.)

6. Dust you're hands generously with potato flour and begin to divide the dough into smaller portions.

7. Wrap your filling with the mochi skin and dust with some more potato starch.

8. Now you have Daifuku! Eat and enjoy!

Friday, April 20, 2007

Yogurt Recipe #2

Well, this morning I woke up and remembered all about that challenge I had made myself. To finish all those yogurt packs before they expire. Not sure how that's gonna turn out, but I decided to use 1 pack of strawberry yogurt for my breakfast today.
Strawberry + Banana Yogurty Pancrépes
Ingredients:
- Pancake mix
- water
- 1 pack of strawberry yogurt
- 1/2 banana, sliced
- Stawberry syrup (optional)

Method:
1. Take your pancake mix and add in water, a little (1/8 cup) at a time, until you achieve a batter with a crépe-like consistency. (Notice, I'm very leche in the morning and just want to get some food in my tummy)
2. Heat a frying pan to low/medium heat. Pour in batter and swirl around until it becomes thin and crépe-like. (Honestly, if you've made crépes before... and even if you haven't, just cook it so it looks right)
3. Fill each pancrépe with a dollop of yogurt and roll them up.
4. Place them on a plate and decorate plate with sliced bananas and syrup.
5. Enjoy your yogurt using success!

I still have 13 more packs of yogurt to use up; I'm gonna go insane! Well, at least finals are over and I can focus on my cooking. Oh, I just had a great idea... not about my yogurt problem but about my pancrépes since the recipe is so quick to qhip up, why not use it for Mother's Day?


Friday, January 19, 2007

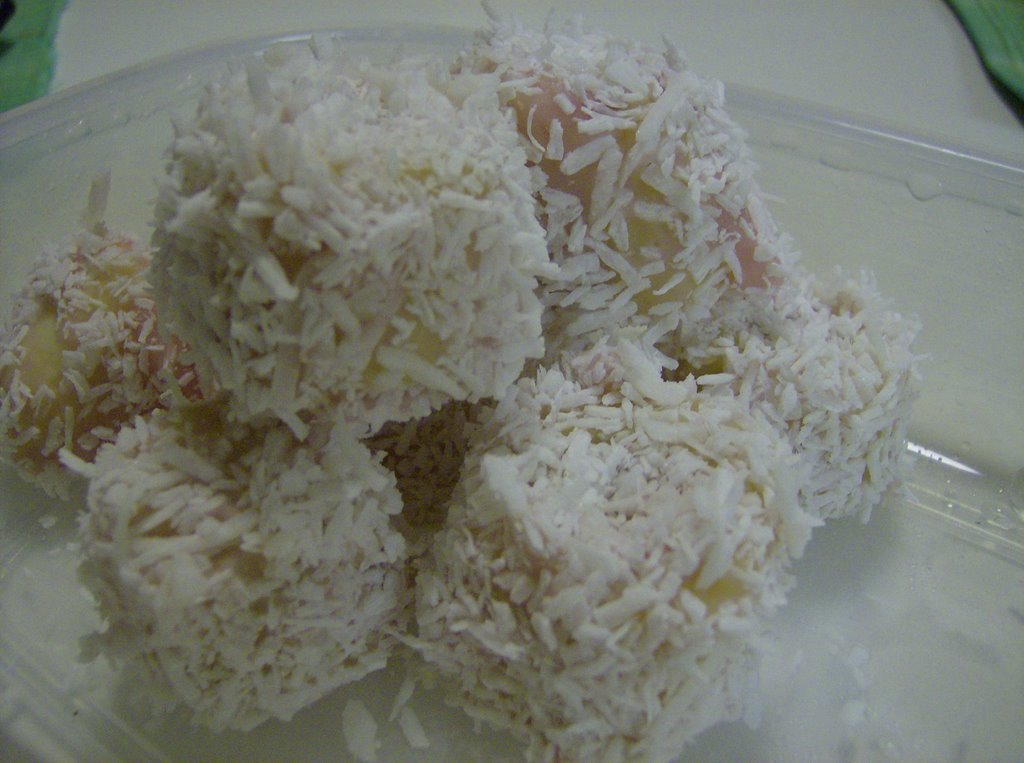
Truffles?

Who doesn't love a delicious truffle? Okay, so they're not really truffles (as you can tell by the photo) but they are delicious. Well, I've created a great way to make a healthy "truffle". It's really simple and doesn't make a ton of mess.

Healthy Tropical Truffles

Ingredients:
1 large banana
1 Silhouette by Danone Strawberry yogurt, 100g (or any other low sugar/fat yogurt)
1 cup desiccated coconut, sweetened

Method:
1. Take a banana and slice it into 3/4 inch pieces (a good truffle size, I should say)
2. Dip each piece of banana into the Strawberry yogurt, making sure the coating is even and there are no huge globs of yogurt on the banana
3. Roll each yogurt-dipped banana piece into the coconut, again evenly coating it.
4. Place your "truffles into a flat container and freeze them for 4 hours.

Note: When freezing, don't let the truffle touch too much. Once they freeze together, they tend to be difficult to separate.


Don't think that you have to just use coconut to coat these cuties. Experiment with different healthy coatings. Oh, how about cocoa powder or crushed, slivered almonds. The possibilities are endless.

These "truffles are delicious during the summer, and you can imagine you're on a tropical beach while you eat them. Enjoy :P

Sunday, October 08, 2006

Marbeled Chocolate Banana Bread

Wow it's been a while... seems like that's how I'm going to start all of my blog entries from now on. *sigh*
What have I been up to? Glad you asked. So far it's been mostly university stuff: writing papers, preparing for midterms, reading up on labs and so on.

Marbeled Chocolate Banana Bread... delicious :P
I made this a while back and just haven't gotten around to posting it. I know, I know I'm an aweful person. Anyways, the recipe I used was from http://www.aspoonfulofsugar.net/ and it's really simple. I just love the marbeling effect that was created in this recipe. I could have marbeled mine a bit more, but it still looks pretty good eh? Looks like the marbeling would take a long time, but really it's one of the simplest techniques and gives off an elegant look. Try it, and impress someone!

Monday, August 07, 2006

Summer Fruits

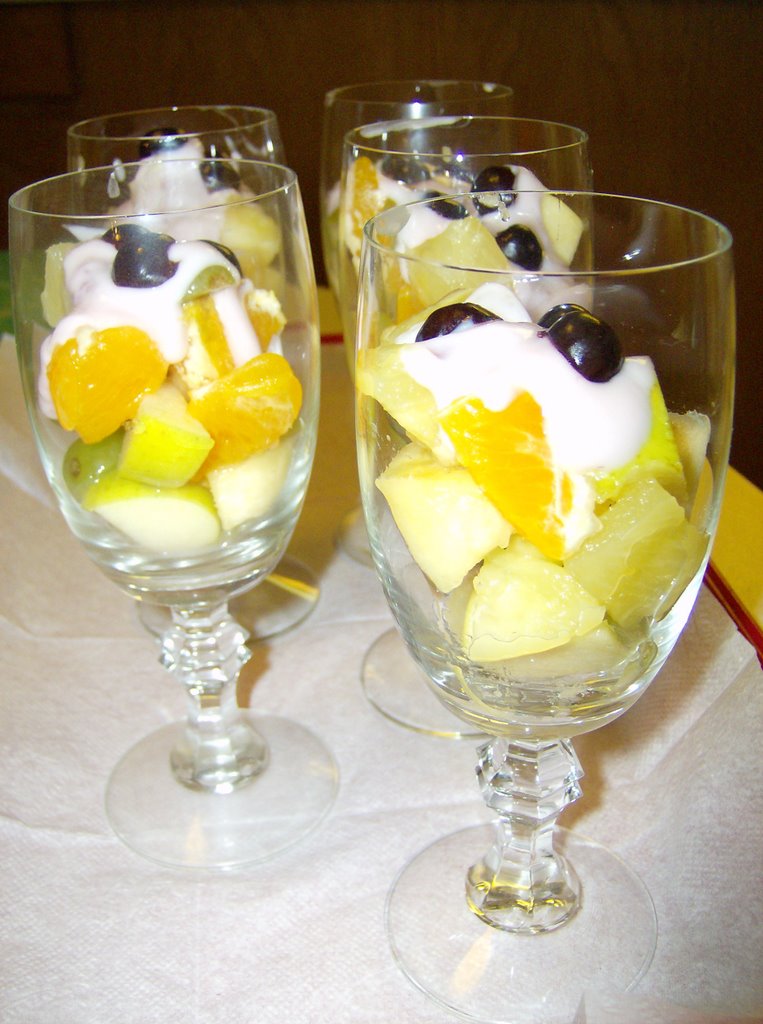
As mentioned many times before, this year has been a scorcher in terms of ... well what else... heat. I have been literally sweating while writting many of my blogs (but you probably didn't need to know that... oh well.) I just love the summer though; going to the beach, picnicing, vacations, strolling along a lake side, camping... all that fun stuff. And summer is also the best time to eat all those yummy summer fruits (well duh)!

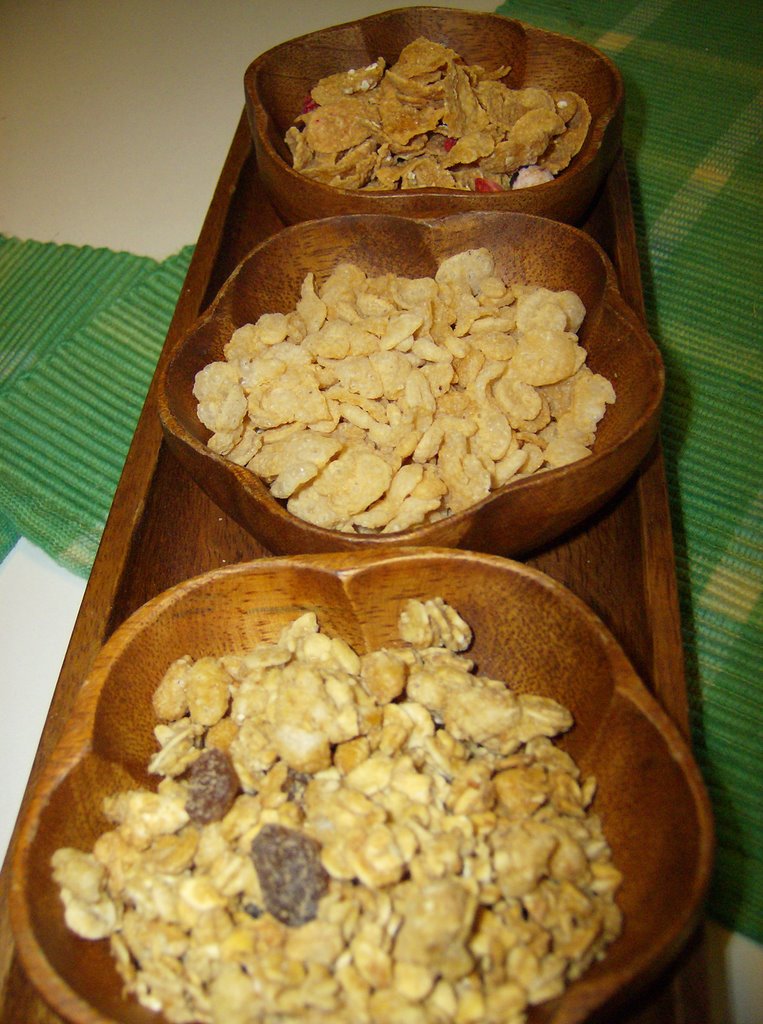
So I decided to make some parfaits that my family could enjoy, at least it would help them cool down in the summer swelter. I used some of the cherries that my family picked from out new found cherry tree, honeydew, grapes, cantaloupe, oranges, pineapples and the ever-loved apple; topping it off with the perfect accompaniment of yogurt and crunchy granola clusters. Simple and delicious... my favorite combination :)

Tuesday, July 18, 2006

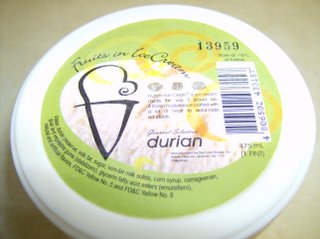
OMG Durian Ice Cream at My Favourite Supermarket

Some people may think that I am crazy, which is in some ways true, as I adore the stinky fruit. But who cares about the strong smell, it's the taste that really counts... am I right? Anyways, many people know that I also love T&T Supermarket and spend almost every waking hour either their or dreaming of being there; and as I walked down the frozen treat aisle towards some free samples (note how Asian I am) I spotted a new brand of ice cream that they were selling. It didn't seem like anything out of the ordinary, they had ube flavour and mango flavour... but then I spotted it, could it be? Durian flavoured ice cream that I can buy and take home :)
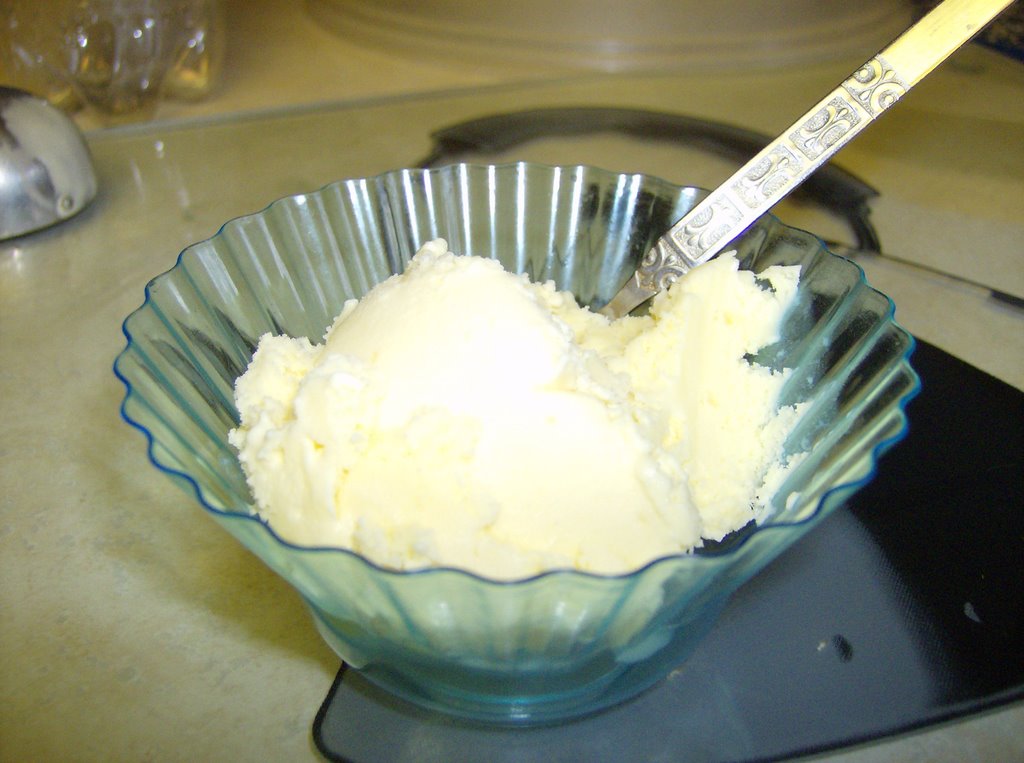
I have tried the durian ice cream at some small vendors in Downtown Vancouver and really came to love it (almost as much as the real fruit itself) but now I could actually buy it, take it home and serve it up whenever I was feeling durian withdrawal! I would have bought it but it was a bit pricey and I had little money to spare... so I sadly walked away *sniff*. Upon arriving back home I hung out with my sisters, playing Soul Calibur 2 etc. Then I heard my parents coming home from work and, as usual, my sisters and I ran to the door to greet them. My mom had come straight home, but my dad had stopped off at T&T on his way back and to my surprise he had bought the durian ice cream that I had been reminiscing about all day. He said that he knew I would enjoy it... aww isn't he sweet?

Of course I didn't scarf down the entire pint of ice cream by myself, my entire family got in on the durian action. Except my youngest sister... who doesn't quite like exotic foods, rather preferring to chow down on her western food.

The ice cream was great, and what I had expected it to be... creamy, rich and it even had chunks of real durian mixed in. Yummy! Maybe I'll try some of the other flavours. My other sister wants to try the ube one, and everyone loves mango... well till then I'm happy sticking with my durian :P

Delicious Lemon Bars

I decided to whip out my 8x8 square baking pan once more and make something that would really make it feel like summer. I opened my fridge to find that my mom had bought about a pound of lemons. What to do? I love bars: nanaimo, peanut butter, chocolate, granola but one of my all-time favourites has got to the classic lemon bar. The lemony-citrusy taste practically screams summer is in town. I had a really simple recipe hanging around my kitchen and remembered how much everyone loved them the last time I baked them. (They're also reasonably healthy, with a few alterations)

Lemon Bars

Ingredients for Crust
1/4 cup margarine or butter, softened
1/4 cup sugar (I use unpacked confectioners)
1 cup flour
A pinch of salt

Method for Crust
1. Preheat oven to 350F

2. In a medium bowl, beat margarine and sugar until creamy. Add flour and salt and stir until well combined and crumbly.

3. Press into the bottom of an 8x8 square pan that has been sprayed with nonstick spray. Bake for 12-15 minutes, until the edges are pale golden.

Ingredients for Lemon Topping
1 cup sugar
2 tbsp. flour
1/4 tsp. baking powder
A pinch of salt
1 large egg (I used 1/4 cup egg substitute)
1 large egg white
The grated zest of 1 lemon
The juice of 1 lemon (approximately 3 tbsp.)
Icing sugar for sprinkling

Method (continued...)
4. In a medium bowl, combine sugar, flour, baking powder and salt. Add egg, egg white, lemon zest and juice and stir until well blended and smooth. Pour over the base. Return to the oven for 25-30 minutes, until slightly
golden on top and bubbly around the edges.

5. Cool completely in the pan on a wire rack. Sprinkle with icing sugar before cutting into bars.

6. Makes 12-16 bars (depending on how you cut it)

At 12 bars and not using my alterations the nutritional information is as follow:

Per bar: 165 calories, 4.3 g fat (.7 g saturated, 2.7 g monounsaturated, .5 g polyunsaturated), 30.3 g carbohydrates, 18 mg cholesterol, 91.2 mg sodium, 0.4 g fiber, 23% calories from fat.

Sunday, July 16, 2006

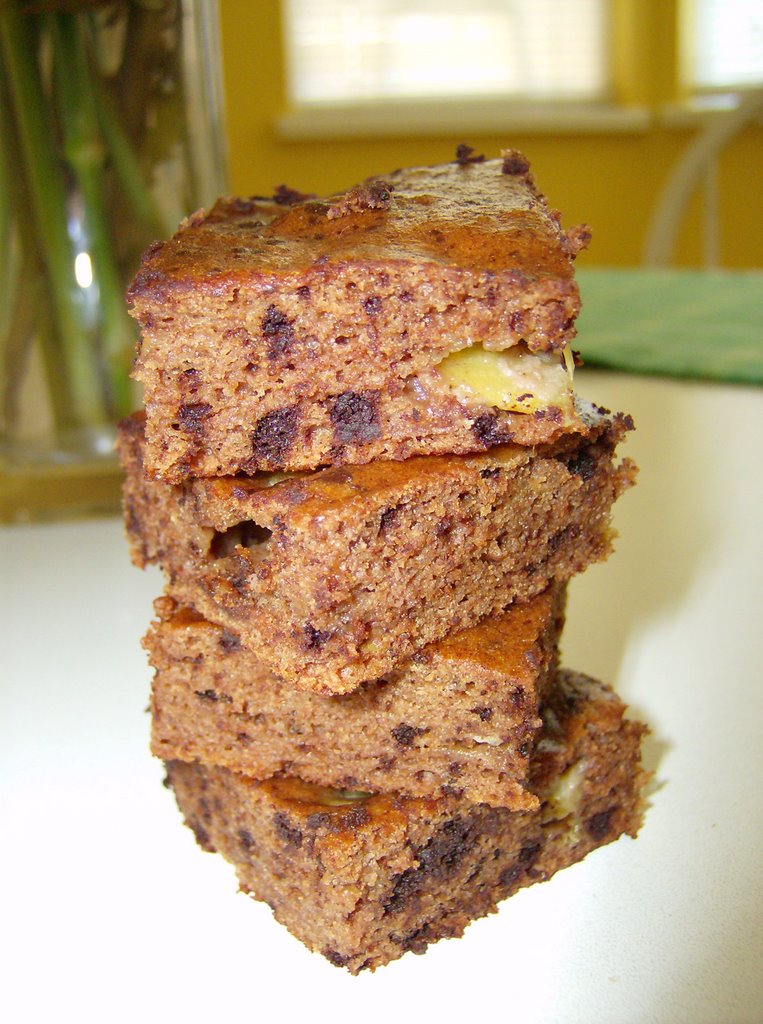
Low Fat Fudgy Banana Brownies

Today I made brownies and decided to add in a few mushed up bananas because they were going brown and no one wanted to eat them... how sad :(
But when I put them in the brownies no one seemed to mind that they were old bananas as the brownies where practically inhaled, they were eaten up so quickly. I got the recipe from my Becel Heart Healthy cookbook. I love my new cookbook, I got it on sale at Cole's Bookstore (during their sidewalk sale) for only $2.99 WOW what an amazing deal I couldn't pass it up. I also bought a cookbook omnibus from the Vancouver Sun Newspaper at Ming Wo, it also has some cool (yet old) recipes... for canning, making jam, doing pot roasts and such. I'm so asian :P I love buying things on sale. I mean why would you pay full price when you can just wait for a good deal to come along.

Anyways, back to the brownies... I know the picture I took of them makes them look like banana bread squares or blondies with speckles of chocolate in them but that's only because I ran out of cocoa powder :( ... but have no fear they turned out fine.

Fudgy Banana Brownies

Ingredients
2 tbsp Becel margarine (or any margarine)
1/2 cup cocoa powder
1 cup granulated sugar
1 egg
3/4 cup unsweetened applesauce
2 tsp vanilla
1/2 cup all-purpose flour
1/4 tsp each: baking soda, salt
1 1/2 large bananas, mashed

Method
1. Preheat oven to 350F (180C). Spray an 8 inch square baking pan with nonstick cooking spray. Dust with cocoa, shaking out excess.

2. In a small saucepan, melt margarine on low heat. Remove from heat and stir in cocoa, sugar, egg applesauce and vanilla. beating until smooth. Gently stir in flour, baking soda and salt until well combined.

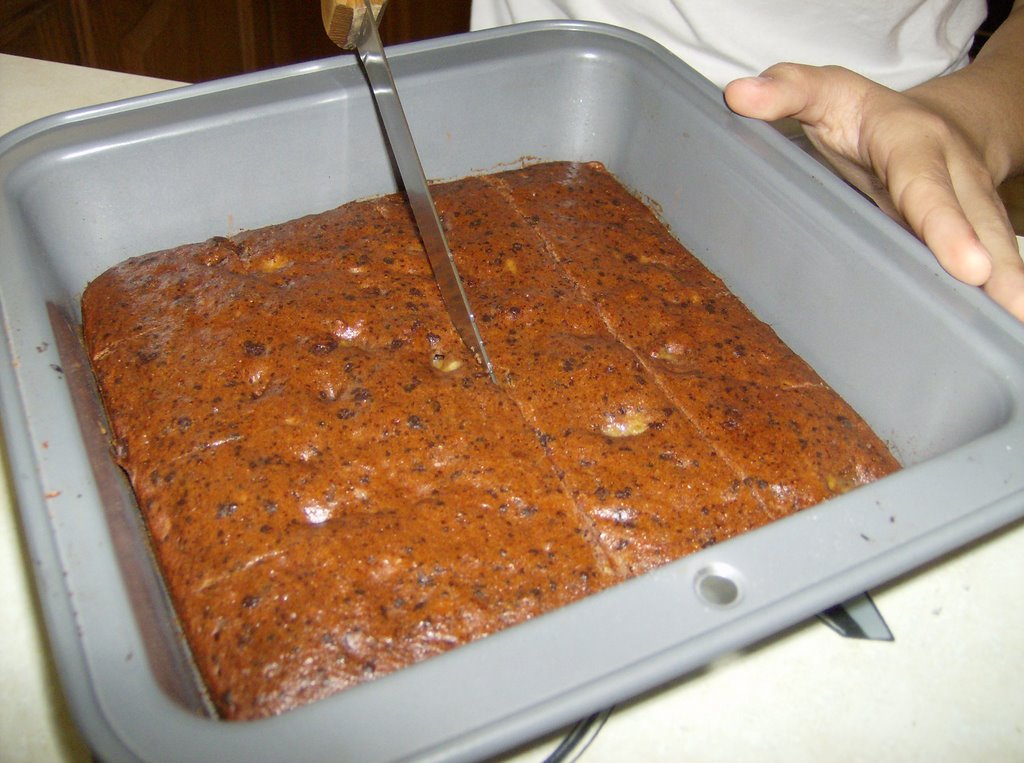
3. Pour into prepared pan and bake 25 to 30 minutes or until set (toothpick place in center should come out clean). Cool completely and cut into 16 squares with hot, wet knife. Store in the refrigerator.

Note: Allowing the brownies to completely cool and cutting with
the hot, wet knife ensures that your squares turn out beautifully without any surface cave-ins.

Variation: I decided to use egg beaters instead of the egg to remove the cholesterol from the recipe and also substituted the granulated sugar for the same amount of unpacked confectioner's sugar (it tastes just as sweet but results in fewer calories!). The addition of banana was my own small variation and you should add the mashed up fruit to the wet batter NOT THE DRY!