Tuesday, April 27, 2010

April's Daring Baker Challenge: Steamed Pudding


The April 2010 Daring Bakers’ challenge was hosted by Esther of The Lilac Kitchen. She challenged everyone to make a traditional British pudding using, if possible, a very traditional British ingredient: suet.

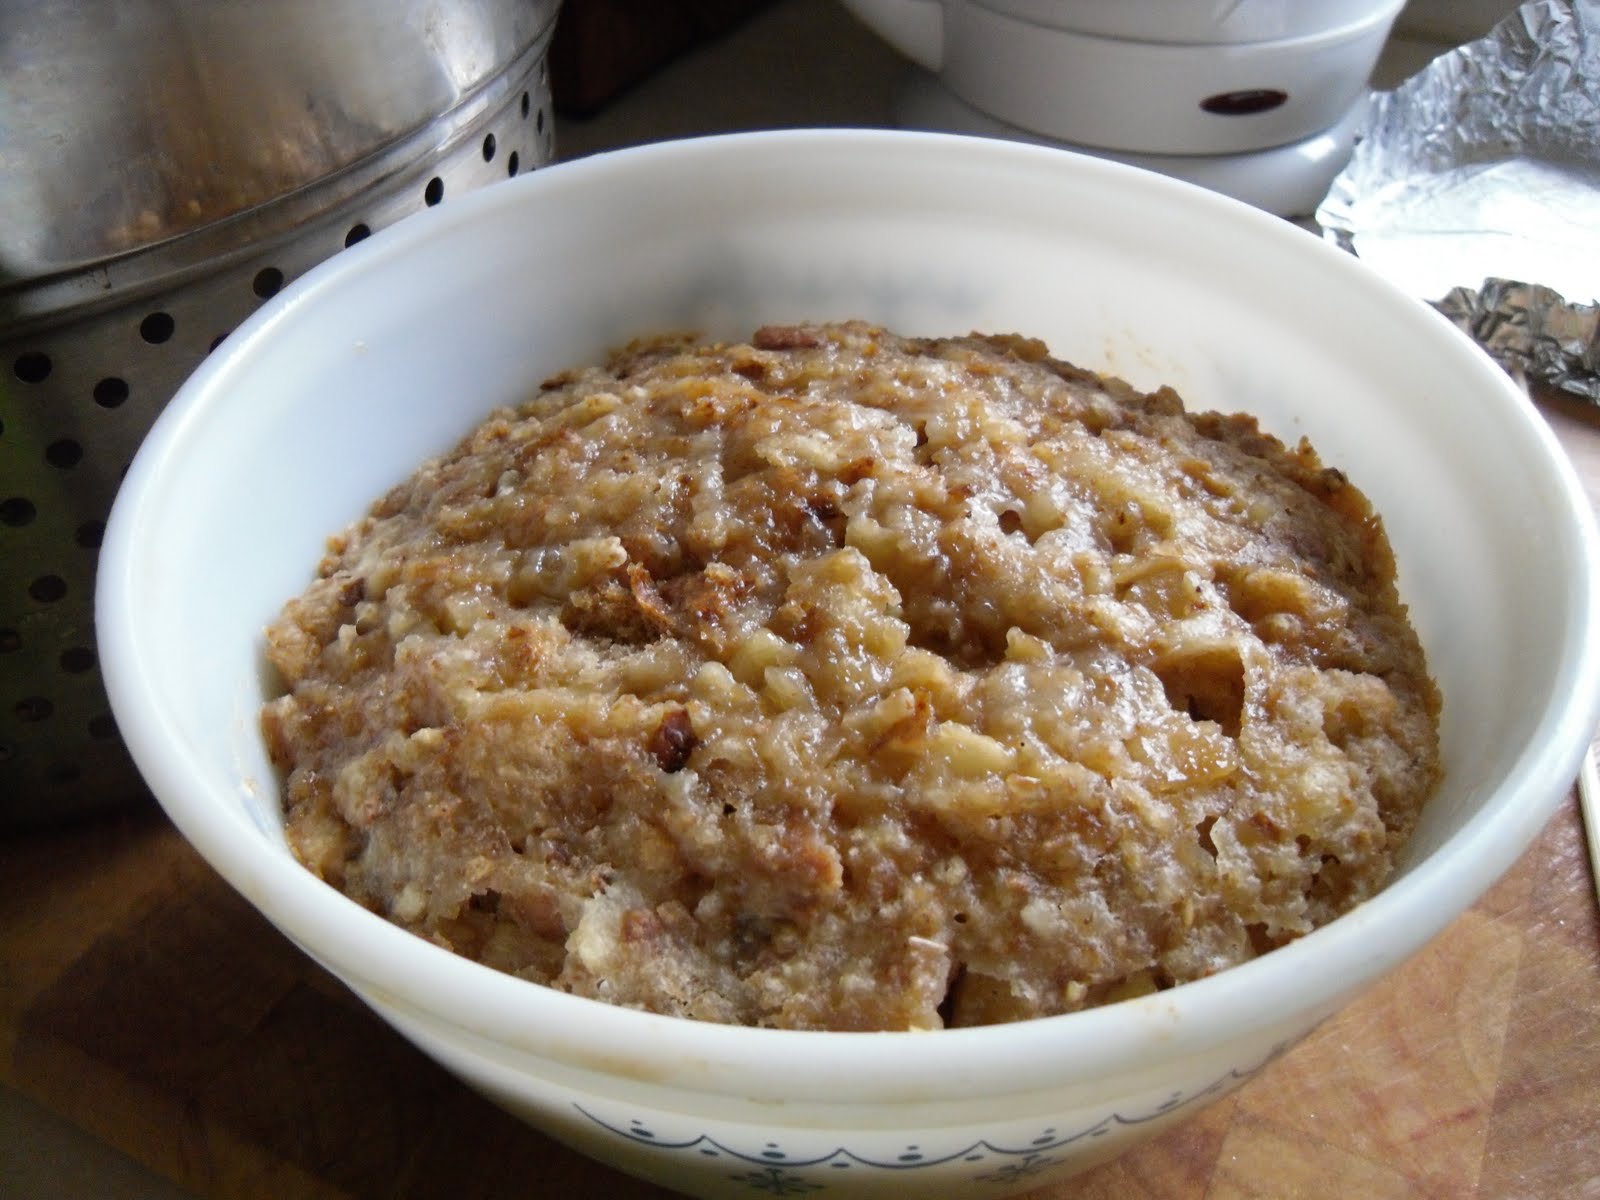
When I read that this month's DB challenge would be the classic British pudding, I was more than excited! I'd already tried my hand at making this type of dessert once before (when I made my steamed Christmas pudding) and now I was going to have another go! Mmmm... I remember the last time I made a steamed pudding it was very tasty indeed, so this time I was ready to have at it. For my topping I used an Apple-cinnamon and Caramel sauce compote. I then strained the compote from the cooking liquid, reduced the liquid and used this as the deliciously sweet drizzlings for my final product. It turned out fantabulous!

This month's challenge allowed for many variations of the classic British pudding, from savory & crusty, to sweet & crusty, to sweet & cakey... I went for the latter.

Steamed Suet Pudding (Sponge type)

(100 grams/4 ounces) All-purpose flour
(1/4 teaspoon) salt
(1.5 teaspoons) Baking powder
(100 grams/4 ounces) breadcrumbs
(75 grams/3 ounces) Caster sugar
(75 grams/ 3 ounces) Shredded suet or suet substitute (i.e., Vegetable Suet, Crisco, Lard)
(1) large egg
(6 to 8 tablespoons) Cold milk

1. Sift flour, salt and baking powder into bowl.
2. Add breadcrumbs, sugar and suet.
3. Mix to a soft batter with beaten egg and milk
4. Turn into a buttered 1 litre/ 2pint pudding basin and cover securely with buttered greaseproof paper or aluminum foil.
5. Steam steadily for 2.5 to 3 hours
6. Turn out onto warm plate, Serve with sweet sauce to taste such as custard, caramel or a sweetened fruit sauce.


Variants:

Apple-Caramel Pudding (my variant) - in a saucepan combine 3 tbsp maple syrup, 1 tbsp cinnamon, 1/2 tsp each cloves and nutmeg, 3 tbsp brown sugar and 3 tbsp heavy cream. Heat over medium until the sugar melts, then add 3 medium apples (peeled and chopped). Cook until apples have sweated and the sauce begins to thicken, 5-10minutes (sauce may still be fairly liquid). Strain the compote from the liquid, mix 1/4 cup of compote with pudding batter and use the remaining compote to cover the bottom of the steaming bowl. Set caramel liquid aside to cool and drizzle over top of cake when steamed and sliced.
Spotted Dick - Add 75g/ 3oz currants and 25g/1 oz of mixed chopped peel with the sugar.
Syrup or Treacle or Marmalade Pudding – put 2 Tablespoons of golden syrup, treacle or marmalade at the bottom of the bowl before adding pudding mix.
My Fair Lady Pudding – Add finely grated rind of 1 medium orange or lemon with the sugar.
Ginger Pudding – replace the sugar with 100g/4oz of treacle, and add 1/2 tsp ground ginger.

With the help of my mom's good ol' fashioned and trusty Corel bowl and my pop's giant, heavy-bottomed steaming pot I was able to steam with ease. Who knew my parent's kitchen would be the perfect place to steam some British pudding?

At first glance, my sister was wary of trying the pudding-cake concoction. But once I told her it was a "British" pudding she practically jumped at the chance to try a piece. See... my sister and I are pretty much obsessed with all things British. There music, culture and television programs out-do the ones we have in North America by far! In fact, here's a list of some of our favorite:

- Music: Radiohead, MUSE, Arctic Monkeys, The Rumble Strips, The Cribs, Klaxxons, The Wombats, Streets, The Hoosiers, Mystery Jets, Mumm-ra, The Holloways
- Tele: The Mighty Boosh, Doctor Who, Never Mind the Buzzcocks, QI, The IT Crowd, Life on Mars, Off the Hook, BBC's Robin Hood
- Comedians: Simon Pegg, Lee Mack, David O'Doherty, Bill Bailey, Phil Jupitus, Jon Richardson
- Mini-series: Shakespeare Re-told, Gormenghast
- Radio: BBC Radio 1 (especially DEV in the morning!)

Thursday, March 18, 2010

What's for Dinner??

While sitting back and catching up on past Gintama episodes, I was suddenly reminded that our family hot-pot machine had not been put to use lately. So, with this in mind I decided that it was time to rummage through the basement, wipe the dust of the hot-pot box and come up with a delicious meal-idea for dinner that night.

In the anime, the characters were eating sukiyaki... being that I'm living off of a student's salary I decided to forgo the expensive meat and opted for something cheaper (although still tasty and still traditionally Japanese). Can you guess what it is??? Here are pictures of the ingredients I used... I'll end the post by showing you the final product, and including a recipe.

Clockwise from top-left corner: chikuwa, firm tofu, beef tendon balls, bonito flakes and sukombu.


Suey Choy, Konjak Board, more tofu and enoki mushrooms


Konjak Board cut into triangles, sukombu (soaked and knotted)

Assorted fish-cakes, fish-balls, beef-balls, tofu and imitation crab.

Kamaboko (Japanese fish-cake)

And to be somewhat healthy, some veggies: carrots, green onions, bok choy and satoimo

Kabocha Squash... mmmm


Daikon

Enoki bundles

I also included some other ingredients, but didn't take photos of them because I'm sure you know what cubed potatoes, hard-boiled eggs and skewered chicken look like. So, have you kind of guessed what the meal was supposed to be from the various ingredients I listed?? Hmm... what other hints can I give? Well, it's a Japanese winter-dish that consists of the above ingredients, all simmered in a kelp-bonito flake broth for hours and sometimes even days. When served at vendor stalls or in oden restaurants, the fishcakes, veggies etc. are often served on skewers. The dish can be served with Karashi (Japanese hot-mustard) to dip.

It's ODEN!

The dish was fairly simple to make. Once the broth was prepared, all I had to do was add in the flavoring ingredients, allow the soup to simmer and then add in the "absorptive" ingredients and serve. Anyways, here's the recipe I used for my Oden Broth.

Oden Broth

- 10 cups dashi stock (see recipe below)
- 2 tbsp sake
- 3 tbsp mirin (or substitute 1.5 tbsp sugar)
- 1.5 tsp light soy sauce
- 1.5 tbsp dark soy sauce

Method:
1. In a wide and shallow pot, combine the broth ingredients and bring to a boil over high-heat. Then, adjust to maintain a low simmer.
2. Add in the flavoring ingredients (fish cakes, kelp knots, meat skewers) and the ingredients that take a fairly long time to cook (satoimo, daikon, potatoes and carrots etc.). Simmer for 20minutes or more.
3. Add in the "absorptive" ingredients (par-boiled kabocha, tofu, konjak, hard-boiled eggs etc.) Simmer for 10 minutes or more. Add more broth as necessary, and adjust to taste by adding more soy sauce or more sugar as needed.
4. Transfer the hot soup and some of the pot-ingredients to the communal hot-pot at the dinner table. Keep hot-pot machine on to maintain a constant low simmer.
5. Provide fresh vegetables on a serving plate at the table. Ensure that everyone at the table has their own serving utensils, bowls, plates and dishes of condiments (i.e. karashi mustard). Have communal cooking utensils (i.e. serving chopsticks and soup ladle) at the table.
6. Everyone helps themselves to the skewers of fish-cakes, tofu, vegetables and meat. As the pot clears, more ingredients from the cooking pot can be added to the hot-pot dish, or the fresh vegetables can be cooked in the hot-pot broth.
7. Serve the oden by itself, with steamed rice, salad, soba, onigiri... basically whatever you would like to complete your meal :)

Dashi Stock

Ingredients:
- 10 cups water
- 12 square inches of kombu (preserved kelp)
- 1 1/2 cups (12g) bonito flakes (dried, shaved, fish flakes)

Method:
1. Soak the kombu in the water in the large-shallow pot that you will use for cooking the oden over stove-top. Soak for 10minutes, or longer depending on personal taste.
2. Bring the kombu and water to a boil, lowering heat once bubbles begin to break the surface. Use tongs to remove the kombu, and turn off the heat.
3. Add in the bonito flakes and allow to sit for 3 minutes.
4. Strain stock through a cloth-lines sieve and place the stock back into the large pot, over medium-high heat. Use this to make your oden broth.


I served the meal with onigiri. Some were plain and some were mixed with furikake... I find this an easy, tasty and no-fuss way to serve rice.

Tuesday, March 09, 2010

Irish Soda Bread


Well, St. Patrick's day is approaching and my dad decided that for dinner last night he'd whip up an amazingly delicious beef and vegetable stew. However, I was kind of tired of eating rice and stew so I searched the internet looking for a tasty alternative to the boring, white flecks of grain :P In my search I stumbled across Irish Soda Bread... and it peaked my interest, as I love baking and have always loved simple recipes that don't call for a lot of ingredients or a lot of prep time. I found a couple recipes out there, some that used eggs and some that used raisins and currants. I didn't want to stick raisins in the bread as I felt that it wouldn't accompany the stew very nicely, and I didn't want to use eggs because... I only had a couple left (and I kind of like my scrambled egg breakfasts... selfish me o_O). So, I modified and mashed together a couple recipes and ended up with this delightful raisin-less, egg-less version.

Irish Soda Bread
Yields 1 small loaf, 6 small scone-sized servings

Ingredients:
- 1 cup flour
- 3/8 tsp baking soda
- 1/4 tsp baking powder
- 1/4 tsp salt
- 2 tbsp sugar
- 1.5 tbsp butter, cold and cubed
- 1/2 cup buttermilk

Method
1. Mix together the first 5 ingredients.
2. Crumble in the butter, as if making short-crust pastry or biscuits
3. Slowly add in the buttermilk, stirring with a spoon (to prevent your body heat from softening the butter), until the dough comes together.
4. Shape dough into a round and flatten slightly.
5. Place on a greased baking sheet and bake at 350degrees for 15minutes. Open oven and use a spray bottle to spray 4-5 squirts of water around the oven (you can spray the bread too, this creates steam and gives the bread a crusty exterior).
6. Close the oven door, increase to 375degrees and bake for another 15-20minutes, or until the inside is cooked and the outside is nice and crusty-golden.
7. Remove from baking sheet and slice into 6 wedges. Serve warm

This was a tasty accompaniment to the hearty stew, and the bread had a slightly sweet and salty flavor to it. The bread was pretty tasty on its own, and I actually ended up eating the majority of the bread on its own, only using it to swipe the last bits of stew out of my bowl. The good thing about this recipe is that it can really be varied to become a savory or a sweet biscuit. Maybe I'll use those raisins next time, or maybe I'll throw in some sharp cheddar cheese and herbs? Who knows?? Whatever I do, I'm sure it will be delicious.

Sunday, March 07, 2010

Coconut Mascarpone Cookie


I wanted to whip up a quick batch of cookies for a little hang-out with my friends, but rummaging through the fridge I realized that I didn't have any BUTTER!! WHA!! I'm not a huge fan of cookies using olive oil as a butter substitute. I find that such strong oils leave a lingering taste in your mouth after you eat those cookie, and it often overpowers the flavorings you add to the cookies. After pondering about what to do, and taking another look at what I had in the fridge, I spotted 1/2 a tub of mascarpone cheese! Whew... thank goodness I had bought this stuff, otherwise I'd have to resort to using those mini-packets of butter/margarine you get from fast-food places for breakfast (yes, my Asian inclination towards non-wastage means that I have an ice cream tub in my fridge dedicated to un-used condiment packages :P). Anywho, with my mascarpone cheese in hand, I set forth in coming up with a tasty cookie recipe from scratch!

Coconut Mascarpone Cookies

Yields 35 cookies

Ingredients:
- 1/2 cup granulated sugar
- 1/2 cup brown sugar
- 2/3 cup mascarpone cheese
- 2 egg whites
- 2 tsp coconut rum, +/- enough to keep the dough from being too crumbly
- 2 cups flour
- 1/2 tsp salt
- 1/2 tsp baking soda
- 1/2 cup desiccated coconut

Method:
1. In a large bowl, cream together the sugars, mascarpone cheese, egg whites and rum.
2. In a small bowl mix together flour, salt and baking soda
3. Add the dry ingredients to the wet ingredients and stir until combined (adding more rum if necessary to keep the dough from being too crumbly)
4. Add in coconut, stirring until just combined
5. Use a tablespoon to make portions of dough. Hand-roll the dough portions into spheres and place onto a parchment-lined baking sheet. Use a fork to gently press down the cookies (like you do for peanut butter cookies).
6. Bake at 375 degrees for 8 minutes, cool on cooling rack. Enjoy!

These cookies are almost like miniature scones in texture. They're more flaky than chewy or cake-y. I really enjoyed them as they were very tender and not too greasy (like cookies that use a lot of butter). The mascarpone gave the cookies a very rich flavor, and the coconut + coconut rum gave the cookies just enough of a kick that no other flavorings were really necessary (i.e. vanilla, almond etc.) It just goes to show you how creative you can be when you have to bake something without the conventional ingredients in your kitchen... that being said, I think I'll drop by the store and buy some more butter ^-^

Sunday, February 28, 2010

Lor Bak Go (Radish Cake) & Chicken Bao

Normally, Sunday mornings are a time when my family likes to go out and eat dim sum. But, since my parents are still on vacation and my sisters and I didn't want to miss the Olympic Men's Hockey Gold-medal Game, we decided to make dim sum at home! I had some zongzi in the freezer from Chinese New Year, so we steamed up a couple of those as well as some gai lan. But, we wanted to round out the meal with at least 2 other dim sum dishes. So, we chose Lor Bak Go and Steamed Chicken Buns.
Lor Bak Go

Ingredients:
- 2 cups rice flour
- 1/4 cup tapioca starch
- 1 tsp salt, or to taste
- 2 links of lap cheong (Chinese sausage), diced
- 3 cups daikon, grated
- 1/2 small onion, minced
- 2-3 garlic cloves, minced
- vegetable oil

Method:
1. Combine rice flour, tapioca starch and salt in a large bowl.
2. Boil the daikon in a heavy-bottomed pot for 10minutes. Drain, but reserve the cooking liquid. Set the liquid and cooked daikon aside
3. Heat some oil in a frying pan and cook the lap cheong, garlic and onions for 2 minutes. Set aside. (You do not need to wash the frying pan yet! You will use it to pan-fry the lor bak go)
4. Add the daikon to the flour mixture and slowly add in 3 cups of the cooking liquid. Mix until no dry clumps are visible.
5. Add the lap cheong mixture to the batter and continue to mix.
6. Pour the batter into a greased, steam-proof 8x8inch square, or 9inch round, tray. Steam for 45minutes. When finished cooking, let lor bak go cool completely.
7. Remove the lor bak go from the steaming tray and slice it into 1/2-inch slices.
8. Heat up the frying pan again to medium-high heat, adding more oil if necessary. Pan fry the lor bak go slices until crispy and golden brown on both sides.

This dish has got to be my sisters' most favorite dish at yum cha. We always order 2-3 servings of it when we go to dim sum. The final result of this recipe was gladly gobbled up by my Lor Bak Go loving sisters and they said that they could hardly tell the difference between mine and the ones we eat at the restaurant! *blush* They're so sweet...

But now, onto the chicken buns! My middle sister loves these, even more so than Char Siew Bao. Actually, she told me that she dislikes Char Siew because of the fatty, flubby and tendon-ness of the meat... too hard to chew, she says. So, with this in mind I decided to use a really nice chicken breast for the filling of the buns. The chicken breast had no flubby skin and no tendons or cartilage pieces, so there would be no risk of my sister getting picky about the meat... YAY!

Chicken Bao

Dough Ingredients:
- 2 cups flour
- 1.5 tsp baking powder
- 1/4 cup sugar
- 1/2 tsp salt
- 1 tbsp margarine
- 3/8 cup water
- 1/2 tbsp vinegar
- 1 egg white

Filling Ingredients:
- 250g chicken breast, minced
- 2 garlic cloves, minced
- 1/2 small onion, minced
- 1inch knob of garlic, minced
- 1 tsp soy sauce
- salt and pepper to taste

Method:
  • Combine flour, sugar, salt and baking soda in a large bowl. Blend in the margarine, until they are well incorporated.

  • In a separate bowl, mix together the vinegar, water and egg white.

  • Add water mixture to flour mixture, knead until dough comes together and is smooth.

  • Roll the smooth dough into a thick log shape, roughly 1.5 inches in diameter.

  • Cover dough in cling-wrap and let rest in fridge for at least 1 hour.

  • Make the filling: mince the chicken breast, garlic and onions and combine. Add in soy sauce and salt + pepper to taste.

  • When dough has rested, remove from cling-wrap and cut log into 10 equal sized pieces.

  • Roll dough into flattened circles, fill with 2 tbsp of chicken filling and shape the buns.

  • Prepare a steaming plate by laying cabbage leaves on it. Arrange the chicken buns on the cabbage leaves and steam the buns for 30minutes.

  • Enjoy!
  • 1. Combine flour, sugar, salt and baking soda in a large bowl. Blend in the margarine, until well incorporated.
    2. In a separate bowl, mix together the vinegar, water and egg white.
    3. Add water mixture to flour mixture, knead until dough comes together and is smooth.
    4. Roll the smooth dough into a thick log shape, roughly 1.5 inches in diameter.
    5. Cover dough in cling-wrap and let rest in fridge for at least 1 hour.
    6. Make the filling by mixing together the minced chicken, garlic, ginger and onions. Then, add in soy sauce and salt & pepper to taste.
    7. When dough has rested, remove from cling-wrap and cut log into 10 equal sized pieces.
    8. Roll dough into flattened circles, and fill with 2 tbsp of filling. Shape the buns.
    9. Prepare a steam-proof plate by laying cabbage leaves on it. Arrange the chicken buns on the cabbage leaves and steam the buns for 30-40minutes.
    10. Serve!

    The buns were also a success! Even my youngest sister, who normally hates to eat bao bao enjoyed these buns and devoured TWO! Now, that's saying something. I quite enjoyed the buns as well. I liked the recipe because the dough was fairly simple to make, and didn't require yeast or raising time. Without the yeast to make the dough fluffy, the texture of this bao was more like a tasty noodle or a giant xiaolong bao. I will definitely have to bake this recipe again, for my parents... because I don't think there will be any left by the time they come back :P

  • Combine flour, sugar, salt and baking soda in a large bowl. Blend in the margarine, until they are well incorporated.

  • In a separate bowl, mix together the vinegar, water and egg white.

  • Add water mixture to flour mixture, knead until dough comes together and is smooth.

  • Roll the smooth dough into a thick log shape, roughly 1.5 inches in diameter.

  • Cover dough in cling-wrap and let rest in fridge for at least 1 hour.

  • Make the filling: mince the chicken breast, garlic and onions and combine. Add in soy sauce and salt + pepper to taste.

  • When dough has rested, remove from cling-wrap and cut log into 10 equal sized pieces.

  • Roll dough into flattened circles, fill with 2 tbsp of chicken filling and shape the buns.

  • Prepare a steaming plate by laying cabbage leaves on it. Arrange the chicken buns on the cabbage leaves and steam the buns for 30minutes.

  • Enjoy!
  • Mmm... the delicious bao. Hehehe... look at the mini one (on the right) I made with the leftover scraps :P it looks so gibbled

    Friday, February 26, 2010

    Daring Bakers February '10: Tiramisu

    Yay! I know I've been slacking off as of late... blame it on school, my up-coming nursing preceptorship, the fact that my parents are on a week-long cruise in the Caribbean (leaving me to legal-guardian to my two younger sisters) and a silly little thing called the Olympics. My time has just been getting eaten up!! But, thankfully I was able to complete this month's Daring Baker's Challenge.

    The February 2010 Daring Bakers’ challenge was hosted by Aparna of My Diverse Kitchen and Deeba of Passionate About Baking. They chose Tiramisu as the challenge for the month. Their challenge recipe is based on recipes from The Washington Post, Cordon Bleu at Home and Baking Obsession.

    I wasn't too sure if I would actually get this challenge done at all! Since I had already had experience making tiramisu, I wasn't completely motivated to finish it... but, thanks to my sisters and their enthusiasm about my baking I forged ahead and even asked them to help me do some baking! Thank goodness for the motivation from my sisters, I actually found that making this tiramisu was relaxing and a good way to de-stress. I really enjoyed baking with my sisters, it was so much fun... and although I did micro-manage them a bit, we still had fun and I let them goof off from time to time.

    Tiramisu

    Recipe yields 6 servings

    Ingredients:
    For the zabaglione:
    - 2 large egg yolks
    - 3 tbsp sugar/50gms
    - 1/4 cup/60ml Marsala wine (or port or coffee)
    - 1/4 tsp/1.25ml vanilla extract
    - 1/2 tsp finely grated lemon zest

    For the vanilla pastry cream:
    - 1/4 cup/55gms sugar
    - 1 tbsp/8gms all purpose flour
    - 1/2 tsp finely grated lemon zest
    - 1/2 tsp/2.5ml vanilla extract
    - 1 large egg yolk
    - 3/4 cup/175ml whole milk

    For the whipped cream:
    - 1 cup/235ml chilled heavy cream (we used 25%)
    - 1/4 cup/55gms sugar
    - 1/2 tsp/2.5ml vanilla extract

    To assemble the tiramisu:
    - 2 cups/470ml brewed espresso, warmed
    - 1 tsp/5ml rum extract (optional)
    - 1/2 cup/110gms sugar
    - 1/3 cup/75gms mascarpone cheese (recipe below)
    - 36 savoiardi/ ladyfinger biscuits (you may use less)
    - 2 tbsp/30gms unsweetened cocoa powder

    Method:
    For the zabaglione:
    1. Heat water in a double boiler. If you don’t have a double boiler, place a pot with about an inch of water in it on the stove. Place a heat-proof bowl in the pot making sure the bottom does not touch the water.
    2. In a large mixing bowl (or stainless steel mixing bowl), mix together the egg yolks, sugar, the Marsala (or espresso/ coffee), vanilla extract and lemon zest. Whisk together until the yolks are fully blended and the mixture looks smooth.
    3. Transfer the mixture to the top of a double boiler or place your bowl over the pan/ pot with simmering water. Cook the egg mixture over low heat, stirring constantly, for about 8 minutes or until it resembles thick custard. It may bubble a bit as it reaches that consistency.
    Let cool to room temperature and transfer the zabaglione to a bowl. Cover and refrigerate at least 4 hours or overnight, until thoroughly chilled.

    For the pastry cream:
    1. Mix together the sugar, flour, lemon zest and vanilla extract in a medium heavy-bottomed saucepan. To this add the egg yolk and half the milk. Whisk until smooth.
    2. Now place the saucepan over low heat and cook, stirring constantly to prevent the mixture from curdling.
    3. Add the remaining milk a little at a time, still stirring constantly. After about 12 minutes the mixture will be thick, free of lumps and beginning to bubble. (If you have a few lumps, don’t worry. You can push the cream through a fine-mesh strainer.)
    4. Transfer the pastry cream to a bowl and cool to room temperature. Cover with plastic film and refrigerate at least 4 hours or overnight, until thoroughly chilled.

    For the whipped cream:
    1. Combine the cream, sugar and vanilla extract in a mixing bowl. Beat with an electric hand mixer or immersion blender until the mixture holds stiff peaks. Set aside.

    Prepare to Assemble:
    1. Have ready a rectangular serving dish (about 8" by 8" should do) or one of your choice.
    2. Mix together the warm espresso, rum extract and sugar in a shallow dish, whisking to mix well. Set aside to cool.
    3. In a large bowl, beat the mascarpone cheese with a spoon to break down the lumps and make it smooth. This will make it easier to fold. Add the prepared and chilled zabaglione and pastry cream, blending until just combined. Gently fold in the whipped cream. Set this cream mixture aside.

    Assembling the Tiramisu:
    1. Working quickly, dip 12 of the ladyfingers (recipe below) in the sweetened espresso, about 1 second per side. They should be moist but not soggy. Immediately transfer each ladyfinger to the platter, placing them side by side in a single row. You may break a lady finger into two, if necessary, to ensure the base of your dish is completely covered.
    2. Spoon one-third of the cream mixture on top of the ladyfingers, then use a rubber spatula or spreading knife to cover the top evenly, all the way to the edges.
    3. Repeat to create 2 more layers, using 12 ladyfingers and the cream mixture for each layer. Clean any spilled cream mixture; cover carefully with plastic wrap and refrigerate the tiramisu overnight.
    4. To serve, carefully remove the plastic wrap and sprinkle the tiramisu with cocoa powder using a fine-mesh strainer or decorate as you please. Cut into individual portions and serve.

    Mmmm... coffee flavored zabaglione

    The creme anglais... also delicious

    Mascarpone Cheese

    Recipe yields 12oz (340g) of mascarpone cheese

    Ingredients:
    - 474ml (2 cups) whipping (36 %) pasteurized, preferably organic cream (between 25%-36%)
    - 1 tbsp fresh lemon juice

    Method:

    1. Bring 1 inch of water to a boil in a wide skillet. Reduce the heat to medium-low so the water is barely simmering. Pour the cream into a medium heat-resistant bowl, then place the bowl into the skillet. Heat the cream, stirring often, to 190 F. If you do not have a thermometer, wait until small bubbles keep trying to push up to the surface.

    2. It will take about 15 minutes of delicate heating. Add the lemon juice and continue heating the mixture, stirring gently, until the cream curdles. Do not expect the same action as you see during ricotta cheese making. All that the whipping cream will do is become thicker, like a well-done crème anglaise. It will cover a back of your wooden spoon thickly. You will see just a few clear whey streaks when you stir.

    2. Remove the bowl from the water and let cool for about 20 minutes. Meanwhile, line a sieve with four layers of dampened cheesecloth and set it over a bowl.

    3. Transfer the mixture into the lined sieve. Do not squeeze the cheese in the cheesecloth or press on its surface (be patient, it will firm up after refrigeration time). Once cooled completely, cover with plastic wrap and refrigerate (in the sieve) overnight or up to 24 hours.
    4. Keep refrigerated and use within 3 to 4 days.

    Ladyfingers

    Recipe yields ~24 big or 45 small (2 1/2" to 3" long) ladyfingers

    Ingredients:
    - 3 eggs, separated
    - 6 tbsp/75gms granulated sugar
    - 3/4 cup/95gms cake flour, sifted (or 3/4 cup all purpose flour + 2 tbsp corn starch)
    - 6 tbsp /50gms confectioner's sugar,

    Method:

    1. Preheat your oven to 350 F (175 C) degrees, then lightly brush 2 baking sheets with oil or softened butter and line with parchment paper.
    2. Beat the egg whites using a hand held electric mixer until stiff peaks form. Gradually add granulate sugar and continue beating until the egg whites become stiff again, glossy and smooth.
    3. In a small bowl, beat the egg yolks lightly with a fork and fold them into the meringue, using a wooden spoon. Sift the flour over this mixture and fold gently until just mixed. It is important to fold very gently and not overdo the folding. Otherwise the batter would deflate and lose volume resulting in ladyfingers which are flat and not spongy.
    4. Fit a pastry bag with a plain tip (or just snip the end off; you could also use a Ziploc bag) and fill with the batter. Pipe the batter into 5" long and 3/4" wide strips leaving about 1" space in between the strips.
    5. Sprinkle half the confectioner's sugar over the ladyfingers and wait for 5 minutes. The sugar will pearl or look wet and glisten. Now sprinkle the remaining sugar. This helps to give the ladyfingers their characteristic crispness.
    6. Hold the parchment paper in place with your thumb and lift one side of the baking sheet and gently tap it on the work surface to remove excess sprinkled sugar.
    7. Bake the ladyfingers for 10 minutes, then rotate the sheets and bake for another 5 minutes or so until the puff up, turn lightly golden brown and are still soft.
    8. Allow them to cool slightly on the sheets for about 5 minutes and then remove the ladyfingers from the baking sheet with a metal spatula while still hot, and cool on a rack.
    9. Store them in an airtight container till required. They should keep for 2 to 3 weeks.

    The light, fluffy and spongy batter

    My sister wanted to make a heart :)

    Being goofy and making a funny hand

    Classically shaped Tiramisu (done in an 8x8inch pan)


    Fancy shaped Tiramisu (done in a round springform pan)

    The Tiramisu was quite fun to make. Piping the cookies, dunking them in coffee, layering the cream and dusting with the dessert with cocoa powder... all that culminating in a deliciously sweet treat for my sisters and I to enjoy. The Tiramisu was so rich with coffee flavor, and even my youngest sister (who's not a big fan of coffee) loved it. The mascarpone was pretty easy to make and gave the dessert a very unique flavor. Very rich and creamy, but not overpowering the aromatic coffee flavor. It's too bad my parents are away on a cruise in the Caribbean right now, because I know they'd love this dessert :( But, I'm sure I'll make it for them again sometime... and I'm sure they have plenty of sweet treats for them on the cruise!

    Tuesday, February 23, 2010

    Go Canada Go!


    In preparation for the big Canada vs. Germany Olympic hockey game today I thought it would be nice to make a cake! I was trying to figure out what kind of cake would be perfect to showcase my Canadian pride, and I settled for red velvet. The red cake and luscious white frosting seemed like a perfect combination of flavors and colors for the event. I used the cake recipe from: Joy of Baking and I made my own frosting (see recipe below).

    White Frosting

    Ingredients:
    - 1 cup confectioner's sugar
    - 1 cup sour cream
    - 1/8 cup cream cheese
    - 1 1/2 tbsp coconut rum
    - 1 cup mascarpone cheese

    Method:
    1. Combine the cream cheese and the sugar. Mix until all the confectioner's sugar is no longer powdery but moistened by cheese
    2. Add in the sour cream, and continue to mix until lumps dissolve
    3. Add in the rum, mixing until well incorporated
    4. Add in the mascarpone cheese, combining well
    5. Use to frost your cake

    The cake didn't turn out as deep-red as I would have liked, and I think there was some strange reaction that the cake had to the parchment paper that I had lined my baking pan with. For some reason, the parts of the cake which touched the parchment paper turned slightly brown in color. This didn't really impact the look that I was going for with my cake, as it kind of gave a "red & white" look to the cake itself... which was unexpected, but it looked kind of cool.

    I baked my cake in a 9 x 13-inch cake pan and then divided it into 3 sections, length-wise. Once the cake cooled, I placed the pieces in the freezer for ~1hour to make slicing and frosting them easier. I then removed the cakes from the freezer and proceeded to divide each cake-piece into 2 layers.

    I frosted the cake between each layer and then covered the entire cake with the rich frosting. I then decorated the cake with the Canadian hockey team logo made out of chocolate and used red-tinted coconut flakes to make the cake resemble the Canadian flag. This was a lot of fun! I sure hope my friends like the cake... and that Canada makes it on to the quarter finals tomorrow.

    Monday, February 22, 2010

    Olympic Fever 2010


    Yay! I know it's been a while, but that's just because I've been busy finishing up my final semester of nursing school! I can't believe I'm graduating on April 30th! It seems like only yesterday I entered university with wide-eyes and a belief that school would never end.

    Also, I've been enjoying the crazy Vancouver Olympic festivities that are all around me! Living around the area, it's hard not to fall prey to the Olympic buzz and when you immerse yourself in the crowd, you can't help but get just a little bit excited. I had actually purchased a pair of tickets to the Olympics to watch my favorite winter sport... no, not hockey... CURLING! I seriously love that game... it's a blast to watch on TV and I was ready to take the next step and watch it in person. I've been counting down the days to watch the Olympic game with my dad, and enjoy downtown Vancouver.The event was held at the Vancouver Olympic Center, and it was great! There were 3 games going on at the same time... Great Britain vs. Sweden; Russia vs. Denmark; and China vs. Switzerland! It was hard to watch all at the same time, so I mostly focused on China's game. It was so energizing to hear the crowd go wild over curling. I thought that I was the only one who was enthusiastic about this game (because whenever I talk to my friends about it, they just don't understand why I'm so in love with the sport) but to be in a crowd full of people cheering on the skip and sweepers... I felt at home! These people understood the love of the game! In the end China beat Switzerland 8-6! It was a nail-biter, but I knew China would pull it off.


    After the game, I hung out downtown with my pop to watch the Olympic flame in the cauldron roar away. There were also booths around Robson for taking pictures with the Olympic torch, so we did that too. I would have liked to try the free zip-line, but the line-up was ~6hours long! Oh well, there were better things to do with my time than line up for a chance to zoom across the sky held by a rope. My dad and I really enjoyed the downtown atmosphere and the amazing lights and such... so, we decided to head back downtown the next day and bring along my sisters and mom. We walked around Robson and did a little window shopping (Olympic souvenirs are quite pricey); then we headed back to the Olympic cauldron. We took a different route to get to the torch... and it's a good thing we did, otherwise I wouldn't have seen the most awesome shrub ever!

    The most amazing shrub... I just had to take a photo.

    I sure hope the Canadian-pride and communal spirit that I saw downtown continues on even after the Olympics. It was a great, once-in-a-lifetime experience and I'll never forget it.


    Wednesday, January 27, 2010

    Daring Bakers Challenge: Nanaimo Bars


    Hehehe... my delicious, yet drippy Nanaimo bars!

    The January 2010 Daring Bakers’ challenge was hosted by Lauren of Celiac Teen. Lauren chose Gluten-Free Graham Wafers and Nanaimo Bars as the challenge for the month. The sources she based her recipe on are 101 Cookbooks and www.nanaimo.ca.

    Eeeee! I epically failed in this month's challenge, and I'm Canadian... way to go :( I did not represent *sigh*. But to tell you the truth, this was actually the first time I'd ever attempted to make Nanaimo bars... ever! The graham cracker recipe went swimmingly, and the cookies/crackers turned out so delicious. And when it came to making the bottom layer of the bars, everything was going according to plan. The epic fail came when I attempted to make a different version of the middle layer of the bar... and ended up with a non-setting, gooey mess. I think I realize where I went wrong, I could have either reduced the amount of liquid or add more confectioner's sugar (sadly, I'd already added the liquid and I had run out of sugar!). Anyways, here's the recipe...


    For Gluten-Free Graham Wafers


    Ingredients
    1 cup (138 g) (4.9 ounces) Sweet rice flour (also known as glutinous rice flour)
    3/4 cup (100 g) (3.5 ounces) Tapioca Starch/Flour
    1/2 cup (65 g) (2.3 ounces) Sorghum Flour
    1 cup (200 g) (7.1 ounces) Dark Brown Sugar, Lightly packed
    1 teaspoon (5 mL) Baking soda
    3/4 teaspoon (4 mL ) Kosher Salt
    7 tablespoons (100 g) (3 ½ ounces) Unsalted Butter (Cut into 1-inch cubes and frozen)
    1/3 cup (80 mL) Honey, Mild-flavoured such as clover.
    5 tablespoons (75 mL) Whole Milk
    2 tablespoons (30 mL) Pure Vanilla Extract


    Directions:
    1. In the bowl of a food processor fitted with a steel blade, combine the flours, brown sugar, baking soda, and salt. Pulse on low to incorporate. Add the butter and pulse on and off, until the mixture is the consistency of a coarse meal. If making by hand, combine aforementioned dry ingredients with a whisk, then cut in butter until you have a coarse meal. No chunks of butter should be visible.
    2. In a small bowl or liquid measuring cup, whisk together the honey, milk and vanilla. Add to the flour mixture until the dough barely comes together. It will be very soft and sticky.
    3. Turn the dough onto a surface well-floured with sweet rice flour and pat the dough into a rectangle about 1 inch thick. Wrap in plastic and chill until firm, about 2 hours, or overnight.
    4. Divide the dough in half and return one half to the refrigerator. Sift an even layer of sweet rice flour onto the work surface and roll the dough into a long rectangle, about 1/8 inch thick. The dough will be quite sticky, so flour as necessary. Cut into 4 by 4 inch squares. Gather the scraps together and set aside. Place wafers on one or two parchment-lined baking sheets. Chill until firm, about 30 to 45 minutes. Repeat with the second batch of dough.
    5. Adjust the rack to the upper and lower positions and preheat oven to 350 degrees Fahrenheit (180 degrees Celsius).
    6. Gather the scraps together into a ball, chill until firm, and reroll. Dust the surface with more sweet rice flour and roll out the dough to get a couple more wafers.
    7. Prick the wafers with toothpick or fork, not all the way through, in two or more rows.
    8. Bake for 25 minutes, until browned and slightly firm to the touch, rotating sheets halfway through to ensure even baking. Might take less, and the starting location of each sheet may determine its required time. The ones that started on the bottom browned faster.
    9. When cooled completely, place enough wafers in food processor to make 1 ¼ cups (300 mL) of crumbs. Another way to do this is to place in a large ziplock bag, force all air out and smash with a rolling pin until wafers are crumbs.


    Nanaimo Bars

    Ingredients:


    Bottom Layer:
    1/2 cup (115 g) (4 ounces) Unsalted Butter
    1/4 cup (50 g) (1.8 ounces) Granulated Sugar
    5 tablespoons (75 mL) Unsweetened Cocoa
    1 Large Egg, Beaten
    1 1/4 cups (300 mL) (160 g) (5.6 ounces) Gluten Free Graham Wafer Crumbs (See previous recipe)
    1/2 cup (55 g) (1.9 ounces) Almonds (Any type, Finely chopped)
    1 cup (130 g) (4.5 ounces) Coconut (Shredded, sweetened or unsweetened)


    Middle Layer:
    1/2 cup (115 g) (4 ounces) Unsalted Butter
    2 tablespoons and 2 teaspoons (40 mL) Heavy Cream
    2 tablespoons (30 mL) Vanilla Custard Powder (Such as Bird’s. Vanilla pudding mix may be substituted.)
    2 cups (254 g) (8.9 ounces) Icing Sugar


    Top Layer:
    4 ounces (115 g) Semi-sweet chocolate
    2 tablespoons (28 g) (1 ounce) Unsalted Butter


    Directions:
    1. For bottom Layer: Melt unsalted butter, sugar and cocoa in top of a double boiler. Add egg and stir to cook and thicken. Remove from heat. Stir in crumbs, nuts and coconut. Press firmly into an ungreased 8x8 inch pan.
    2. For Middle Layer: Cream butter, cream, custard powder, and icing sugar together well. Beat until light in colour. Spread over bottom layer.
    3. For Top Layer: Melt chocolate and unsalted butter over low heat. Cool. Once cool, pour over middle layer and chill.


    For my middle layer, I simply added some seedless raspberry syrup to the mix (roughly 1/4 cup). I think that this addition of liquid should have been balanced by minimizing the amount of cream added to the mix. However, I don't think my thinking cap was on straight as the smell of chocolate and cookies was too distracting :P Oh well, the challenge was fun and the dish was delicious... although appearing strange and loppy, it was chock full of chocolate-y, raspberry goodness.

    Wednesday, January 20, 2010

    Wheat-stalk Shaped Bread


    I've always loved attempting to make something that I'd never tried before, and shaping bread simply reminds me of playing with play-doh in pre-school! It's so therapeutic and relaxing, and you can eat the end-product :P So, for dinner yesterday I decided to bake up a loaf of bread using my favorite dinner-roll recipe and slathering on an herbed egg-wash just to give it an extra little kick.

    Dinner Roll Recipe

    Ingredients:
    - 1/4 cup milk
    - 1/4 cup water
    - 1 large eggs
    - 1/4 cup sugar
    - 2 tbsp butter or margarine
    - 1/2 tsp salt
    - 2 1/2 cups bread flour
    - 2 1/4 tsp active dry yeast

    Egg wash Ingredients:
    - 1 egg
    - 2 cloves of garlic, minced
    - 1 tsp each: dried thyme, rosemary and parsley

    Method:
    1. Place ingredients into bread machine in order listed.
    2. Set the machine on the "dough" setting and press start.
    3. Once complete, remove the dough from machine. Cover with a large bowl and let rest for 10 minutes.
    4. On a floured surface, shape the dough into the "wheat-stalk". This is done by working the dough into a long, thin baguette shape and then taking a pair of sharp scissors to into the dough at 45degree angles roughly 1.5-2 inches apart (making sure not to slice through the dough).
    5. Push the consecutive sections of dough in opposite directions; i.e. one piece goes left and the next piece goes to the right.
    6. Place shaped dough on a baking sheet that is covered in a single-layer of cornmeal (to prevent the bread from sticking). Cover and let rise for 30-45minutes.


    7. Prepare eggwash by beating all the ingredients together. Once bread is risen, coat liberally with egg wash.


    8. Prepare oven by placing 1 cup of water in a broiler-pan on the lower-rack. Place loaf on the middle-rack of the oven and bake at 350degrees for 30 minutes. Serve warm.

    I really enjoyed the taste of this mildly sweet bread. The outside was a little less "crunchy" than I would have liked, but other than that it was a very nice way to serve dinner rolls. The bread was nice and fluffy and almost didn't need any butter because of the wonderful flavor that the herbed egg wash imparted. The wheat-stalk shape was really fun to make, and gave off the impression that it would have taken a lot of effort to prepare. It's a great way to impress when wanting to show off your culinary skills.