Saturday, March 24, 2007

Red Bean Ice Cream

Getting back into the cooking groove... Woot! Well, it's not exactly my most challenging piece, but I love this ice cream. It's simple and delicious. I basically just make my red bean paste (using the recipe from About.com) and once that cools I add it to a regular old tub of vanilla ice cream. See, so simple! Sure your arm may get a little sore from mixing, but it's totally worth it to taste the finished product.

Yum Cha Dessert

Since my family came home from California I decided to treat them to some good old home cooking. They have been telling me how sick of MICKEY D's they are and how the chinese food in the states is pathetic. You have got to hear this story my mother told me. Here goes, my family stopped of in Oregon along the way to Disneyland and decided to eat at some chinese restaurant. They wanted some chow mein, so that's what they asked their waitress for. When the dish came out is was mostly bean sprouts with a handful of those deep fried "crunchy" chow mein noodles on top! How sad... American's do not know how to serve good asian noodles. This could explain why my family insisted that we go out to Hon's for lunch the day after they returned from their trip.
Seeing how deprived of good quality chinese food my family was, I decided to make some baked sago pudding. I've been searching for this recipe for ever, and finally found it at Grab Your Fork. I decided to half the recipe (as I could see from the recipe it would make quite a bit), and it still made lots of pudding. It was delicious, especially since I layered the bottom of the ramekins with red bean paste (just like the one's at yum cha). And my family was very appreciative.

Monday, March 19, 2007

I'm back!

I know I haven't been blogging for a little while, but I've been busy with school and everything that that entails. Plus, my family is on vacation and I have no one to cook for! Do you know how inconvenient it is too bake for 1... quite. Well, the other day I made Jook and decided that I was going to save gas by making my own Yar Char Kway. It actually turned out pretty well. Looking at the picture, it doesn't look brown enough to be YCK; but I remember reading somewhere that if the food you're frying becomes dark brown then that means it's actually soaking up the oil. If you fry the YCK just to the point where it is cooked (and still mostly white), then that's when all the water is evaporated and just before you start soaking up the greasy stuff. It tasted just like the real thing... I was pretty impressed. I got the recipe from Playing With My Food which also has a couple other recipes for YCK, using ammonia and Alum.
The Jook
1. Just your basic 1 cup rice to 8 cups water, boiling in a pressure cooker for a long time (it more or less depending on how mushy you like the rice).
2. Add in sliced ginger and let that soak in the congee for about 1 hour (longer if you enjoy it more flavorful.
3. Add in sliced century eggs, chopped green onion, salt (or chicken stock powder) and some shredded chicken (if desired).
4. Top with white pepper, fried garlic and green onions. Easy peasy.... Oh! and don't forget to eat it with your YCK!

I can't wait until my family comes back... I've been missing them for so long... 10 whole days :(


Friday, March 09, 2007

Sniff... sniff

Well, my entire family (all four people :P) have left me to go on their Spring Break trip to Disneyland. I'm slightly depressed, seeing as how no one will be around to sample my cooking... and of course because they're going on a trip without moi! They're going to 10 days, stopping off in Ventura (not quite sure where that is) and then ending up at the "Happiest Place on Earth" for their final 3 days. Alas... but I will get to spend some quality time with my puppy and maybe we'll do some good bonding, who knows.

I didn't want them leaving me behind empty handed, so I made them some breakfast to take along with them (they driving down to the U.S. isn't that crazy?!!?). I told myself to stop cooking anymore dishes until they come back; otherwise they'll return from their vacation to a fridge full of old food... bleh! Truthfully, I don't know how well that command is going to stick. Anyways, I made them some steamed Malay cakes, otherwise known as Ma Lai Koh. As you can see, I was in the lovey-dovey mood when I was making them... I just love my family soooooo much!

I just love Florence's Blog, she has a ton of delicious malay bun recipes. You can also find alternate recipes for Ma Lai Koh at: My Zest or jodelibakery.com but I prefer Florence's, it's much simpler and I find it less oiley.
Well, I hope my family enjoys their vacation... I should be celebrating being home alone; but without my sisters, and mom and dad home just doesn't seem so homey :(

Hope you're reading this... HAVE A GREAT VACATION!

Saturday, March 03, 2007

Mom's B-day

She's one special gal... my mom. I just love my mom and everything she does for me, so I decided that this year I would whip out my cake making skills (which are very minimal) and make her a cute fondant covered, butter pecan cake. I worked so hard on making the fondant that I decided to give myself a break and used a boxed cake mix (I know... gasp). But Betty Crocker sure knows what she's doing, her Supermoist Butter Pecan Cake was wonderfully flavorful. My family really enjoyed eating the cake, and my mom really enjoyed looking at it. I decorated it with a fondant rose, fondant hearts, green dragees and chocolate lettering.
Basically, I baked two 8-inch cakes using the one box of Betty Crocker cake mix. Let them cool completely. Then I layered; and covered them with homemade, vanilla butter frosting as a crumb coat. I then rolled out the fondant I made and draped it over top of the frosted cake. Finished it off by decorating it and placing it in my cake display.

Friday, March 02, 2007

Scary Movie Night

Well, yesterday I went to a friends house and we stayed up late watching scary movies... alright, it was only one... and it was the Davinci Code. I know that it's not quite considered a scary movie, but boy am I glad we didn't watch a really freaky movie (which I actually usually enjoy) because I needed to get a good-night's sleep. The next day was my mom's b-day party after all, and I needed to get up early to prep her cake, among other things... I'll be posting that tomorrow, I hope :P

Anyways, back to the scary movie night... I decided to make some cat paw cookies. I got the idea from marthastewart.com but didn't really fancy the idea of making a sugar cookie and adding in black food coloring (YUCK!) It's so un-natural... and just plain gross. So I used my own chocolate cookie recipe and used her idea to make the cat paws.

My Version of Chocolate Cat Paw Cookies

Ingredients:
- 1/4 cup butter, softened
- 1 1/4 cup powdered sugar
- 1 large egg
- 1/2 tsp vanilla extract
- 1 1/2 cup all-purpose flour
- 1/2 cup Dutch process cocoa
- 1/8 tsp salt
- 1/4 tsp cinnamon, ground
- 1/2 cup slivered almonds

Method:
1. Beat butter until fluffy; gradually add sugar and continue to beat well. Add egg and vanilla, blend until smooth.
2. In a separate bowl, combine flour + cocoa + salt + cinnamon.
3. Add flour mixture to butter mixture, gradually (I added 1/3 cup at a time).
4. Divide dough in half.


NOTE: If you wish to work with a firmer dough, wrap each dough portion tightly in plastic wrap and chill for at least 1 hr.


5. Roll 1 portion at a time to 1/4-inch thickness on a surface dusted with cocoa powder (if dusted with flour, your cookies may have flour marks in your final presentation)
6. Cut with cookie cutters, and place on lightly greased cookie sheet.


NOTE: If you are making the cat paws, insert the slivered almonds at this time.


7. Bake at 350 F for 10 minutes; remove to cooling rack and cool completely.
8. Decorate as you wish.

Not everyone showed up to the movie; I guess they were too scared to watch the Davinci Code... sad. Those who tried the cookies said they were tastey, so I think I'll wrap up a couple and give them to the people who didn't come... wouldn't want them to miss out. The movie was good and I wasn't so scared that I couldn't get to sleep, so waking up for mom's b-day prep was not a problem.

SIDE BAR: I decided to make these on the day before the party, but I didn't have a cat paw cookie cutter. The Martha Stewart link above has a template for the cat paws, but I was not too keen on hand-cutting each cookie; especially not when a cookie cutter would save so much time. So I made my own! I was so impressed with myself... I just used a good pair of shearing scissors and cut the rim off of a butter cookie tin. Then I used a good pair of pliers to shape the paw the way I wanted. Simple, and I didn't have to spend any money on it! (that's always the best part)

Thursday, March 01, 2007

Swirled Mantou

Being given this "Independent Study Week" has not really resulted in much reading or study, sad to say. But it has given me a ton of time to prep for my mom's b-day which is coming up this Saturday! I can't wait... hopefully she doesn't read this blog and discover that I have a special treat made for her. Let's distract her from reading this with some nice pictures of my swirled breakfast mantou.


I decided to make mantou... we finished all of the buns in our freezer and since the snow fall we've gotten too lazy to leave the house (call us chicken). So I thought to myself, why not make some mantou? I found the cutest recipe at Do What I Like and decided to give it a shot, after all her pictures looked tastey. So I got to work and used the yeast I had leftover from making pretzels/bread/turtles to make my own mantou. I decided to make them miniature, because hey... everything that's cute in full-size, can be made cuter by making it mini! I also decided to make the outer layer white, with the chocolate inside; don't know why... I guess it just kinda happened (got to excited when it came to rolling the dough I suppose).

Wednesday, February 28, 2007

Mua Chee! On A Cold Day

The words themselves sound just like a cry of happiness. Since it's been snowing like crazy, again, I decided to settle down with a nice bowl of warm Mua Chee. Can you believe that it's still snowing? It's practically March... doesn't Mr. White Christmas know that his season is so over? I am so ready to have a beautiful summer. Hopefully since we've had such a crumby cold spell we'll get a perfectly sunny summer, not too hot and not too cold. Actually... I'd just be satisfied if it didn't snow during the summer :P hehehe
Anyways, here's my recipe for mua chee... it's quick, simple and wonderfully delicious.
Mua Chee
Ingredients:
- 1 cup glutinous rice flour
- 2 tsp sugar
- 2 tbsp thick coconut milk
- 1 tbsp oil
- 1/2 cup water
- 1 tbsp oil (to reduce stickiness)
Coating: Mix 1/2 cup of chopped unsalted peanuts + 1/4 cup granulated sugar + 1 tsp toasted sesame seeds
Method:
1. Mix flour, sugar, coconut milk, oil and water in a microwable bowl until well blended.
2. Microwave for 1 minute. Stir mixture and cook on high for another minute.
3. Stir well, and microwave again if batter is not fully cooked.
4. Add in the 1 tbsp oil and mix. Let the dough cool (if you do not, the sugar in the coating will dissolve and get all sticky)
5. Add the peanut, sesame seeds and sugar mixture to the dough. Using an oiled scissor, cut dough into small pieces. Continue to toss until dough is well coated.

Yum, yum... hope you find this as delicious as I did. Have a warm day!

Tuesday, February 27, 2007

Wake up to Waffles

Don't you just love waking up to the smell of freshly made waffles? Well, technically I didn't really "wake up" to the smell, I kinda woke up and made the smell... but it's basically the same thing, right? Anywho... I wanted to eat waffles for breakfast, but was getting really tired of eating the same old frozen eggos. Seriously, "Leggo, my eggos! And drop them in the trash". They taste like frozen, plastic, hockey pucks. Maybe that's because they've been in the freezer for too long, or maybe my taste has evolved... I sure hope it's the latter. So here goes, my recipe for light and fluffy waffles (and you don't even need any yeast!).

Light and Fluffy Waffles

Ingredients:
1 cup all-purpose flour
1 1/2 teaspoons baking powder
1/4 teaspoon salt
1 1/2 tablespoons granulated white sugar
1 large egg, separated
1 cup milk
1/2 tsp vanilla
2 tablespoons unsalted butter, melted

Method:
1. Mix together flour, baking powder, salt and sugar.
2. In another bowl whisk together the egg yolk, vanilla and milk.
3. Whisk egg white until soft peaks form
4. Add the egg yolk mixture to the flour mixture, all at once, and stir just until combined.
5. Stir in the melted butter.
6. Lightly fold in the frothy egg white, until just combined.
7. Pour batter into prepared waffle iron and follow directions to cook it thoroughly.
8. Drizzle it in maple syrup, corn syrup or/and fruit syrup (hopefully it's or... hehehe) and enjoy your homemade waffles :P

Monday, February 26, 2007

Pretzels? Bread? Turtles?

I had a desire to make something using yeast today. Don't quite know why, but I just wanted to smell freshly baked yeast goods come out of the oven. Isn't that the best smell ever? I was browsing through a couple of blogs and stumbled upon many different versions of turtle bread. They were all so cute that I decided I had to make some of my own. The fact is, I haven't really had much experience with yeast (I actually think it hates me) so I was determined to make the turtle bread recipe perfectly. I used the pretzel recipe from allrecipes.com and got the instructions to shape the loaf from bettycrocker.com. Albeit, my loaf didn't turn out exactly like the crocker one, but I still think it's darned cute!

As you can see I also made a few pudgey looking pretzels... I wasn't in the mood for anything really salty, so I covered the pretzels with demerara sugar. They were so delicious fresh out of the oven; warm, light and sweet... one of the best breakfasts I'd ever had. No need for butter or jam, they had just the right flavor all by themselves. My parents really enjoyed the pretzels/bread turtles, and my sisters were nice enough to tell me that my pretzels looked like little "turds" but still tasted good (How sweet!).

Saturday, February 24, 2007

One yummy lunch!

Ooooo, check out those ingredients. What could I possibly be making? I wonder. Just this week I developed a hankering for some green onion pancakes. My dad said that they were a bit to expensive in store and to wait for the price to drop before we bought some. But being one of the most impatient people ever, I decided to make some of my own. We had some green onions hanging around the house (leftover from the jamaican rice night) all chopped up and ready to be used for something... why not use it to feed me?

I just couldn't wait, I took a couple big bites from my pancake before I remembered that I was going to take a picture. Oh well, it just proves to you how delicious it was.

I followed the recipe from Cafe of the East, it's very simple and doesn't utilize any confusing ingredients... I guess that's what attracted me to this recipe. That and the fact that "Cafe of the East" provides you with a step-by-step guide to properly forming the green onion pancakes. It was so much fun making them, but even more fun was the eating part!

Friday, February 23, 2007

Congrats Dad!

Just last Sunday my dad finished an amazing 1/2 marathon. That's a whole 22k!!! I was so impressed. He is super-dad. He had to get up really early in the morning (I'm talking 4:30am early) and drive out to a small town where the marathon began. He finished in 2.5 hrs and recieved a cool medal. I knew that dad would do well, after all he's been training extremely hard for the past 5 months, so while he was gone running I decided to make him a congratulatory cake.

Since he's been working hard to be as fit as can be for this race, I decided to make it an angel food cake. I made the cake just for him... and when I say just for him that's exactly what I mean. I got the recipe for this Individual Spiced Angel Food Cake from bakingsheet.blogspot.com. Seen above is the cute, undecorated cake.

And now the final presentation...
Just decorated it with a bit of cool whip and some drizzled chocolate. I made the chocolate hearts myself, thought it added a cute "I-Luv-You" touch. Kraft Canada has some really awesome tips on how to use melted chocolate... I followed their instructions on making the hearts and then decided to decorate the plate for some more "I-Luv-You" umph.

Monday, February 19, 2007

BBQ Portobello Burger

For some reason, today I decided to eat something healthy. Already had quite a filling lunch (from subway); and still being in the mood for a food that I could eat with my hands I decided to make some "hamburgers". I bought some huge portobello mushrooms from Ralph's Farmer's Market and since the rest of my family was eating beef burgers, I decided to just toss a mushroom onto the grill along with their meat and enjoy a hearty (and heart healthy) dinner.
I basically just removed the stem from the mushroom and grilled it for about 4 minutes on either side. I then added BBQ sauce during the last minute of cooking and transferred it onto a toasted bun. Tossed a couple veggies on the burger and smothered it in mustard (the best condiment ever). Looked just like a regular hamburger (notice I said regular and not McDonald's, those are just disturbing) and tasted just like mushrooms... I love mushrooms.

Sunday, February 18, 2007

HAPPY CNY! Gong Xi!

Well guys, I didn't really go all out in baking goodies this CNY (although that doesn't really matter, because we got a ton of treats from T&T... as you've seen in my previous post) but I did manage to make at least one treat. One of my favorites... Kueh Bangkit. I used the recipe from Little Corner of Mine and the kueh turned out beautifully; light, crisp and melt-in-your-mouth. Didn't have parchement paper to line my trays with, so I generously covered each tray with tapioca starch. I made many shapes using small cookie cutters, but really wish I had the real Kueh Bangkit moulds. Pictured above are my cute little piggies; I had to make them by hand... and they took a while (me being a perfectionist and all) so I only made a couple. They are so cute and I think they truly encompass the spirit of the Fire Boar. My sisters loved the cookies and my parents said they tasted just like the real thing. We've decided to eat the pig one's last... maybe on the last day of the lunar new year. Seems fitting, eh?


So, I've decided that I must invest in buying some traditional kueh moulds. Some for Bangkit, Ang Koo and Mooncakes. Can't find them in stores though. I've only seen the bangkit and mooncake one's online at amazon.com (still not sure if I trust buying stuff off the internet... we'll see).

Saturday, February 17, 2007

One more day and counting...

Well, CNY is only a day away. My family has plans to go out for dinner at Hon's and maybe we'll stop by at T&T to watch the festivities. Although if you really want to get a taste for the traditional CNY fun go to the Plaza of Nations or even Crystal Mall. Since all of my extended family is in Singapore, my family of 5 usually just has a small CNY bash... but that doesn't mean it's not exciting. And this will be the first CNY that my puppy will be involved in! I'm thinking of dressing him up like a dragon! What d'ya think?

We've been loading up on all the Chinese New Year goodies... take a look. We've got sugared water chestnuts, peanut candies and peanut crunch pastries.

The peanut candies are my favorite, I always start to miss them around Decembers. But then I remember that CNY is just around the corner and the stores will start selling these again :) The flavors are (from bottom to top): Coffee, Almond, Peanut, Cocoa, Nutmeat, Black Sesame, Cream and Coconut... Yum!

The picture of the peanut pastry is pretty sad. That's because I didn't remember to take a photo until there was only one left... so I really had no choice in which pastry to photograph :P And if you want a recipe for this see: Florence's Crispy Peanut Puff


Not quite sure what the multicolored sweet things are... supposedly they're made of sugar, glutinous rice flour, butter and oil (didn't quite like them). But my family just started gobbling up the deep-fried sesame balls, or as Florence calls them Chinese Laughing Dumplings.
Well I should definetly rest up a bit before CNY, so I'll see you then!


Friday, February 16, 2007

CNY!!!

Well Chinese New Year is just a day and little bit away. I decided I had to make at least one post about it... after all I am chinese! How could I miss one of our largest celebrations??!?! Well, today I went to my favorite supermarket T&T and amazingly found a lot of caucasians shopping there. I guess everyone wants in on the chinese culture... after all, we are an incredible people are we not? I found the cutest looking Hongbao in store and had to buy them, pictured above. I figured after 18 yrs of getting money from my parents it's about time I started sharing prosperity. Aren't they cute? And when you pull on a side-tab it opens to reveal a chinese new year symbol... and of course the money! I bought the Hongbao on impulse and actually was a T&T looking for a fish nian gao mold. I found the nian gao and decided to buy it. The cake came with the mold still encasing it... I hope the mold can be reused *crosses fingers* we'll just have to wait and see. But anyways, the store bought nian gao looked so cute how could I pass up the opportunity to but it, and at only $1.99 it was a steal!

Thinking of making some special desserts for CNY, not quite sure if I have the time... but we'll see. If I don't have, a HAPPY NEW YEAR; and if I do then I will see you soon! (Hypothetically speaking)

Breakfast Time!

Didn't feel like eating the regular breakfast of eggs, sausage and bacon... a bit too greasy for me so early in the morning. My family usually eats that meal every Saturday morning, call it tradition. I've decided to lay off on all that fatty, meaty stuff for now... who knows, I may revert back to it :P But this morning I made 2 small breakfast casseroles using my newly bought ramekins. They were on sale at Winners, for 2 bucks... and since I'd been looking for a pair I decided to snatch these ones off the clearance shelf.

Breakfast Casserole (serves 2)

Ingredients:

-2 tsp butter
-1 egg, slightly beaten
-1/3 cup milk
-1/4 cup cooked hashbrown
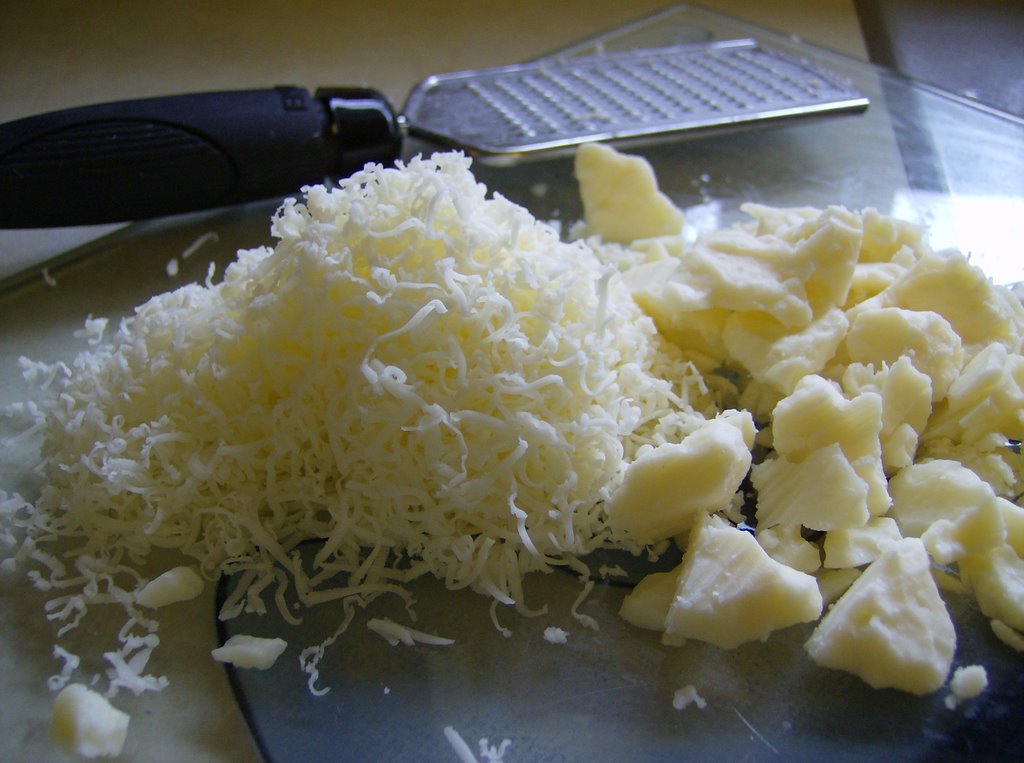
-1/4 cup marble cheese, shredded
-2 tbsp green onions, chopped
-1 rasher of bacon, crumbled
-4 medium sized brocolli florets, cut into bite-sized pieces

Method:
1. Grease ramekins evenly, making sure to cover all the way up the sides.
2. Line the bottom of the ramekins with the cooked hashbrown pieces.
3. Mix together the green onions, bacon, and brocolli. Then divide mixture between the two ramekins.
4. In a separate bowl, whisk together the slightly beaten egg and milk. Divide evenly between ramekins and be sure to cover the brocolli mixture. Sprinkle with cheese.
5. Place in oven (325° F) for 10-15 minutes, or until egg mixture is fully cooked.
My parents really enjoyed it, although my mom (and her aversion to potatoes) didn't really like the hashbrown layer. My sisters didn't really want to try this; they stuck with their eggs, bacon, sausage and hashbrowns. I guess the brocolli turned them off... not their kinda breakfast :( But hopefully it's yours! Enjoy.


Thursday, February 15, 2007

Rice Krispies... kinda

I decided a couple days ago that I wanted to make something short and sweet... just like me :P I settled on the ever classic Rice Krispie square. Sadly I didn't have any Rice Krispies lying around the house, so I had to resort to using Special K cereal. They turned out the same, after all they are exactly the same cereal, just in different shapes. Honestly, I just think that Special K is the grown-up version of Rice Krispies... because apparently no self respecting adult eats a cereal that's suppose to Snap, Crackle and Pop (right?). I won't post the recipe because I'm pretty sure there are a billion out there on the internet... and I would hate to be #1,000,000,001.

Valentine's Eggplant for 2


Well, I decided on making a cute little dish for Valentine's (even though I made it on the 15th... hehehe). This recipe is great if you fancy the essence of the Mediterranean. My parents thought it was great, I ate some and found it delicious as well. My sisters steered clear of it and stuck with their favorite... meat lasagna. Something about eggplant seems to turn them off, how sad :(

Just a quick note: the following pomodoro recipe can be doubled or tripled and is amazing with pasta. It's much more fresh than regular tomato paste and has fewer preservatives.

Eggplant for 2

Ingredients:
-1 medium eggplant
-1/2 large onion, chopped
-oil for frying
-Homemade pomodoro sauce (recipe follows)
-1/2 of a 14oz. can of tuna, flaked
-1 tsp brown sugar
-ground pepper and dried parsley to taste
-1/2 cup grated mozzarella cheese


Ingredients for Pomodoro Sauce:
-1 clove garlic, diced
-1 large tomato
-1/2 tsp dried basil
-1/2 tsp chopped fresh cilantro
-salt

Method:
1. Cut the eggplant in half, lengthways. Using a spoon, carefully remove the inside flesh, leaving a 1/2-inch layer of raw eggplant in the shell.

2. Chop the eggplant flesh roughly, add chopped onions and set aside.

3. Make the pomodoro sauce by first coring the tomato. Place the tomato in a pot of boiling water for about 30 seconds. Drain and peel off the skin of the tomato. Chop tomato roughly and remove the seeds.

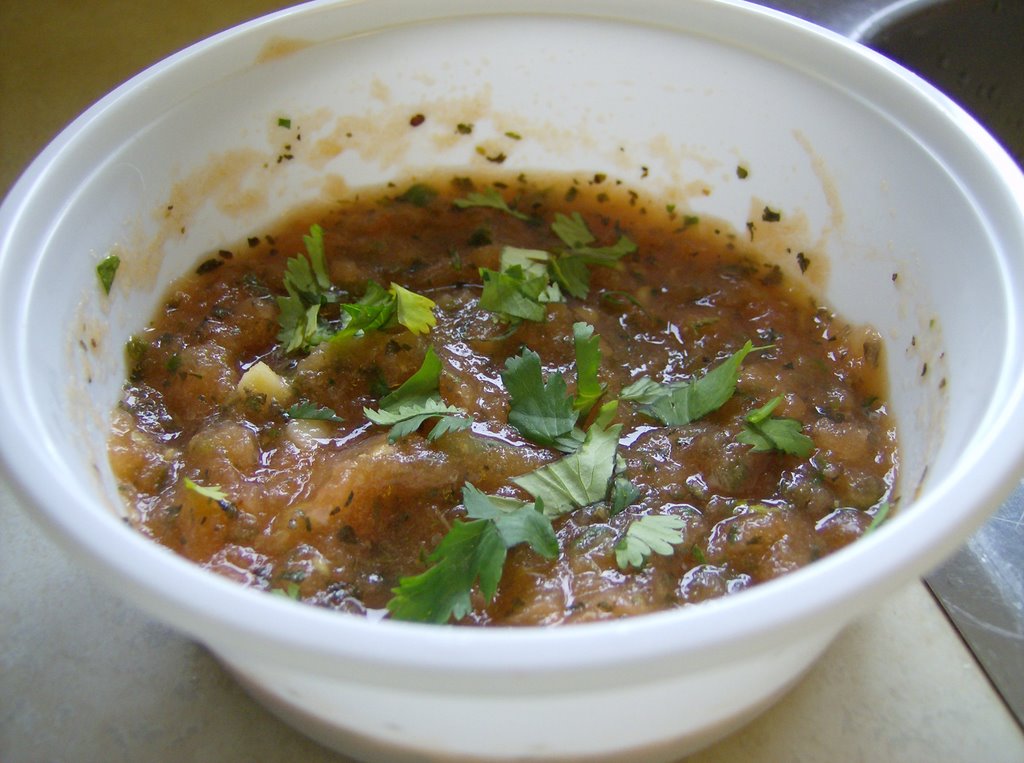
4. Place the tomato and diced garlic in a non-stick frying pan, cook over medium heat. Add salt, basil and fresh cilantro; continue cooking tomato mixture until tender and juicy.

5. Place tomato mixture in a blender/food processor and pulse until it makes a non-lumpy sauce.

6. Now fry eggplant + onion mixture with oil in non-stick frying pan on medium heat. Cover with a lid and let simmer for 10 minutes, until soft and golden.

7. Add pomodoro sauce, brown sugar, parsley and ground pepper. Cook uncovered for 10 minutes. Then add flaked tuna.

8. Arrange the eggplant halves side by side in a casserole dish and divide the mixture between them. Cover generously with mozzarella.

9. Tent dish with aluminum foil. Cook for 10 minutes at 350°F, then lower heat to 325°F for 10 minutes or until eggplant feels tender when pierced with a fork.

10. If you wish for the cheese to be nicely browned, place in broiler for 2 minutes.

Wow! My favorite how did you know?

Valentine's day is awesome, but what's truly great is when someone you love makes you the perfect dessert! My dad is an awesome cook, I guess that's where my culinary flare comes from, and just the other day he made one of my favorite singaporean desserts... Bubur Cha Cha. He doesn't really use a recipe, so I can't really post it... sorry guys. But it's amazing watching him at work; it seems as if it takes no effort at all. He just dumps all the ingredients in the pressure cooker and leaves it be for about 2 hrs and voila! The perfect Bubur Cha Cha everytime. My pop always adds in the best ingredients; this time it was sweet potato, purple yam and taro... delicious. The rest of the ingredients are standard for your regular Bubur Cha Cha; rock sugar, coconut milk (the good thick stuff), sago pearls. If you want some recipes go to: dianasdesserts.com or Little Corner of Mine (They're not quite the same as my dad's but it looks close -- aside from those colorful starch things... weird!)