Saturday, March 03, 2007
Mom's B-day
Friday, March 02, 2007
Scary Movie Night
Well, yesterday I went to a friends house and we stayed up late watching scary movies... alright, it was only one... and it was the Davinci Code. I know that it's not quite considered a scary movie, but boy am I glad we didn't watch a really freaky movie (which I actually usually enjoy) because I needed to get a good-night's sleep. The next day was my mom's b-day party after all, and I needed to get up early to prep her cake, among other things... I'll be posting that tomorrow, I hope :PAnyways, back to the scary movie night... I decided to make some cat paw cookies. I got the idea from marthastewart.com but didn't really fancy the idea of making a sugar cookie and adding in black food coloring (YUCK!) It's so un-natural... and just plain gross. So I used my own chocolate cookie recipe and used her idea to make the cat paws.
My Version of Chocolate Cat Paw Cookies
Ingredients:2. In a separate bowl, combine flour + cocoa + salt + cinnamon.
3. Add flour mixture to butter mixture, gradually (I added 1/3 cup at a time).
4. Divide dough in half.
NOTE: If you wish to work with a firmer dough, wrap each dough portion tightly in plastic wrap and chill for at least 1 hr.
5. Roll 1 portion at a time to 1/4-inch thickness on a surface dusted with cocoa powder (if dusted with flour, your cookies may have flour marks in your final presentation)
6. Cut with cookie cutters, and place on lightly greased cookie sheet.
NOTE: If you are making the cat paws, insert the slivered almonds at this time.
7. Bake at 350 F for 10 minutes; remove to cooling rack and cool completely.
8. Decorate as you wish.
Not everyone showed up to the movie; I guess they were too scared to watch the Davinci Code... sad. Those who tried the cookies said they were tastey, so I think I'll wrap up a couple and give them to the people who didn't come... wouldn't want them to miss out. The movie was good and I wasn't so scared that I couldn't get to sleep, so waking up for mom's b-day prep was not a problem.
SIDE BAR: I decided to make these on the day before the party, but I didn't have a cat paw cookie cutter. The Martha Stewart link above has a template for the cat paws, but I was not too keen on hand-cutting each cookie; especially not when a cookie cutter would save so much time. So I made my own! I was so impressed with myself... I just used a good pair of shearing scissors and cut the rim off of a butter cookie tin. Then I used a good pair of pliers to shape the paw the way I wanted. Simple, and I didn't have to spend any money on it! (that's always the best part)
Thursday, March 01, 2007
Swirled Mantou

I decided to make mantou... we finished all of the buns in our freezer and since the snow fall we've gotten too lazy to leave the house (call us chicken). So I thought to myself, why not make some mantou? I found the cutest recipe at Do What I Like and decided to give it a shot, after all her pictures looked tastey. So I got to work and used the yeast I had leftover from making pretzels/bread/turtles to make my own mantou. I decided to make them miniature, because hey... everything that's cute in full-size, can be made cuter by making it mini! I also decided to make the outer layer white, with the chocolate inside; don't know why... I guess it just kinda happened (got to excited when it came to rolling the dough I suppose).
Wednesday, February 28, 2007
Mua Chee! On A Cold Day
The words themselves sound just like a cry of happiness. Since it's been snowing like crazy, again, I decided to settle down with a nice bowl of warm Mua Chee. Can you believe that it's still snowing? It's practically March... doesn't Mr. White Christmas know that his season is so over? I am so ready to have a beautiful summer. Hopefully since we've had such a crumby cold spell we'll get a perfectly sunny summer, not too hot and not too cold. Actually... I'd just be satisfied if it didn't snow during the summer :P heheheTuesday, February 27, 2007
Wake up to Waffles
Light and Fluffy Waffles
Ingredients:
1 cup all-purpose flour
1 1/2 teaspoons baking powder
1/4 teaspoon salt
1 1/2 tablespoons granulated white sugar
1 large egg, separated
1 cup milk
1/2 tsp vanilla
2 tablespoons unsalted butter, melted
Method:
1. Mix together flour, baking powder, salt and sugar.
2. In another bowl whisk together the egg yolk, vanilla and milk.
3. Whisk egg white until soft peaks form
4. Add the egg yolk mixture to the flour mixture, all at once, and stir just until combined.
5. Stir in the melted butter.
6. Lightly fold in the frothy egg white, until just combined.
7. Pour batter into prepared waffle iron and follow directions to cook it thoroughly.
8. Drizzle it in maple syrup, corn syrup or/and fruit syrup (hopefully it's or... hehehe) and enjoy your homemade waffles :P
Monday, February 26, 2007
Pretzels? Bread? Turtles?
I had a desire to make something using yeast today. Don't quite know why, but I just wanted to smell freshly baked yeast goods come out of the oven. Isn't that the best smell ever? I was browsing through a couple of blogs and stumbled upon many different versions of turtle bread. They were all so cute that I decided I had to make some of my own. The fact is, I haven't really had much experience with yeast (I actually think it hates me) so I was determined to make the turtle bread recipe perfectly. I used the pretzel recipe from allrecipes.com and got the instructions to shape the loaf from bettycrocker.com. Albeit, my loaf didn't turn out exactly like the crocker one, but I still think it's darned cute!
As you can see I also made a few pudgey looking pretzels... I wasn't in the mood for anything really salty, so I covered the pretzels with demerara sugar. They were so delicious fresh out of the oven; warm, light and sweet... one of the best breakfasts I'd ever had. No need for butter or jam, they had just the right flavor all by themselves. My parents really enjoyed the pretzels/bread turtles, and my sisters were nice enough to tell me that my pretzels looked like little "turds" but still tasted good (How sweet!).
Saturday, February 24, 2007
One yummy lunch!
Ooooo, check out those ingredients. What could I possibly be making? I wonder. Just this week I developed a hankering for some green onion pancakes. My dad said that they were a bit to expensive in store and to wait for the price to drop before we bought some. But being one of the most impatient people ever, I decided to make some of my own. We had some green onions hanging around the house (leftover from the jamaican rice night) all chopped up and ready to be used for something... why not use it to feed me?
I just couldn't wait, I took a couple big bites from my pancake before I remembered that I was going to take a picture. Oh well, it just proves to you how delicious it was.I followed the recipe from Cafe of the East, it's very simple and doesn't utilize any confusing ingredients... I guess that's what attracted me to this recipe. That and the fact that "Cafe of the East" provides you with a step-by-step guide to properly forming the green onion pancakes. It was so much fun making them, but even more fun was the eating part!
Friday, February 23, 2007
Congrats Dad!
Just last Sunday my dad finished an amazing 1/2 marathon. That's a whole 22k!!! I was so impressed. He is super-dad. He had to get up really early in the morning (I'm talking 4:30am early) and drive out to a small town where the marathon began. He finished in 2.5 hrs and recieved a cool medal. I knew that dad would do well, after all he's been training extremely hard for the past 5 months, so while he was gone running I decided to make him a congratulatory cake.Since he's been working hard to be as fit as can be for this race, I decided to make it an angel food cake. I made the cake just for him... and when I say just for him that's exactly what I mean. I got the recipe for this Individual Spiced Angel Food Cake from bakingsheet.blogspot.com. Seen above is the cute, undecorated cake.
.jpg)
Monday, February 19, 2007
BBQ Portobello Burger
Sunday, February 18, 2007
HAPPY CNY! Gong Xi!
Well guys, I didn't really go all out in baking goodies this CNY (although that doesn't really matter, because we got a ton of treats from T&T... as you've seen in my previous post) but I did manage to make at least one treat. One of my favorites... Kueh Bangkit. I used the recipe from Little Corner of Mine and the kueh turned out beautifully; light, crisp and melt-in-your-mouth. Didn't have parchement paper to line my trays with, so I generously covered each tray with tapioca starch. I made many shapes using small cookie cutters, but really wish I had the real Kueh Bangkit moulds. Pictured above are my cute little piggies; I had to make them by hand... and they took a while (me being a perfectionist and all) so I only made a couple. They are so cute and I think they truly encompass the spirit of the Fire Boar. My sisters loved the cookies and my parents said they tasted just like the real thing. We've decided to eat the pig one's last... maybe on the last day of the lunar new year. Seems fitting, eh?.jpg)
Saturday, February 17, 2007
One more day and counting...
Well, CNY is only a day away. My family has plans to go out for dinner at Hon's and maybe we'll stop by at T&T to watch the festivities. Although if you really want to get a taste for the traditional CNY fun go to the Plaza of Nations or even Crystal Mall. Since all of my extended family is in Singapore, my family of 5 usually just has a small CNY bash... but that doesn't mean it's not exciting. And this will be the first CNY that my puppy will be involved in! I'm thinking of dressing him up like a dragon! What d'ya think?.jpg)
.jpg)
.jpg)
.jpg)
Not quite sure what the multicolored sweet things are... supposedly they're made of sugar, glutinous rice flour, butter and oil (didn't quite like them). But my family just started gobbling up the deep-fried sesame balls, or as Florence calls them Chinese Laughing Dumplings.
Friday, February 16, 2007
CNY!!!
Well Chinese New Year is just a day and little bit away. I decided I had to make at least one post about it... after all I am chinese! How could I miss one of our largest celebrations??!?! Well, today I went to my favorite supermarket T&T and amazingly found a lot of caucasians shopping there. I guess everyone wants in on the chinese culture... after all, we are an incredible people are we not? I found the cutest looking Hongbao in store and had to buy them, pictured above. I figured after 18 yrs of getting money from my parents it's about time I started sharing
prosperity. Aren't they cute? And when you pull on a side-tab it opens to reveal a chinese new year symbol... and of course the money! I bought the Hongbao on impulse and actually was a T&T looking for a fish nian gao mold. I found the nian gao and decided to buy it. The cake came with the mold still encasing it... I hope the mold can be reused *crosses fingers* we'll just have to wait
and see. But anyways, the store bought nian gao looked so cute how could I pass up the opportunity to but it, and at only $1.99 it was a steal!Thinking of making some special desserts for CNY, not quite sure if I have the time... but we'll see. If I don't have, a HAPPY NEW YEAR; and if I do then I will see you soon! (Hypothetically speaking)
Breakfast Time!
-2 tsp butter
Thursday, February 15, 2007
Rice Krispies... kinda
I decided a couple days ago that I wanted to make something short and sweet... just like me :P I settled on the ever classic Rice Krispie square. Sadly I didn't have any Rice Krispies lying around the house, so I had to resort to using Special K cereal. They turned out the same, after all they are exactly the same cereal, just in different shapes. Honestly, I just think that Special K is the grown-up version of Rice Krispies... because apparently no self respecting adult eats a cereal that's suppose to Snap, Crackle and Pop (right?). I won't post the recipe because I'm pretty sure there are a billion out there on the internet... and I would hate to be #1,000,000,001.
Valentine's Eggplant for 2
Well, I decided on making a cute little dish for Valentine's (even though I made it on the 15th... hehehe). This recipe is great if you fancy the essence of the Mediterranean. My parents thought it was great, I ate some and found it delicious as well. My sisters steered clear of it and stuck with their favorite... meat lasagna. Something about eggplant seems to turn them off, how sad :(
Just a quick note: the following pomodoro recipe can be doubled or tripled and is amazing with pasta. It's much more fresh than regular tomato paste and has fewer preservatives.
Ingredients:
-1 medium eggplant
-1/2 large onion, chopped
-oil for frying
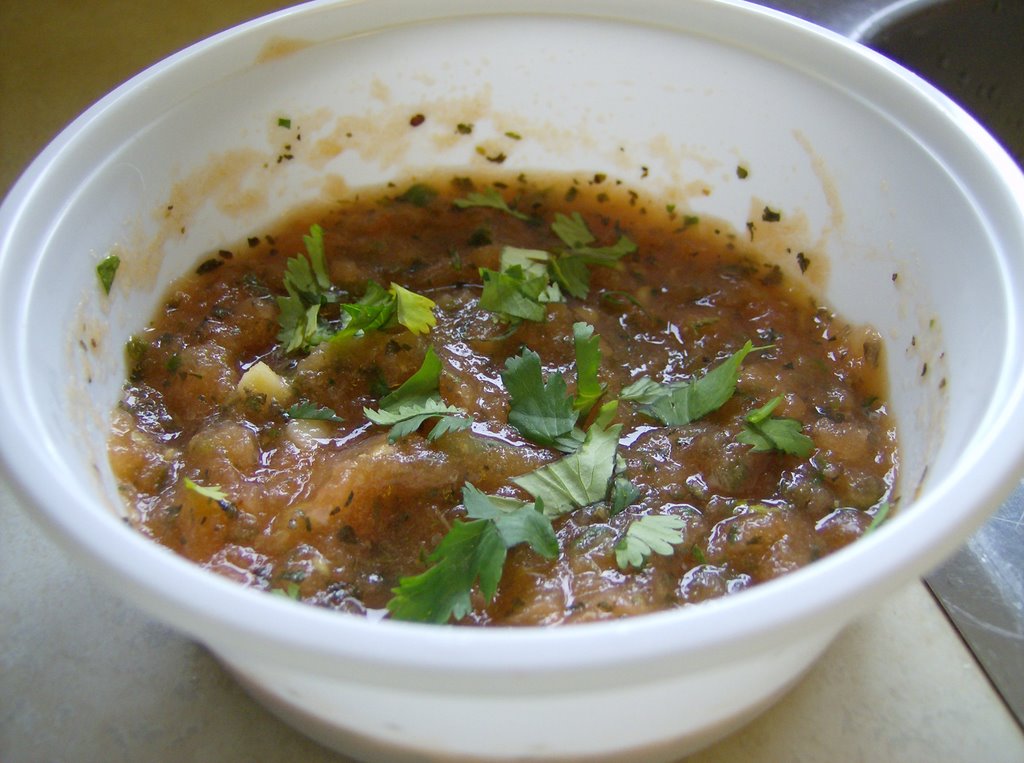
-Homemade pomodoro sauce (recipe follows)
-1/2 of a 14oz. can of tuna, flaked
-1 tsp brown sugar
-ground pepper and dried parsley to taste
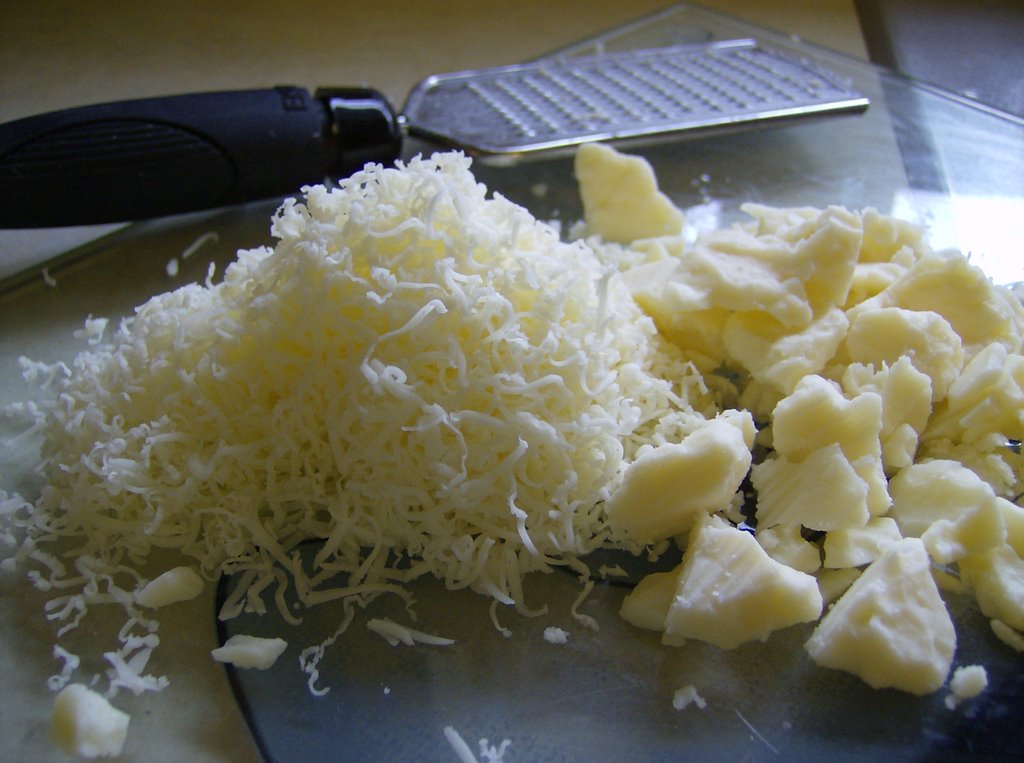
-1/2 cup grated mozzarella cheese 
Ingredients for Pomodoro Sauce:
-1 clove garlic, diced
-1 large tomato
-1/2 tsp dried basil
-1/2 tsp chopped fresh cilantro
-salt
Method:
1. Cut the eggplant in half, lengthways. Using a spoon, carefully remove the inside flesh, leaving a 1/2-inch layer of raw eggplant in the shell.
2. Chop the eggplant flesh roughly, add chopped onions and set aside.
3. Make the pomodoro sauce by first coring the tomato. Place the tomato in a pot of boiling water for about 30 seconds. Drain and peel off the skin of the tomato. Chop tomato roughly and remove the seeds.
4. Place the tomato and diced garlic in a non-stick frying pan, cook over medium heat. Add salt, basil and fresh cilantro; continue cooking tomato mixture until tender and juicy.
5. Place tomato mixture in a blender/food processor and pulse until it makes a non-lumpy sauce.
6. Now fry eggplant + onion mixture with oil in non-stick frying pan on medium heat. Cover with a lid and let simmer for 10 minutes, until soft and golden.
7. Add pomodoro sauce, brown sugar, parsley and ground pepper. Cook uncovered for 10 minutes. Then add flaked tuna.
8. Arrange the eggplant halves side by side in a casserole dish and divide the mixture between them. Cover generously with mozzarella.
9. Tent dish with aluminum foil. Cook for 10 minutes at 350°F, then lower heat to 325°F for 10 minutes or until eggplant feels tender when pierced with a fork.
10. If you wish for the cheese to be nicely browned, place in broiler for 2 minutes.
Wow! My favorite how did you know?
Valentine's day is awesome, but what's truly great is when someone you love makes you the perfect dessert! My dad is an awesome cook, I guess that's where my culinary flare comes from, and just the other day he made one of my favorite singaporean desserts... Bubur Cha Cha. He doesn't really use a recipe, so I can't really post it... sorry guys. But it's amazing watching him at work; it seems as if it takes no effort at all. He just dumps all the ingredients in the pressure cooker and leaves it be for about 2 hrs and voila! The perfect Bubur Cha Cha everytime. My pop always adds in the best ingredients; this time it was sweet potato, purple yam and taro... delicious. The rest of the ingredients are standard for your regular Bubur Cha Cha; rock sugar, coconut milk (the good thick stuff), sago pearls. If you want some recipes go to: dianasdesserts.com or Little Corner of Mine (They're not quite the same as my dad's but it looks close -- aside from those colorful starch things... weird!)
Sunday, February 11, 2007
Dinner #4

Now let's start with the...
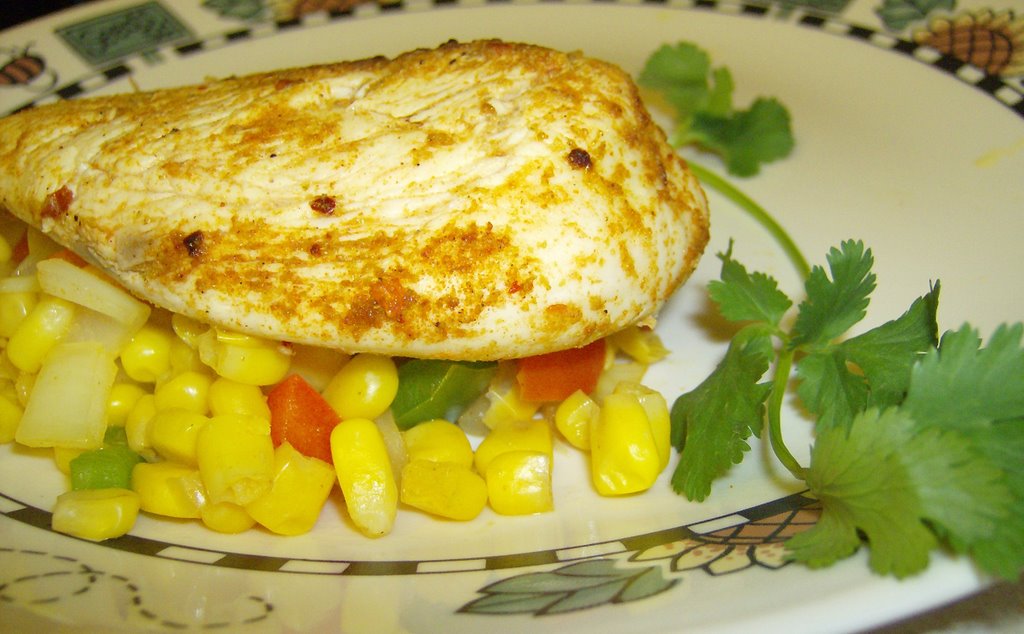
Citrus Chicken with Pepper and Corn Relish (serves 4)
Ingredients:
-4 6oz (I used 3oz) skinned chicken breast
-2/3 cup fresh lime juice
-1 tsp ground cumin
-1 tsp chili powder -1/2 tsp salt
-1/2 tsp ground red pepper (more or less, if you like it mild or spicy)
-Non stick cooking spray
-1 cup frozen corn + 1/2 cup diced red peppers + 1/2 cup chopped onions
-2 tsp chopped cilantro
-8 fresh cilantro sprigs (optional)
Method:
1. Place chicken in a heavy-duty, zip-top plastic bag. Reserve 1 tablespoon lime juice; pour remaining juice over chicken. Seal bag; shake to coat chicken. Marinate in refrigerator 1 hour; turn bag occasionally.
2. Combine cumin, chili powder, salt, and 1/8 teaspoon red pepper in a small bowl. Remove chicken from marinade, discarding marinade. Sprinkle chicken with cumin mixture.
3. Coat rack of a broiler pan with cooking spray. Place chicken, skinned sides down, on rack; broil 8 inches from heat (with electric oven door partially opened) 25 minutes. Turn chicken, and broil 15 additional minutes or until done. Set chicken aside, and keep warm.
4. Coat a large nonstick skillet with cooking spray; place over medium-high heat until hot. Add corn mixture and remaining 1/8 teaspoon pepper; sautรฉ until corn is lightly browned and tender. Spoon corn mixture onto individual serving plates; top with chicken. Drizzle with reserved 1 tablespoon lime juice; sprinkle with chopped cilantro. Garnish with cilantro sprigs, if desired.
Nutritional Information: Calories 237; Carbohydrate 20.2g; Protein 29.1g; Fat 4.1g; Fiber 1.5g; Cholesterol 72mg; Sodium 226mg
Now for the delectable...
Jamaican Curried Rice (serves 8)
Ingredients:

-2 tsp olive oil
-1 cup diced red peppers
-1/2 cup sliced green onions
-2 tbsp curry powder
-3 cups hot cooked rice
-1/8 cup sugar (original recipe called for 1/4 cup... I though this to be too much)
-2 tbsp lime juice
-1/2 tsp salt
-1 can pineapple chunks, drained
-1 can black beans (I omitted these, as I believed them to overpower the subtle sweet curry flavor)
-1/2 cup salted cashews (optional)
Method:
1. Heat oil in medium skillet. Cook and stir bell pepper and onions 2 to 3 minutes.
2. Add curry powder; stir 30 seconds.
3. Combine cooked rice, sugar, lime juice and salt in medium-size bowl.
4. Stir in cooked vegetable mixture, pineapple and black beans (if using).
5. Rice may be served warm or at room temperature. Sprinkle with cashews just before serving.
Nutritional Information: Calories 196; Carbohydrate 31g; Protein 6g; Fat 3g; Cholesterol 0mg; Sodium 474mg
Don't forget my croquettes!
Thursday, February 08, 2007
Good-Morning All!
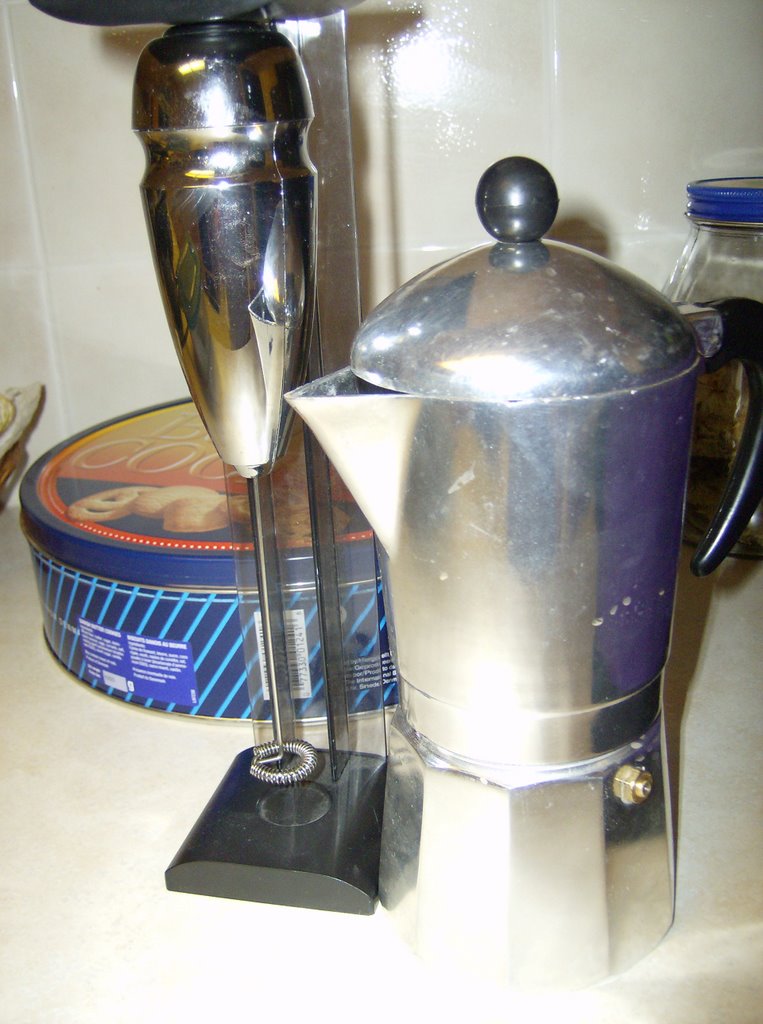
You should know one thing about me by now. I love to make my own goodies, and I would much rather bake cookies and brew my own coffee than spend money at Starbuck's for their low quality snacks and mediocre coffee. Well, for Christmas I had bought my parents a moka pot. I
actually use it more than they do... infact I don't think they've ever used it. It's always just me making coffee for the family in the mornings (I don't mind of course). So anyways, I used this moka pot to make some really awesome eggnog lattes for breakfast this morning. I had bought the coffee from Safeway (I just love using the in store grinder, honestly there's no point in buying one when you can ground it for free at the store) just the other day and decided to bring a little holiday cheer into the house, even though Christmas is long gone. So I brewed some espresso, frothed some milk with my handy dandy milk frother (duh!) and used the stencils I had bought from Daizo to fancy up the regular cups of joe. Take a look! Just a few stencils and some cocoa powder and you turn boring into beautiful!
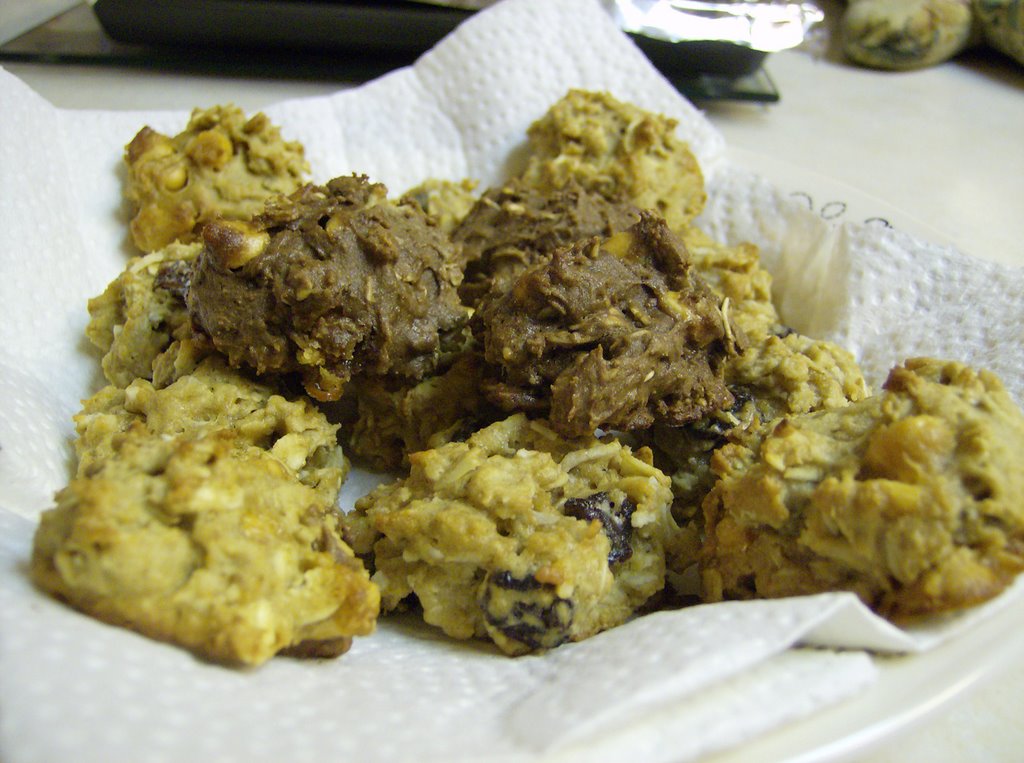
I also decided to whip up a batch of breakfast cookies; oatmeal and raisin is my favorite but my sisters aren't big fans. So I used a regular chocolate chip cookie recipe, divided it into thirds and made one batch oatmeal raisin, one batch chocolate butterscotch chip, and one batch butterscotch coconut. De-licious! Always nice to wake up to a wonderfully nutritious breakfast, eh? hehehe :P
Thursday, February 01, 2007
Hawaii Part 2... Finally

I guess I decided to finally finish up my blog on Hawaii because the weather we've been experiencing is just so completely opposite to that of Waikiki. Went there during the last summer of my high school career and just before entering the crazy world that is university :P So let's reminisce shall we? I think in Part 1 I talked about the International Marketplace and shopping... but right now I feel like remembering the beautiful beaches of Waikiki. Funny thing, we woke up early the morning of our trip to Hanauma Bay but the first 2 buses to that beach were full so they didn't stop to pick us up!? So we eventually decided on taking a taxi to the beach, the fare was decent and the taxi looked like a limo (my family thought this was neat as we had never
ridden in a limo before). We managed to reach Hanauma Bay before the buses and we were 5th in line, ready and roaring to enter the sandy paradise. We spent about 2 hours there, snorkeling was awesome (except for the salty water going up your nose... blegh). After that amazing experience we decided to go to Genki Sushi... oh boy do the Hawaiin's love their Japanese cuisine.We did a tons of stuff in Hawaii, don't think I'll be able to fit all the awesome pictures onto one blog... so I guess there'll be a part 3 to this seemingly endless saga. Please stay tuned!
To read Part 1 click here.
Friday, January 19, 2007
Truffles?
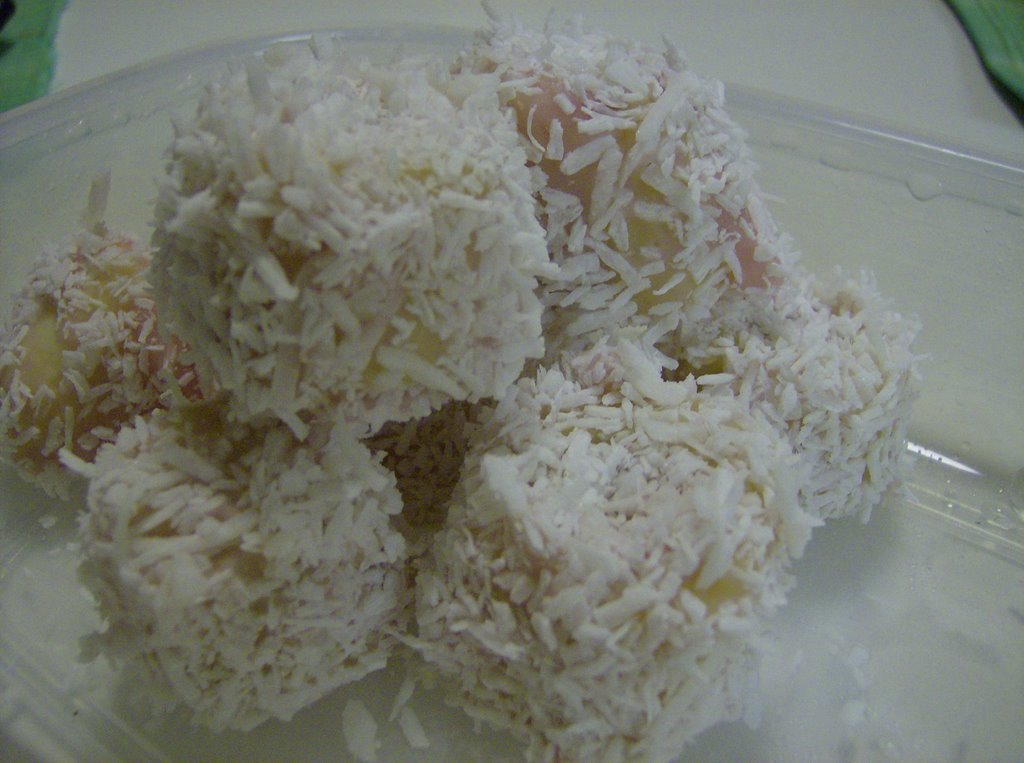
Who doesn't love a delicious truffle? Okay, so they're not really truffles (as you can tell by the photo) but they are delicious. Well, I've created a great way to make a healthy "truffle". It's really simple and doesn't make a ton of mess.Healthy Tropical Truffles
Ingredients:
1 large banana
1 Silhouette by Danone Strawberry yogurt, 100g (or any other low sugar/fat yogurt)
1 cup desiccated coconut, sweetened
Method:
1. Take a banana and slice it into 3/4 inch pieces (a good truffle size, I should say)
2. Dip each piece of banana into the Strawberry yogurt, making sure the coating is even and there are no huge globs of yogurt on the banana
3. Roll each yogurt-dipped banana piece into the coconut, again evenly coating it.
4. Place your "truffles into a flat container and freeze them for 4 hours.
Note: When freezing, don't let the truffle touch too much. Once they freeze together, they tend to be difficult to separate.
Don't think that you have to just use coconut to coat these cuties. Experiment with different healthy coatings. Oh, how about cocoa powder or crushed, slivered almonds. The possibilities are endless.
These "truffles are delicious during the summer, and you can imagine you're on a tropical beach while you eat them. Enjoy :P
Good Old-Fashioned Meatloaf
I'm beginning to love those Pyrex casserole dishes. This is the second time in 1 week that I'm using them to create a meal. Anywho, can't remember how many dinners I've made so far but I'm sure it won't be my last. I decided on meatloaf because... my family has never eaten it before (Myself included)! I know, such a shock. I guess we've never really gotten into the idea of having meat shaped into a bread loaf. But it was nonetheless successful and my family loved it. I got the recipe from kraftcanada.com but varied it just a tad.
Variation: When the recipe called for the first addition of ketchup (1/4 cup) I instead used half ketchup and half kraft original bbq sauce. And when it called for 1/2 cup of ketchup to be spread over the meatloaf I did half and half again. The bbq sauce makes the loaf taste like a really good burger; and since I'm not particularly fond of globbing on the ketchup it mellows out that strong ketchup-y taste.
We ate the meatloaf with garlic-herb mashed potatoes and a chili, mustard and sesame seed Rodini from Cobs Bread (we just love their loaves... a bit expensive but you can treat yourself once in a while.)
Thursday, January 18, 2007
World, what crazy weather you have!
By now, I would have expected the snow to stop coming. I mean really, this incessant dumping of unexpected snow is getting out of hand. I guess that old man winter is pretty reluctant to let the spring roll around. Well, the good news is that I can continue to bake more winter oriented dishes... and I intend to. Oh, I know this isn't really food related, but I saw this at a gift shop and had to get it for my sisters birthday.Isn't it cute? We love our chinese food, being chinese and all. And one of her favorite colors is blue. I thought I was dreaming when I stumbled upon this perfect gift, but I guess I was just in the right place at the right time. Oh, and we also love lychee. Amazing!
She's just started learning how to knit. It's pretty confusing, but it's cute and it's something that we can both do together on these cold "winter" nights by the fireplace. Besides, there's nothing better to do... play in the snow? I don't think so. I'd rather stay bundled up in the warm indoors baking away or spending time with my family.
Sunday, January 14, 2007
Kueh Lapis
So, the other day I decided to reach deep down into my Singaporean/Malaysian roots and make a much loved Malaysian dessert: Nine Layer, Kueh Lapis. It was a bit tricky finding a recipe that was reliable but I managed to find one online at pwmf.blogspot.com/. I wasn't quite sure if I could trust this recipe so I also relied heavily on a book I have lying around the house entitled "Singaporean Cooking with Mrs Leong Yee Soo". These two resources combined with my culinary experience allowed me to create a beautiful looking (and tasting) Kueh Lapis with an amazing texture. But have no fear, though I cannot lend you all my cookbook I can surely show you how I was able to create this kueh (while also varying the recipe slightly).When first approaching the recipe from pwmf.blogspot.com/ I prepared myself for what seemed a difficult dessert to make. Firstly, all of the ingredients were measured out in grams (sadly I do not have a kitchen weighing machine) so I had to modify the recipe using online conversion resources. So, feel free to follow the directions on the "Playing with My Food" site or use my variated recipe below.
(NOTE: I halved the online recipe so that the Kueh batter would fit into a round 8-inch diameter cake pan)

Joanna's Variation on Kueh Lapis Beras
(Steamed Tapioca Layer Cake)
Ingredients
Batter A: (Yields 4 Cups)
2 cups Tapioca Starch
1/2 cup Rice Flour
1 1/3 cup Sugar
1 1/4 cup Coconut Milk mixed with 1 1/4 cup Water
1 tsp Pandan Paste
Batter B: (Yields 2 Cups)
150 grams Cooked Taro Root (approx. 1/4 of a medium sized Taro)
1/3 cup Sugar 1 cup
Tapioca Starch 45ml Coconut Milk + 45ml Water
3-4 drops red food coloring
Batter C: (Yields 2 Cups)
150 grams Cooked Mung Bean (1 cup)
1/3 cup Sugar
1 cup Tapioca Starch
45ml Coconut Milk +45ml Water
Preparation:
To cook Mung Bean- Wash beans and discard damaged ones. Place in a pot with 2 cups of water and soak for 3-4 hours. After this time, boil mung beans for 15-20 minutes, until soft.
To cook Taro- Wash and peel off skin; remove damaged parts. Dice the taro into equal sized cubes. Place in a pot of water to soak for 1 hr. After this time, boil taro for 15-20 minutes, until soft.
Grease 8-inch round cake pan. Prepare wok for steaming process.
Method:
Pandan Layer
1. Combine Coconut milk and water (from Batter A) together in a small mixing bowl. Add 1 tsp pandan paste to give flavor and create the green color.
2. Combine the Tapioca Starch, Rice Flour and Sugar (from Batter A) in a larger mixing bowl.
3. Now pour the liquid ingredients (from Batter A) into the dry ingredients (from Batter A) to form a thin paste. Set Aside.
Taro Layer
4. Combine Coconut milk and water (Batter B) and mix thoroughly.
5. Drain cooked Taro Root and place in blender.
6. Add in the Tapioca Starch and Sugar (Batter B). Then add in the coconut/water mixture. Blend.
7. Add a few drops of red food coloring to create a purple color.
8. Place Batter B into an easily "pourable" bowl/container. Set Aside.
(TIP: When adding food coloring, add drops one at a time between blender pulses. This way you can more easily control the hue of the batter)
Mung Bean Layer
9. Combine Coconut milk and water (Batter C) and mix thoroughly.
10. Drain cooked Mung Beans and place in blender.
11. Add in the Tapioca Starch and Sugar (Batter C). Then add in the coconut/water mixture. Blend.
Look... all the pretty colors. Now the Batters are ready for steaming!
Cooking/Steaming:
Thursday, January 11, 2007
Spring... a long ways away
Just the other day I was saying to myself, "I can't wait for the Spring 2007 semester to begin." Ready to go to class on Wednesday, I had packed my bags and my car up for my commute to school. Then Tuesday night decides to be insane and we're hit with a freakish snow storm. I can't believe they can call this a Spring semester when the entire campus, as well as my house, is being blanketed by almost a foot of snow. I thought, "oh boy... now school's going to be cancelled for sure" (in a sort of happy, sort of sad way). My sister's school was closed due to the crazy weather... so why not mine. I checked my schools website and to my dismay I had to go to class.Actually surviving my drive to campus, I found it grueling to trudge through all that snow to make it to my classes. To make matters worse, the classes I had that day were on opposite sides of the campus so I had to lug my stuff around from the eastside to the westside in the blizzarding cold. Apparently, one of the English Proffs decided to skip out due to the weather conditions leaving her class high and dry. If a teacher leaves campus then I think they should just close for the day... eh? And honestly, it's the first day of classes... so the most you can expect to learn in the classes is everyone's names (if you're lucky) and review the syllabus. If the school closed, we wouldn't have missed out on anything! That's my honest opinion. My classes ended at around 5pm, but the traffic was so horrible that I didn't get home until 7pm. Having woken up at 7:30 that morning I was about ready to drop into my bed the minute I got home.
Spring, you better come soon and take this crappy weather with you. Or we may have to call this semester the Cold-Snowy-Traffic Laden Semester of 2007.
Pizza Casserole

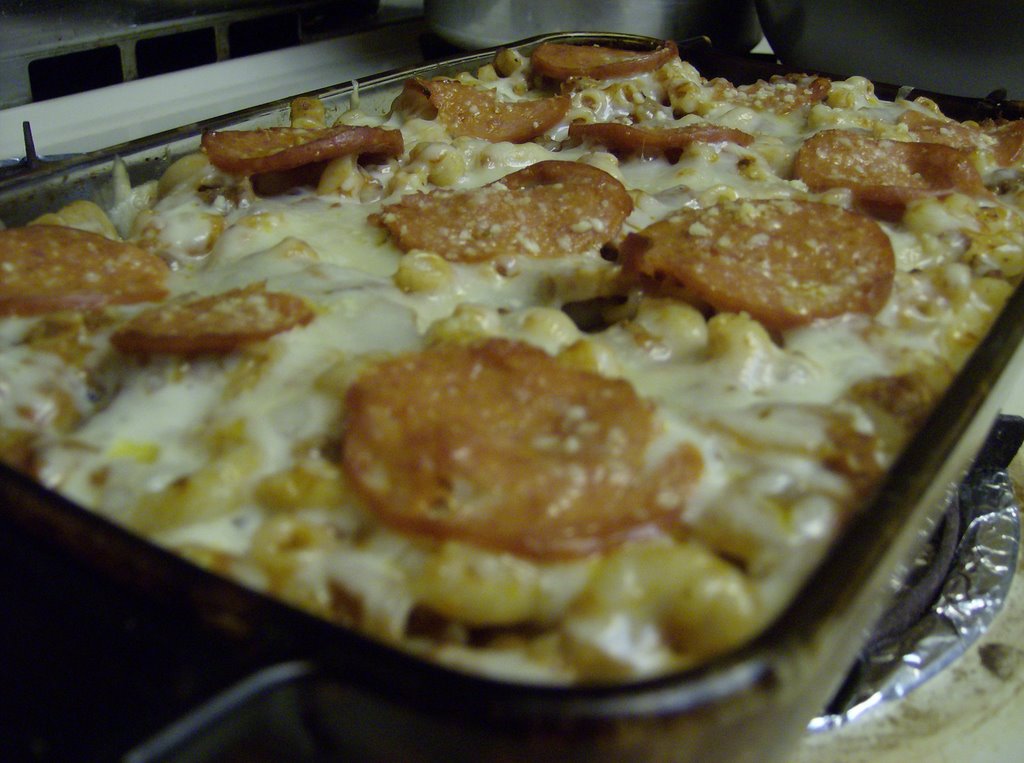
Decided to make another dinner today. But I think I'm starting to get lazy. There are a couple reasons: I made garlic bread for the side dish, and salad to go with it... and it was a casserole. Oh no! Have I become a lazy chef? I sure hope not, let's just say that this laziness is just an experiment.
Anywho, I decided to make this casserole because during the holiday I recieved a free copy of the Taste of Home cooking magazine. Apparently I had signed up on their website or something, and in the issue they sent it said that if I wanted to continue recieving their magazine I would have to pay. The long and short of it is, I'm cheap... so this is going to be my first and only Taste of Home magazine. So, seeing that I was only going to get this single issue I was determined to make something from it, and the pizza casserole seemed simple enough.
I set to work and prepared to make the casserole. The recipe said it serves 8 people but looking at the ingredients and the portion size disgusted me. So I reduced the recipe by 1/2 and it fed my family of 5.
Pizza Casserole
Original Recipe: Serves 8 (2 casseroles) <--- crazy!
Ingredients:
3 cups uncooked spiral pasta (I used macaroni... everyone loves macaroni)
2 lbs ground beef
1 medium onion, chopped
2 (8 oz.) cans mushroom stems/pieces, drained
1 (15 oz.) can tomato sauce
1 (14 oz.) jar pizza sauce
1 (6 oz.) can tomato paste
1/2 teaspoon each: sugar, garlic powder, onion powder, dried oregano (I put tons of oregano, my favorite herb)
4 cups shredded mozzarella cheese, divided
1 package (3.5 oz) sliced pepperoni
1/2 cup grated Parmesan cheese
Method:
1. Cook pasta according to package directions.
2. In Dutch oven (or non-stick frying pan), cook beef and onion over medium heat until meat is no longer pink. Drain out fat.
3. Stir in mushrooms, tomato sauce, pizza sauce, tomato paste, sugar and seasonings.
Note: When halving the recipe I decided to annex the tomato paste. So I used 1/2 a jar of Classico pasta sauce. If following this recipe, you can substitute the tomato sauce + tomato paste for one jar of Classico/Ragu pasta sauce.
4. Drain pasta; stir into meat sauce.
5. Divide half of the mixture between two greased 11-in. x 7-in. x 2-in. baking dishes.
6. Sprinkle each with 1 cup mozzarella cheese. Repeat layers and top with pepperoni and Parmesan cheese.
7. Cover and bake at 350ยบ for 20 minutes.
8. Uncover; bake 10-15 minutes longer or unti heated through.
Again... More Asian Pride

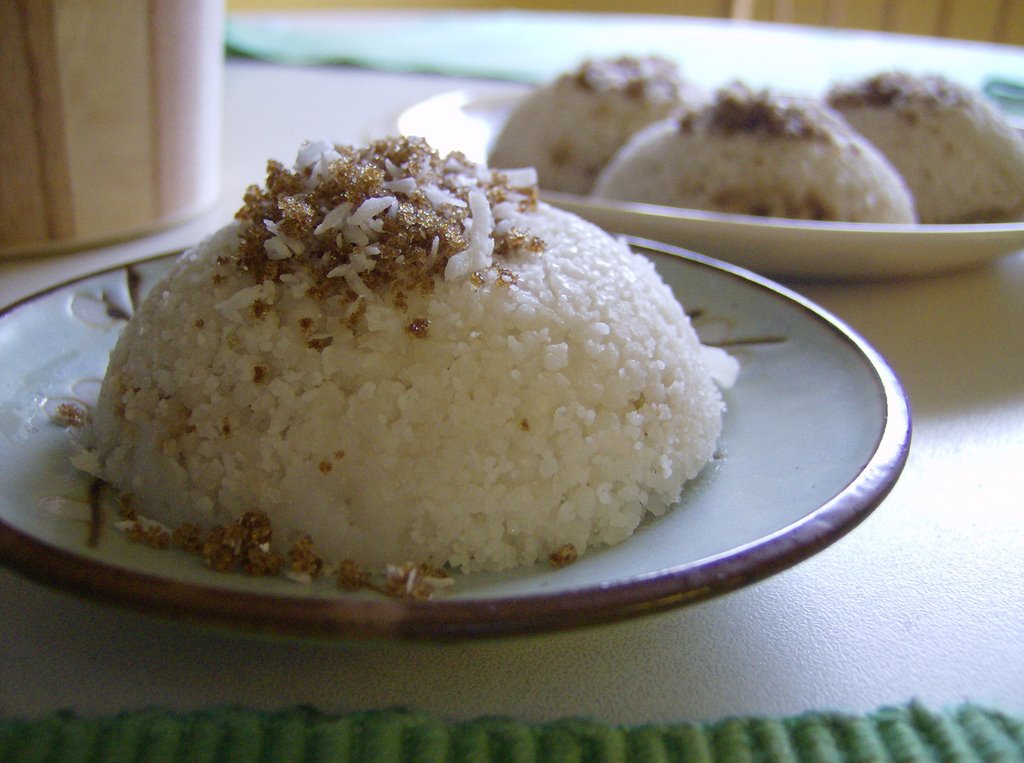
Decided to make Putu Piring today. Found the recipe on the Ja's Kitchen webpage. She is quite a talented cook, with great recipes to choose from. I followed her recipe for this Malay treat to a tee and it turned out beautifully. I was unsure of how my family would like it, seeing as this is one of my dad's favorite sweets I didn't want to mess up. So I decided to half the recipe and make only 4 Putu Pirings; sadly, I wish I had made more because my littlest sister (the one who doesn't particularly like Malay sweets actually liked this one!)

I read a review of this recipe somewhere that said it didn't turn out properly, but that person probably just didn't have the right ingredients or something. This recipe was easy to follow and the results were delicious.
Tuesday, January 02, 2007
Cherry Garcia, that's me!
Cherry Garcia, that's me!Boy do I love Ice Cream and inadvertently today I came across this really cool site that let's you see what kind of ice cream you are. Check it out! I turned out to be average :( somewhere in the middle in terms of sweetness, chunkiness (whatever that means) and uniqueness. Yet, I believe that everyone is unique in their own way... so there. Anyways, you should definitely check out this test it's only about 30 questions and takes no time at all.